Author: Anne

Happy Birthday, Anne!!!

Today is Anne’s birthday!!  Some of the admins and I decided to get together and make her a birthday card.  Hmmm…  I guess this would be a birthday blog post wouldn’t it? Anyway, we couldn’t let her celebrate her birthday without doing something special.

Anne, we hope you enjoy your birthday and all that your new year has to offer.

Warmest birthday wishes,

Miranda

IMG_3264

Continue reading

Guest post: Alter A Pattern

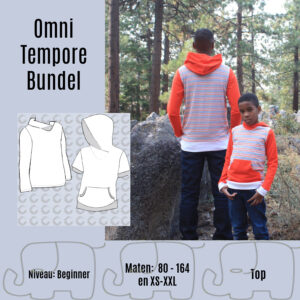
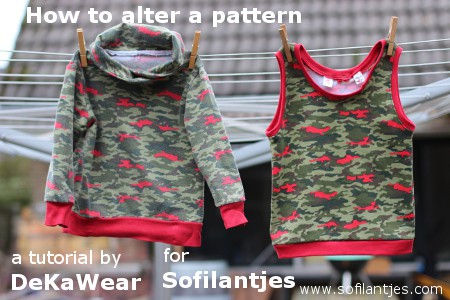
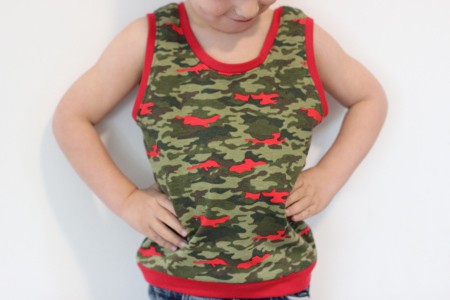
Today is our last day for the Guest Blog Tour. We hope you enjoyed it as much as we did. Our last contribution for this Guest blog tour is How to alter a pattern by Deka Wear. Mirjam shows you how she alters our very popular Omni Tempore pattern into a tank top.

Would you like to see all the Guest posts one more time? Scroll down for the links. Plus, enter the Giveaway.

Hi, I’m Mirjam from DeKaWear. I learned how to sew when I was a kid but didn’t do much with it until I had my own kids. About six years ago, when my grandmother died I inherited her sewing machine. I decided to pick up sewing again. I did not get serious until about three years ago when I started my blog and bought my own sewing machine. I have three children: two daughters, one is almost 7 years old, the youngest is 15 months old. And a son who is 4 years old.

Last summer, I needed to sew a tank top for my eldest daughter, but I didn’t have a pattern. I decided to alter a sweater pattern into a tank top pattern. With summer coming up (I hope…), this trick might come in handy again.
IMG_7355_DeKaWear_GP

Some things you need to consider before altering this pattern:

  • Alterations you make to the shoulder line and armhole should be the same on front and back.
  • Alterations you make to the middle of the neckline can be different in the front and back.
  • Alterations I’ve made are my own preference.
  • I’ve used a size 3 for this tutorial; actual measurements can be different in other sizes.
  • Make a muslin first to check if you like these alterations or if you would use other measurements.

Choose a pattern you like. For this tutorial, I used the Omni Tempore. First, make the sweater as is and try it on for size. Next, determine what you’d want to change:

  • The side seam at the shoulder will be taken in towards the neckline. Measure how much you want it taken in. This will be marked A in the tutorial.
  • Next, determine how wide you’d the shoulder seam to be. This will be mark B in the tutorial.
  • Determine if you’d like to make the armhole deeper. The difference between the original armhole depth and the new armhole depth will be marked C.
  • The center neckline will be lowered in the front and back. Determine how much you would like it to drop. This will be your mark D (front center neckline) and mark E (back center neckline)

<>

Some numbers…

In my tutorial, I used these measurements:

A: 3 cm or 1 1/4 inch
B: 5 cm or 2 inch
C: 3 cm or 1 1/4 inch
D: 4 cm or 1 5/8 inch
E: 5 cm or 2 inch

Transfer the front and back bodice parts of the pattern. (Note: You do not need the sleeves and collar parts.) If you want to finish the bottom hem with ribbing, use the instructions in the pattern.

Front bodice piece.
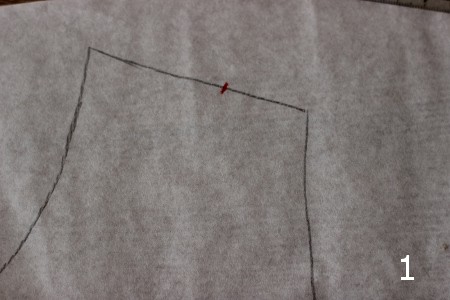
1. Draw a dot on the shoulder line, shift the distance A from the side seam to the neckline.
IMG_7277_DeKaWear_GP
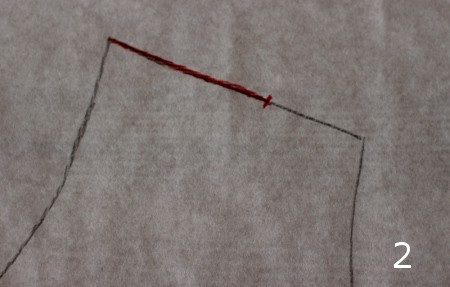
2. Draw a line with the length you’ve chosen for B from that dot (mark A) towards the neckline.
IMG_7279_DeKaWear_GP
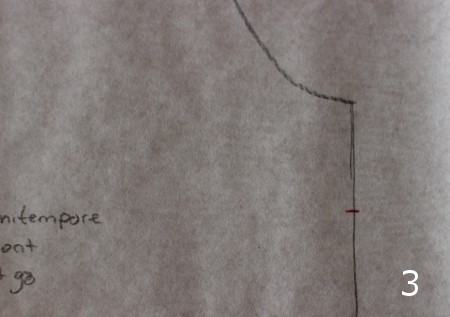
3. Draw a dot at the distance you’ve chosen for mark C under the armhole/side seam point (see picture).
IMG_7281_DeKaWear_GP
4. Draw a dot at 4 cm / 1 5/8 inch left from the original armhole/side seam point.
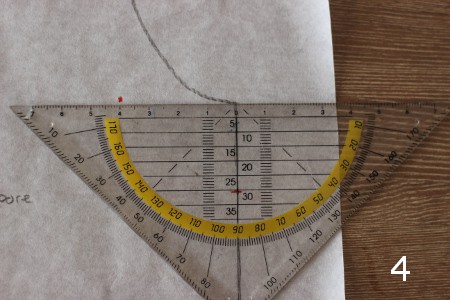
IMG_7284_DeKaWear_GP
5. Draw the new armhole line, starting from the dot you’ve placed in step 3, following to the dot from step 4, ending at the dot from step 1. (Do not give up if this fails the first time. It takes some exercise to draw a nice armhole. At least in my case it did.  If you have a French curve on hand, now is the time to use it)
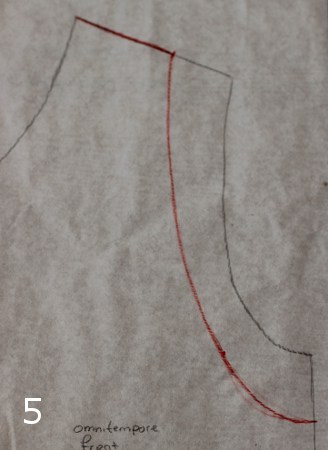
IMG_7287_DeKaWear_GP
6. Draw a dot at the distance you’ve chosen for D under the middle neckline point.
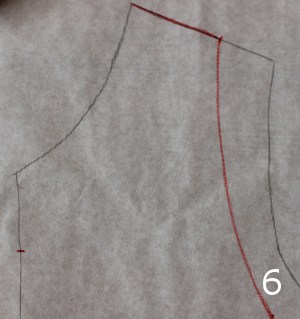
IMG_7289_DeKaWear_GP
7. Draw the new neckline between the dot you placed in step 6 to the end of the line you made in step 2. Note: Draw the line flat at the center neckline to change the original neckline that is V-shaped.
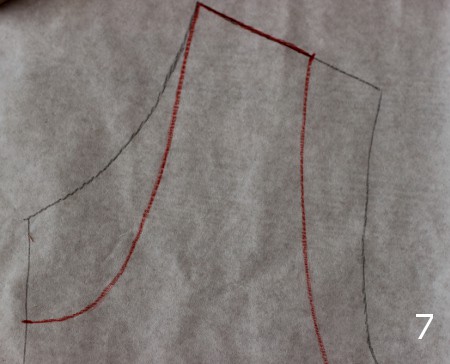
IMG_7292_DeKaWear_GP

Now you’ve made the front piece for your new tank top pattern.

Take the back bodice piece and repeat steps 1 – 5.
8. Draw a dot at the distance you’ve chosen for mark E under the middle neckline point.
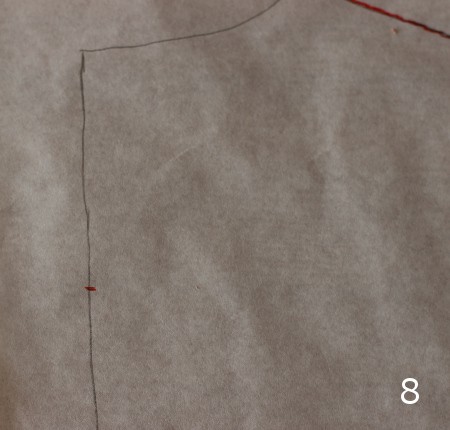
IMG_7307_DeKaWear_GP
9. Draw the new neckline between the dot you placed in step 8 to the end of the line you made in step 2.
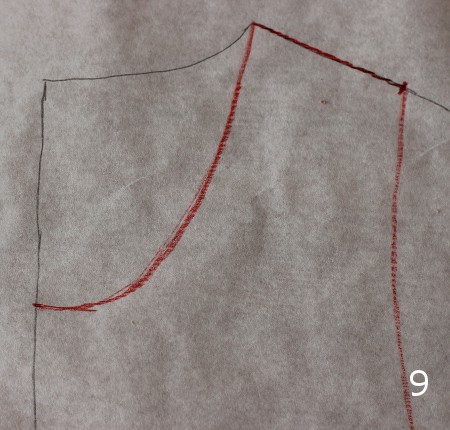
IMG_7308_DeKaWear_GP

Now you’ve also made the back piece for your tank top pattern.

Cut out the fabric. Seam allowance is included (3/8″- 1cm). Sew the shoulder and side seams. Press the seams towards the back.

About ribbing…

To finish the armhole and neckline, we are using ribbing. The ribbing piece’s width should be between 85% and 90% of the length of the armhole or neckline. Use this formula to calculate the amount of ribbing you will need:

Height: (2*seam allowance) + (2* hem)
Width: The total length of the armhole or neckline * 0,9 (this is for 90%, for 85% choose 0,85)

In my case, the seam allowance was 1 cm or 3/8 inch. The hem also is 1 cm or 3/8 inch.

So in the formula for cm it is: (2*1) + (2*1) = 2+2 = 4
In inches the formula is: (2* 3/8) + (2 * 3/8) = 3/4 + 3/4 = 1 1/2 inch

For the armhole, measure the length of the front and back armhole and add them together. In my case, they were both 20 cm or 8 inches. So one armhole is 40 cm or 16 inches.

Put this in the formula and you get (CM): 40 * 0,9 = 36 cm.
For inches it is: 16 * 0,9 = 14 3/8 inch.

For the neckline, measure the size of the front and back neckline and add them together. If you measured from the pattern pieces, you would have to multiply this by 2. In my case it was 12 cm or 4 3/4 inch and 15,5 cm or 6 inch (on the pattern piece), so the length of the neckline in cm was (12+15,5) * 2 = 27,5 * 2 = 55 cm. Put this in the formula and you get 55 * 0,9 = 49,5 cm.
In inches it was (4 3/4 + 6) * 2 = 10 3/4 * 2 = 21 1/2 inch. In the formula you’ll get 21 1/2 * 0,9 = 19 1/2 inch.

So now you have two squares: One for the armhole and one for the neckline. In my case:

For the armhole, in cm: height: 4 cm, width: 36 cm
In inch: height: 1 1/2 inch, width: 14 3/8 inch

For the neckline, in cm: height: 4 cm, width 49,5 cm
In inch: height: 1 1/2 inch, width: 19 1/2 inch

Enough mathematics (although I love maths!), let’s sew!

Cut out the ribbing, one strip for the neckline, and one for each armhole. Total of three pieces of ribbing.

There are more ways than one to sew ribbing. I’ve chosen what I think is the quick and easy way and described it here. You could also choose to sew it on the way you sew on bias tape.

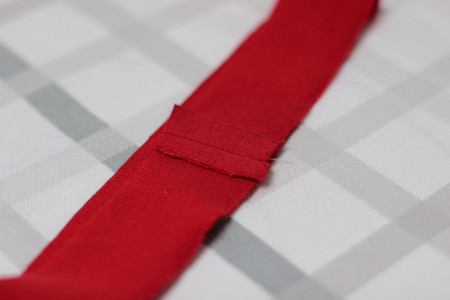
With the right sides together, sew the short ends together.
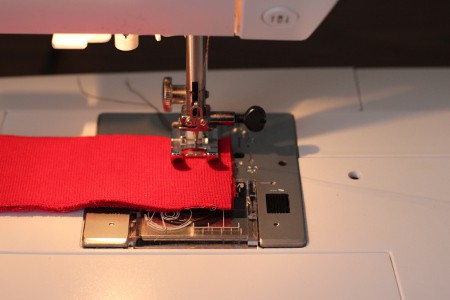
IMG_7311_DeKaWear_GP

Press the seam open.

IMG_7330_DeKaWear_GP
Fold the ribbing in half lengthwise, wrong sides together, and press.
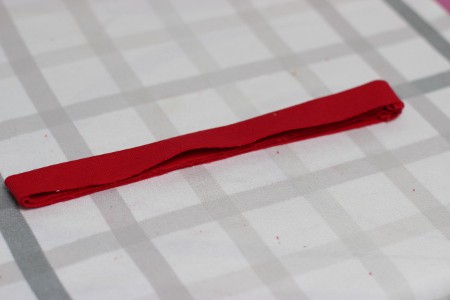
IMG_7334_DeKaWear_GP
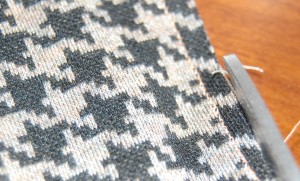
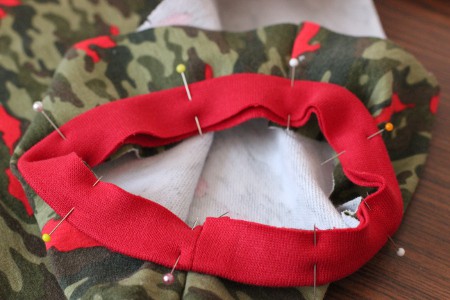
Pin the ribbing to the armhole. Placing the seam of the ribbing on the sideseam of the armhole. Stretch out the ribbing while pinning it on the fabric.
IMG_7336_DeKaWear_GP
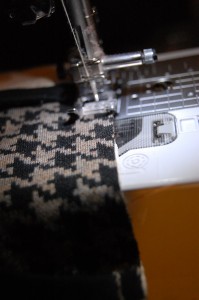
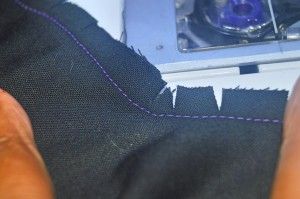
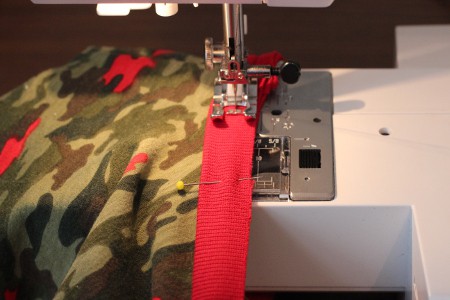
Now stitch the ribbing to the armhole, stretch the ribbing while sewing.
IMG_7339_DeKaWear_GP

Repeat for the other armhole and the neckline. For the neckline, place the seam of the ribbing at the center back or the shoulder seam.

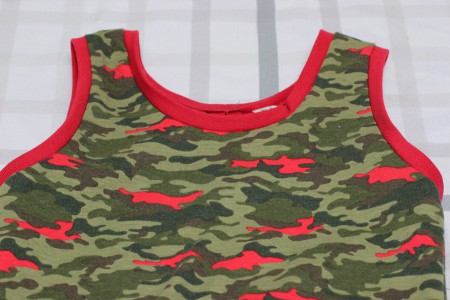
Fold the ribbing to the inside and press.
IMG_7340_DeKaWear_GP

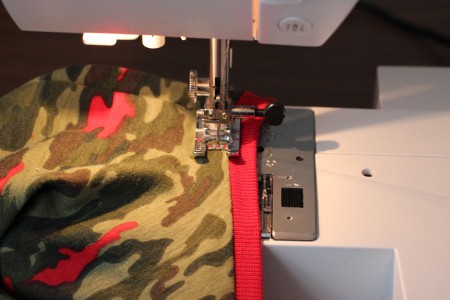
Topstitch around the armhole and neckline, using 0,5 cm or 1/8 inch seam allowance. Stretch out the fabric while sewing.
IMG_7344_DeKaWear

Finish the bottom hem like described in the pattern.

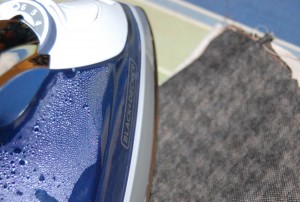
Press the top, and you’re finished!
IMG_7354_DeKaWear_GP

Anne, thanks for having me!

Thanks for being part of this tour, Mirjam.

Would you like to see the other posts one more time? Here they are:
Guestpost: Skipping your understitching? Stop it!
Guestpost: The Power of Pockets
Guestpost: Slim adjustments with the ADVTee
Guestpost- Shirring: Don’t Be Scared
Guestpost: Mash It Up!
Guestpost: Sewing with Knits
Guest post: Sewing on the perfect binding
Guestpost: How to make your own bias tape
Guest Post: How to Make a French Seam
Guestpost: Sewing by hand
And today’s post Guest post: Alter a pattern

Guestpost: Sewing by Hand

Last week we let you know this post was late, but it was worth the wait. Today, on our Blog Tour, we have Deborah from Sprouting Jube Jube. She will teach you how to hand-sew. Hand sewing your hems and linings is a beautiful way to finish the inside of your garment. Please read, and try it yourself. To celebrate Deborah sharing her knowledge with us, we are having a giveaway. Please read to the end of the post to know what we are giving away and how.

Hand sewing using the Amare Dress & Tunic pattern by Sofilantjes

Hi, I’m Deb of Sprouting JubeJube, and today I’m going to share a couple of secrets of hand sewing. I used Amare Dress and Tunic pattern by Sofilantjes to show you the blind hem stitch and the ladder stitch.

It’s always so tempting to find shortcuts to finish a garment a little faster, but in all honesty, I love hand sewing. It is very calming to sit and take the time to hand-sew with a hot cup of tea or coffee.

Sewing a blind hem to a garment. You’ll be able to use this one to hem just about anything. I start by serging the raw edge or using a zigzag stitch on my simple sewing machine. Then press the hem up to the desired hem allowance.

When hand sewing, some like to use bee’s wax; it prevents knots from forming in your thread.

On the outside of the garment, use small stitches so that the thread doesn’t show. Stitches should be about 2cm (3/4″) apart.

Sewing the bodice lining to the main garment creates a beautiful finish without worries of visible topstitching.

Once through the lining, small even stitches through the main dress, using the seam from the skirt and bodice as a guide.

The stitches seem to form a ladder, hence its name the ladder stitch. You can also use this stitch to close up throw pillows or repair stuffed animals.

Once I pull on the thread to tighten the ladder stitch I get a nice clean finish.

Last quick tip for hand sewing no, I’m not going to explain how to sew on a button but how many knew that the buttonhole dictates how someone should attach the button. If using a button with two holes, like this one seeing that the buttonhole is horizontal, the button should also be stitched horizontally. If using a button with four holes, the same should apply. Your stitching should be in the same direction as the buttonhole.

I hope I was able to give some insight into hand sewing. For modeled photos of this very adorable tunic come visit my blog, Sprouting JubeJube…Julia loves her new tunic!

Thank you Deborah

Only two more posts left! Did you learn something this blogtour?
March 7: How to alter a patternDeka Wear

Guest Post: How to Make a French Seam

Today on our Blog Tour, we have Ronda from Winingwife. She will teach you how to sew French seams. French seams are a great way to get a clean and beautiful look on the inside of your garment. Please read, and try it yourself.

For this tutorial, Ronda used the Liv skirt. I would love to do a Giveaway on the Liv skirt, but it’s already free! Just follow the link in the listing, and you will find it 😉

12631342_10103168814392659_405401405726985570_nHi! I’m Ronda Bowen from Wining Wife®. I’ve been sewing for over 20 years since I was a teenager. I sew for my whole family – my husband, our 17-year-old son, our 2-year-old daughter, and now our 6-week old son. I love pairing together fun fabrics with great patterns and putting something together that fits really nicely. I run a writing and editing business as well.

I’m here to talk with you about how to do French seams in your projects. For this, I chose the Liv Skirt that Sofilantjes offers. French Seams work best on lighter weight fabrics and sheer fabrics where you don’t want the seams to show, but they’re also really great for providing a nice finish and making a smoother seam for those who have sensory issues. I chose to use the skirt because it allows me to use fabrics with clear right and wrong sides for the instruction photographs, but I used this technique when I made the Otium in a sheer knit fabric. This technique would work great for lace and sheer overlays on the Iridis, Brueram, and Amare.

First, you divide your seam allowance in half. You will be sewing twice for each seam. For Sofilantjes’ patterns (who uses a 3/8″ – 1cm seam allowance), that means using a 3/16”, or ½ centimeter, seam allowance.

Once you’ve done that, you’re going to start with the pieces that need to be sewn together with the wrong sides together (like it will be when the garment is worn). You’re going to sew that seam with a 3/16″ or ½ centimeter allowance.

Image 1
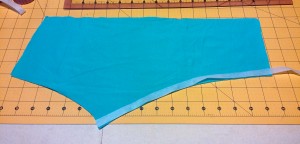
Carefully trim your seam close to the stitching.

Image 2
Press your seam open. Flip your fabric pieces so that they are now right sides together. Press again to get a crisp line.

Image 3
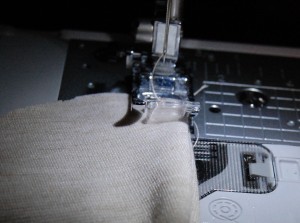
Sew with right sides together and a 3/16″, or ½ cm seam allowance.

Image 4

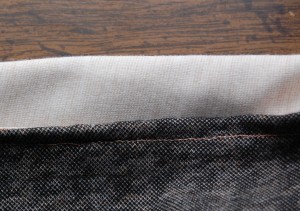
Press seam open and press seam allowance (now nicely bound) to the back of the garment. You’ll have something that looks like this:

Image 5

Here’s the finished skirt on my model. I’m biased, but I think it’s super cute!

Using French seams is an easy technique to give your finished garments a more professional and clean appearance. What will you make using French Seams?

Thank you, Ronda, for writing this tutorial for us.

Only three more posts on this blog tour. I have learned so much already. You?

February 14: Handstitching the right waySprouting Jube Jube
March 7: How to alter a patternDeka Wear

Guestpost: How to make your own bias tape

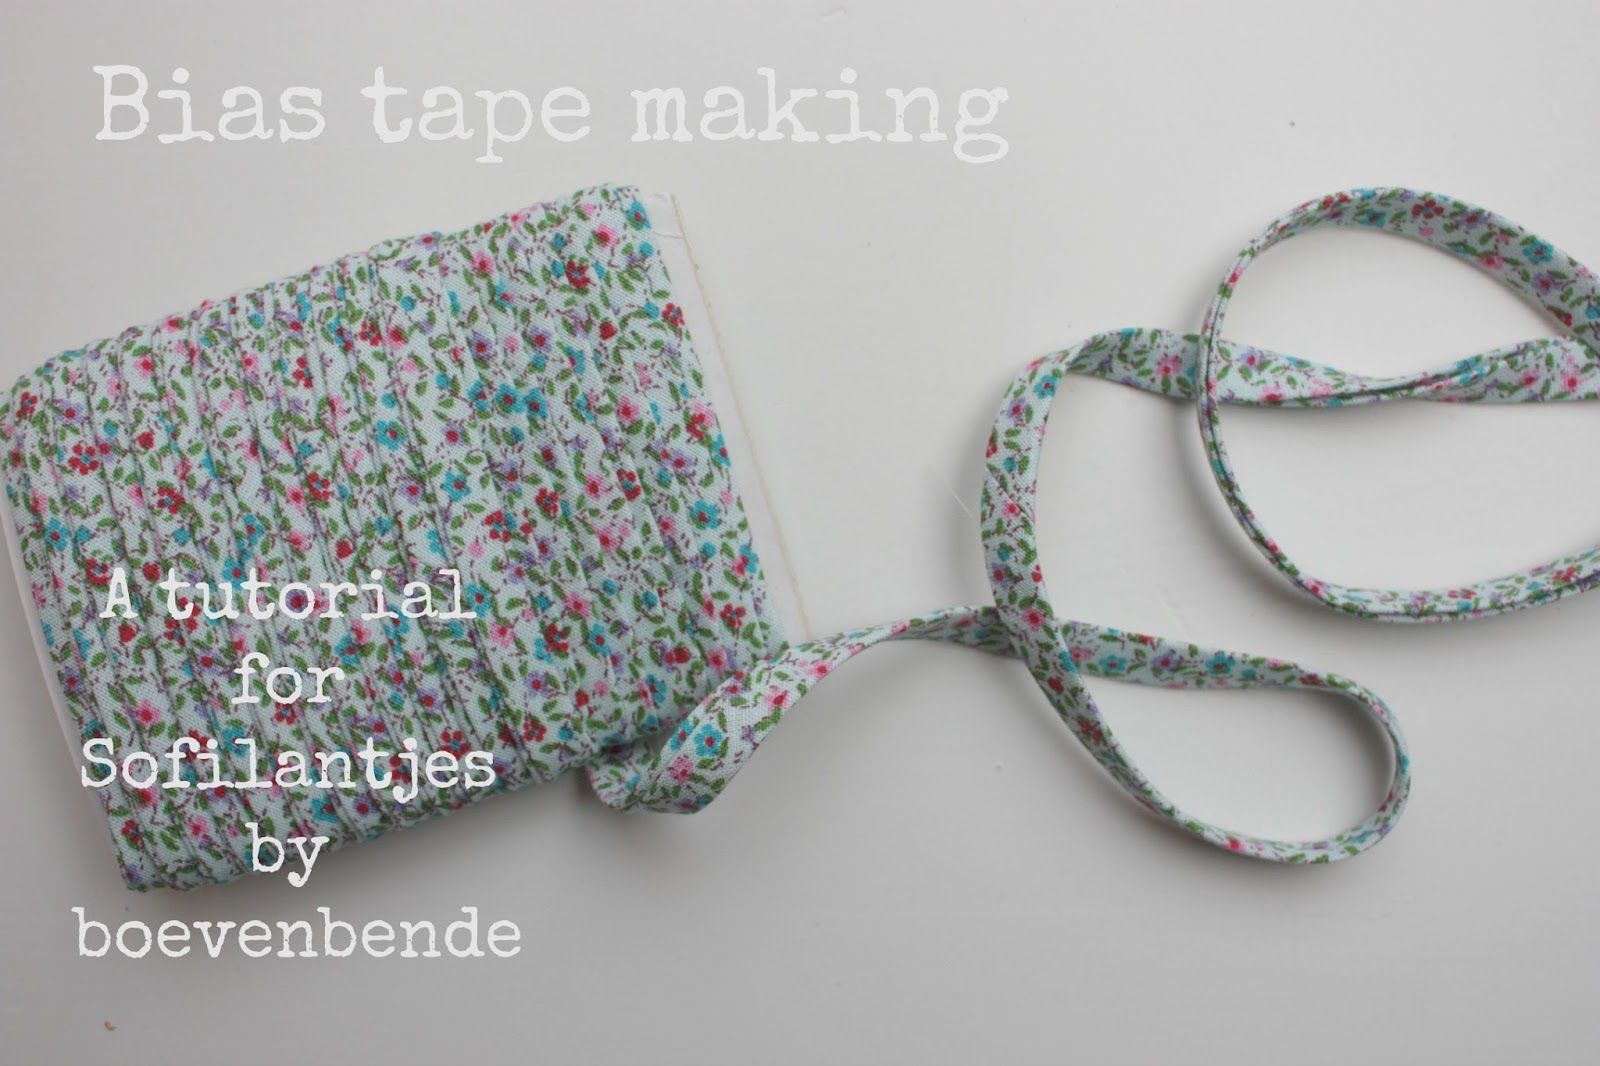
Somehow in between pattern release and all other things life throws at us I completely missed posting this guest post. I am really sorry. Verinne from Boevenbende did a great job on creating a tutorial for you. She shows you how to make your own bias tape. Did you know it was this easy?! Quickly read and try it yourself.

Continue reading

Guestpost: Mash It Up!

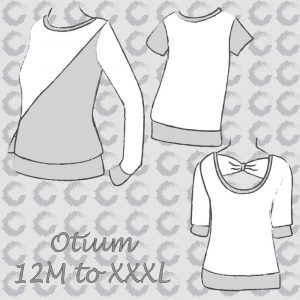
Todays post you really do not want to miss! Melissa from Tales of a Tester will show you how you can mash up the Otium and Domi in to a onesie! I really need to try this one. So should you…… And you can…. After you finish the post, scroll down further for the giveaway and win both the Otium and the Domi patterns. We just need one thing from you. promise you will show us when you are done?!

Thanks for having me, Anne.  I hope I don’t embarrass myself.  Hi everybody! My name is Melissa and I blog over at Tales of a Tester.  I have 2 beautiful, rambunctious children.  I love sewing for them.  I have been sewing for 3.5 years and I really wish I hadn’t waited so long to learn.  It’s my everyday stress reliever. Although those that sew know sewing can be just as stressful.  I may or may not have stressed myself out by making silly mistakes, but that’s neither here nor there. So let’s get started shall we?

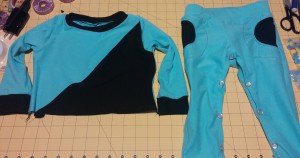
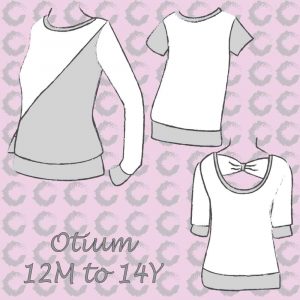
I will be showing you how to mash patterns together to make something new.  I chose the Domi Sweats and the Otium Girls.  I have wanted to mash the Otium or Summer Surprise Top with another designer’s pattern for a while.  Then Anne made the Domi sweats pattern (which I tested) and I was hooked like most others.  So I decided to make a romper with the 2 patterns.  This is how I did it.  I made the 18months.  There are probably easier/better ways to mash these 2 patterns together, but this way works for me.  There are 2 ways the romper can be accomplished.*  I am going to show you how to make it for our babies that are still in diapers.

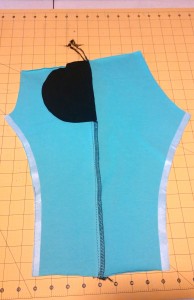
The pattern calls for 1.25″ elastic for the waist you will need 1″ instead. After cutting the pattern out you’ll want to add a strip of interfacing  (3/8″ wide x length of pants you’re making) to the crotch and down the inner leg of all 4 pants pieces.

20151206_111736

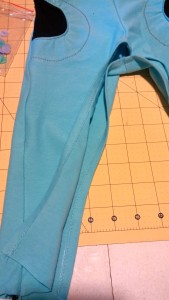
Follow the instructions until you complete sewing the front legs and back legs together. I’ll wait…  Are you finished? Good.   Now stop.  Open up one leg and lay it flat, right side up.  Place the other leg right side down and sew the crotch together. Now fold over the interfacing and press (I used fabric glue here instead of pins after I pressed). Sew it down on both legs.  It should look like this.

20151206_123338 20151206_130456

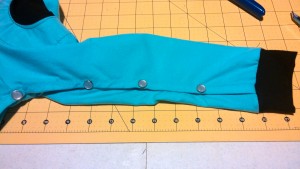
Baste the legs closed at the ankle and add the cuff.  I then put the snaps on. I did the snap in the center of the crotch first. Then worked my way up from the ankle. Now you should have pants without the waistband.

20151206_141709

Prep the waistband following the instructions. I’ll wait again.  Just let me know when you get back… Back? Good.  Attach the waistband to the pants and make sure you are very precise with your seam allowance. Push the elastic down in the waistband and set the pants aside.

20151206_162517

On to the Otium.  I wanted the top to fall at my daughter’s belly button, so I shortened the front and back bodices by 3 inches.  I suggest you make a muslin of the bodice for this step. So you can figure out how much you want to take off.  If you are going to make the diagonal pocket you also need to adjust that piece.

20151206_144034

Follow the instructions for construction and I’ll wait… again. I have plenty of shows on my DVR to keep me busy while I wait.

20151206_161527

Done? Good. We are now in the home stretch!! Now you are going to attach the top to the pants.  Remember pushing the elastic down? That’s to make sure it’s out of the way.  Instead of a 3/8″ seam allowance we will use a 1/4″ seam allowance. Turn the top wrong side out and mark the centers of the waistband and the bottom of the top.  Match quarter marks and make sure the front of your top and the front of your pants match (don’t ask me why I say this…). Stretch the waistband to fit as you sew with 1/4″ s.a.

ALL DONE!

We love it.  I am a big fan of one piece outfits.  I don’t have to look for matching pieces or figure out outfits in the wee hours of the morning when I have to dress her so we can take her brother to school.  It’s also Daddy approved.  Gotta make those diaper changes easy.


20151206_171244
20151206_17133120151206_17150020151206_171346

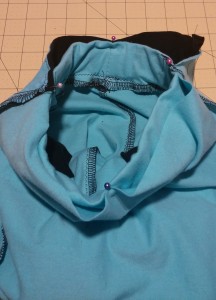
*Alternatively, if you do not want to do snaps along the legs you can do snaps down the back or down the front of the top.  You would cut 2 of either the front or the back and add 3/8″ seam allowance down the middle.  Interface the top like you did the pants.  As far as the collar you will fold it in half lengthwise and round the short ends.  Match the raw edge of the short end to the corners and sew the collar to the neckline.  Finish the neckline and press.  Baste the bottom of the top together and with 1/4″ s.a. attach the top to the pants.

Check out the other guest posts.

December 21: Sewing with knits Shani Sews
Januari 8: Sewing on the perfect binding Droomstoffen
Januari 14: How to make your on bias tapeBoevenbende
Febuari 1: French seams Winingwife
Feburari 14: Handstitching the right waySprouting Jube Jube
March 7: How to alter a patternDeka Wear

Thanks for hanging out with me. Until next time!

Melissa

Thank you Melissa. Such a great idea.

Guestpost: Slim adjustments with the ADVTee

We have come to our third guest post. Heather from Boutique Birdie will show you a great way to adjust your pattern to fit your child perfectly! She actually uses our newest pattern for this: The ADVTee. In her post she shows you the simple V-neck option. The pattern will release coming Friday….. Just like the last two posts though we will host a giveaway. So check out the raffle copter below and try to win the ADVTee before it’s release (pattern will be send to you Friday). On to Heather….

Thank you Anne for allowing me to be a guest on your blog today!  Today I will be explain how I make slim alterations to my Sofilantjes patterns.  My oldest daughter has always been on the slim side.  As you can guess, this can make things a bit tricky when buying and sewing clothes.  We either end up with necklines too big and pants cinched up as much as possible or end up with sleeves and pants that are too short.  I was very glad to see Sofilantjes include directions in the Brueram dress pattern to make slim or plus size adjustments.  That was the first time I had used this method and it was a big success.  Since then this method has been my favorite for adjusting patterns to fit my daughter.

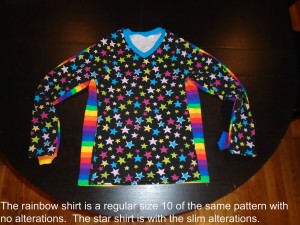
The pattern I am working with is the new pattern called the ADVTee that will be releasing soon!  Here are my before and after pictures.  The rainbow striped shirt on the left is before the alterations.  As you can see the pattern is very wide on my daughter but the length is perfect.  The picture on the right of the shirt with the stars is with the slim alterations.  The tee-shirt fits her so much better but kept the length she needs.  Even though the neckline is a different style this is the same pattern.

sidebyside

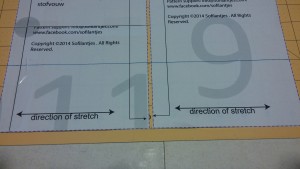
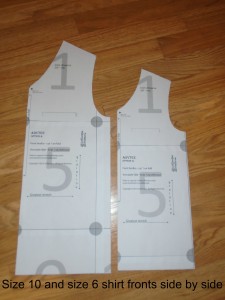
Now let’s get started.  The first thing you will need to do is measure your child.  Once you have properly measured your child, take your measurements and compare them to the size chart.  My daughter is currently 55” tall and has a 23 ½” chest.  This puts her in a size 10 for height and a size 6 for her chest.  You will now need to print two copies of the pattern, one for each size.  I like to print off both sizes at once with the layers feature and then trace off the sizes I need.  That way I have an original copy of the size I am altering to refer to as a reference if needed later.

sofilantjes_blog_1

Now before we begin altering the pattern I want to note one important thing….once you start adjusting one area, you will also need to adjust all areas that are sewn to that area!  For example, if you adjust the front bodice of a dress, the skirt will have to be adjusted too.  If you adjust the neckline area, the neckband will need adjustments.

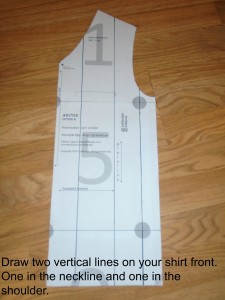
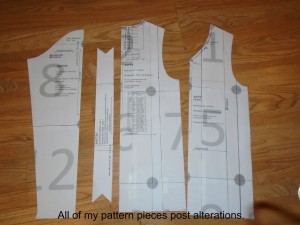
I am going to start with altering the front shirt piece.  This is the size 10 in my case.  I want to slim down the tee in the neck and shoulder area.  I do not want to alter the sleeve area.  So, I draw two vertical lines straight down my pattern piece.  One in the approximate center of the neckline area and one in the approximate center of the shoulder.  (If you want to also slim the sleeves you will need to draw a third line through the armscye area of the pattern piece…just remember if you do this you will also need to adjust your sleeves too!)  sofilantjes_blog_2

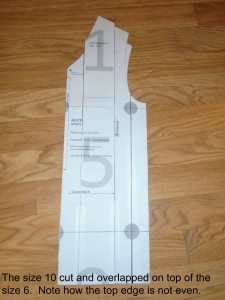
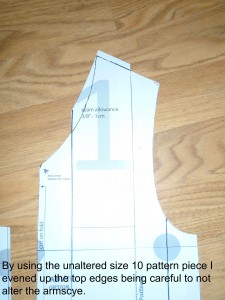
Next you will cut the pattern in three pieces along those lines.  Once your pattern is cut you will arrange them on top of your smaller sized pattern piece, in my case the size 6.  I used the bottom edge of the size 6 to make sure everything was squared off on the bottom.  I kept the overlap the same between the pieces.  As you can see my top edges don’t exactly match up.  I use my unaltered size 10 pattern piece to even them up being careful not to make any changes to the armscye.  Congratulations, you have successfully altered the front of the shirt!

sofilantjes_blog_3sofilantjes_blog_4

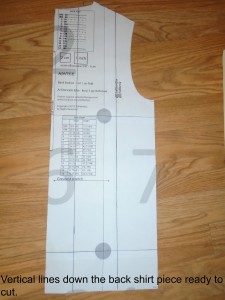
Next grab the back shirt piece and essentially do the same thing you did for the front.  One thing to double-check is that your shoulders are even when adjusting the back piece.  Even out the top pieces of your pattern and set them aside.

sofilantjes_blog_5

As I mentioned before, if you adjust one part of a pattern you will also need to adjust all the other pieces that are sewn to that piece.  This means we will also need to adjust our neckband.  To do this I compared the measurement of the unaltered neckline to the neckline of my new neckline.  Then I use a little math and decreased my neckband to stay in proportion to the orignal.

sofilantjes_blog_6

Now you have all your pattern pieces ready to go.  Since I did not alter my armscye, I do not have to alter my sleeve.  I will cut the original size 10 sleeve.  Cut out all your pattern pieces and sew according to the patterns directions.
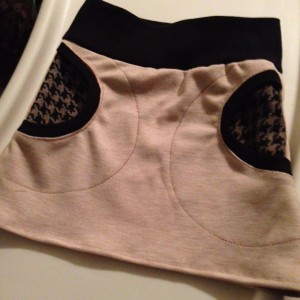
Here is a picture of my unaltered size 10 ADVTee (rainbow stripes) compared to my altered size 10 ADVTee (stars).  As you can see the length of the pattern stayed exactly the same.  As did the depth of the armholes and the depth of the v neck.  The only thing that was altered was the width of the tee-shirt.

sofilantjes_blog_7

There are lots of methods out there to alter patterns, but for children I find this to be the easiest one for me.  If you are needing a plus size adjustment you can still follow the same methods I have shown.  Instead of overlapping your pieces you will simply spread them apart to fit a larger width.  I hope you have enjoyed my tutorial and will find it useful.  Happy sewing everyone!

Thank you Heather.

If you would like to see what else we will talk about here is our schedule:

October 7: Understitching Adventures with Bubba and Bug
October 19: How to add pockets to a dress Heartmade by Suzy

November 2: How to adjust to skinny or plus sizeBoutique Birdie
November 16: Shirring Shani Sews

December 7: How to mash up patternsTales of a Tester
December 21: Sewing with knits Shani Sews

Januari 8: Sewing on the perfect binding Droomstoffen
Januari 14: How to make your on bias tapeBoevenbende

Febuari 1: French seams Winingwife
Feburari 14: Handstitching the right waySprouting Jube Jube

March 7: How to alter a patternDeka Wear

Guestpost: Skipping your understitching? Stop it!

Today Essence from Amazing Adventures With Bubba and Bug! kicks off our Guest Blogtour, where we will be showing you a few techniques that you need for our patters. Or how you can add a nice detail. These coming months there will be a guest blogger showing you a new technique (2 x a month) and we will be adding a nice giveaway to! So make sure you follow along. You will find the schedule and and giveaway at the bottom of the post.

Hello everyone! It is me, Essence from Amazing Adventures With Bubba and Bug!  Today, I get to do a guest post here at the Sofilantjes blog on my newest sewing discovery!  I have been sewing for about 2 years and I mostly sew for my daughter, who you will see today and my son, who grows so rapidly I don’t even know why I bother.  But enough about me, let’s get down to business!

Continue reading

The Brueram top and dresses review post, a summary

Do you like the Brueram top and dresses? So do we. But if you are still in doubt. Here are a few blogposts for you to read. This really is a beautiful pattern. And if you are very quick you can still get it on sale HERE.

Check out the review of a very pretty Maxi version and Tulip version. I so love this little girl. And her mom is just awesome!
Keep Calm and Carrion blog.
Bru2

Brueram5

How about a big girls version.
Creative Bug blog
DSC00783

And this one is just so sweet. She added a button placket.
The craft is in me blog
brueramdresscollage

Oh I so love this little face.
Frail designs blog
11154700_10153072215064270_8720882791337928121_o

A review about the very skinny adjustment. This dress looks great on her.
Boutique Birdie blog
maxi 12 skinny

Add pockets and bias tape and you get a fun dress that hold stones and other non- washing machine approved 😉
Inspinration blog
IMG_7804

Or use a very romantic fabric. I love blue!
Sprouting Jube Jube blog
IMGP5347ab

This dress truly is a closet staple. The wide traps are perfect for school. Great to wear when it gets warmer but still enough coverage. And with a cute cardigan still good for the less hot summers or even winter!

Do not forget to come to our Sofilantjes Sew and Show group and get inspired or show off what you made. And off course ask any question you have.

Love the dress but do not have the time or you do not sew. Check out this Etsy shop. She will sew it for you.
brueram top front

brueram top back

Or if you are UK based. Here’s a another shop.
brueram top sz3

SALE

REGISTER FOR OUR NEWSLETTER

OR FOLLOW US