Guestpost: Mash It Up!
Todays post you really do not want to miss! Melissa from Tales of a Tester will show you how you can mash up the Otium and Domi in to a onesie! I really need to try this one. So should you…… And you can…. After you finish the post, scroll down further for the giveaway and win both the Otium and the Domi patterns. We just need one thing from you. promise you will show us when you are done?!
Thanks for having me, Anne. I hope I don’t embarrass myself. Hi everybody! My name is Melissa and I blog over at Tales of a Tester. I have 2 beautiful, rambunctious children. I love sewing for them. I have been sewing for 3.5 years and I really wish I hadn’t waited so long to learn. It’s my everyday stress reliever. Although those that sew know sewing can be just as stressful. I may or may not have stressed myself out by making silly mistakes, but that’s neither here nor there. So let’s get started shall we?
I will be showing you how to mash patterns together to make something new. I chose the Domi Sweats and the Otium Girls. I have wanted to mash the Otium or Summer Surprise Top with another designer’s pattern for a while. Then Anne made the Domi sweats pattern (which I tested) and I was hooked like most others. So I decided to make a romper with the 2 patterns. This is how I did it. I made the 18months. There are probably easier/better ways to mash these 2 patterns together, but this way works for me. There are 2 ways the romper can be accomplished.* I am going to show you how to make it for our babies that are still in diapers.
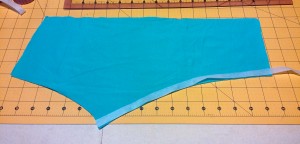
The pattern calls for 1.25″ elastic for the waist you will need 1″ instead. After cutting the pattern out you’ll want to add a strip of interfacing (3/8″ wide x length of pants you’re making) to the crotch and down the inner leg of all 4 pants pieces.
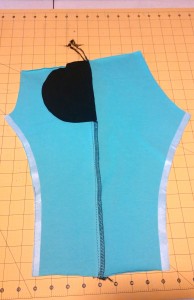
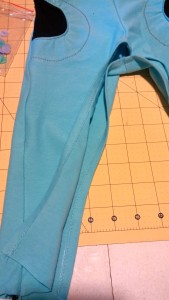
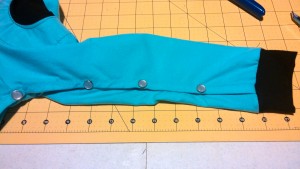
Follow the instructions until you complete sewing the front legs and back legs together. I’ll wait… Are you finished? Good. Now stop. Open up one leg and lay it flat, right side up. Place the other leg right side down and sew the crotch together. Now fold over the interfacing and press (I used fabric glue here instead of pins after I pressed). Sew it down on both legs. It should look like this.
Baste the legs closed at the ankle and add the cuff. I then put the snaps on. I did the snap in the center of the crotch first. Then worked my way up from the ankle. Now you should have pants without the waistband.
Prep the waistband following the instructions. I’ll wait again. Just let me know when you get back… Back? Good. Attach the waistband to the pants and make sure you are very precise with your seam allowance. Push the elastic down in the waistband and set the pants aside.
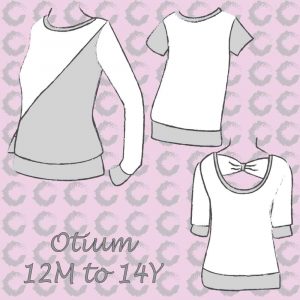
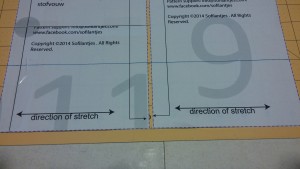
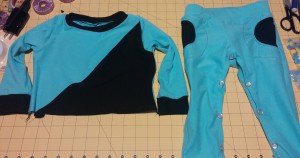
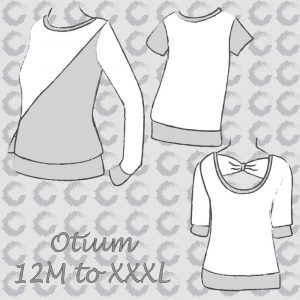
On to the Otium. I wanted the top to fall at my daughter’s belly button, so I shortened the front and back bodices by 3 inches. I suggest you make a muslin of the bodice for this step. So you can figure out how much you want to take off. If you are going to make the diagonal pocket you also need to adjust that piece.
Follow the instructions for construction and I’ll wait… again. I have plenty of shows on my DVR to keep me busy while I wait.
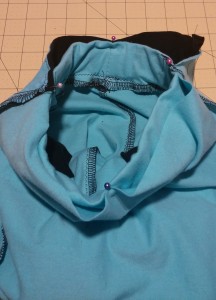
Done? Good. We are now in the home stretch!! Now you are going to attach the top to the pants. Remember pushing the elastic down? That’s to make sure it’s out of the way. Instead of a 3/8″ seam allowance we will use a 1/4″ seam allowance. Turn the top wrong side out and mark the centers of the waistband and the bottom of the top. Match quarter marks and make sure the front of your top and the front of your pants match (don’t ask me why I say this…). Stretch the waistband to fit as you sew with 1/4″ s.a.
ALL DONE!
We love it. I am a big fan of one piece outfits. I don’t have to look for matching pieces or figure out outfits in the wee hours of the morning when I have to dress her so we can take her brother to school. It’s also Daddy approved. Gotta make those diaper changes easy.
*Alternatively, if you do not want to do snaps along the legs you can do snaps down the back or down the front of the top. You would cut 2 of either the front or the back and add 3/8″ seam allowance down the middle. Interface the top like you did the pants. As far as the collar you will fold it in half lengthwise and round the short ends. Match the raw edge of the short end to the corners and sew the collar to the neckline. Finish the neckline and press. Baste the bottom of the top together and with 1/4″ s.a. attach the top to the pants.
Check out the other guest posts.
December 21: Sewing with knits – Shani Sews
Januari 8: Sewing on the perfect binding – Droomstoffen
Januari 14: How to make your on bias tape – Boevenbende
Febuari 1: French seams – Winingwife
Feburari 14: Handstitching the right way – Sprouting Jube Jube
March 7: How to alter a pattern – Deka Wear
Thanks for hanging out with me. Until next time!
Melissa
Thank you Melissa. Such a great idea.
-
 Domi Sweatpants – English$7.85 excl. tax
 -
 Domi Sweatpants – Nederlands$7.85 excl. tax
 -
 Otium Sweater – English$8.68 excl. tax
 -
 Otium Sweater – Nederlands$8.68 excl. tax
This site uses Akismet to reduce spam. Learn how your comment data is processed.
Buy more save more
(PDF patterns only)
- Spend €25* or more and save 10%.
Use code: SAVE10 - Spend €45* or more and save 20%.
Use code: SAVE20 - Spend €65* or more and save 30%.
Use code: SAVE30
(Sale items excluded)
* Excl. Taxes
Recent comments
- Anne on The Hibernis/Semper or Omni. what’s the difference?
- Anne on Tutorial: How to add a Tulle Skirt to the Regina
- Judy Blumert on Tutorial: How to add a Tulle Skirt to the Regina
- Heleen Dewitte on 25K Grand Giveaway!
- Nicole on 25K Grand Giveaway!
Archives
Thank you for visiting
Thank you for visiting our website. This website and all its content are copyright protected. Please ask permission before sharing any pictures or articles, especially when a child is shown in the image.






Leave a Reply