
Author: Anne

Guestblog: Semper with a twist

Last week you could read about the differences between the Hibernis, Semper and Omni Tempore in this blogpost.

Today MoonStar is showing you a Semper Sweater with a twist.
One of the features of the Semper Sweater is the hood with a split. What if you would make it symmetrical?

skate-semper-collage-01

It’s really very easy! Only thing you need to change is the hood parts. Instead of cutting two different hood parts, you cut the part with the long end 2x twice (once your main fabric and once your lining fabric). You will have this on your cutting table:

skate-semper-hood

Now you just follow all the instructions and when you come to the hood, you attach the both front sides like the instructions say to attach the long side. No difference for boys and girls, unless you want to play with which side should cross over on the outside.

skate-semper-collage-02

For this version I used the dress add-on pieces. In case you don’t have these pieces, you can find them in the files section of the Sofilantjes Sew & Show Facebook group.

skate-semper-01

skate-semper-10

I added a little bit of length to the pockets because her short arms would otherwise not reach them in this length.
She falls in the size 7 for chest, but size 8 for length. Because this is a unisex pattern the sweater is quite loose.
It really shows how important it is to measure your child and compare it to the charts.

skate-semper-04

The side panels with the pockets are one of my favourite features of the Semper Sweater!

skate-semper-03

I just had to sneak in this picture… Little Happy brings so much joy to our family!

The Hibernis/Semper or Omni. what’s the difference?

I’ve been getting questions about the difference between the Hibernis Cowl Shirt, the Omni Tempore and the Semper Sweater. Most people think they ‘look similar’. I agree they do a little. But if you look closer they are not. Let me tell you why.

I made a chart to show you the differences. But let me walk you trough them first. First let’s show them to you in one post. First up, the Hibernis Cowl Shirt.

The Hibernis Cowl Shirt is made to fit girls (pink chart). It has a slimmer fit and is curved towards the waist. The sleeves are normal sleeves. The optional side panel is made out of two pieces that holds two pockets. One pocket is the width of both side panel pieces and one pocket the width of one side panel piece (small one). Both pockets are made with a higher and a lower side. The Cowl is a separate cowl that sits loose on top of the neckline (like a scarf). It is being hold in place by the plackets. A fun options is that you get to use the Nivalis sleeves and neckline options on the Hibernis Cowl shirt and vice versa.

Next the Semper Sweater.
dragon Semper Sweater-Sofilantjes Hood

semper sweater size 5 option B

The Semper Sweater is a Raglan sweater. So it is made using a Raglan sleeve. The optional side panels are made out of one piece and you have only one pocket to add, that is a square pocket. The neckline options are a sewn in Cowl or a Hood with a split at the Raglan (shoulder) seam. The Semper Sweater is made using a boys/unisex chart. A different chart with different measurements than the Hibernis Cowl Shirt (yellow chart vs. pink chart). Unlike the Hibernis Cowl shirt, this shirt is not a slim fit and doesn’t curve at the waist. A curved waist usually isn’t a good look on boys right? 😉

And last the Omni Tempore.

The Omni Tempore is also a boys/Unisex pattern (yellow chart). The fit is just a tad slimmer than the Semper Sweater but that is mostly in the sleeves and the neckline. There are normal sleeves and the neckline is a bit less wide than the Semper Sweater. It’s more V shaped. Options are a Collar or a Hood. Both fold over on the front. There are no side panels and the only pocket option is the kangaroo pocket on front. There is a waistband option but you have another option to hem the bottom of the shirt.

Charts:
The Hibernis Cowl Shirt chart.
size-charthibernis
The Semper Sweater chart.
size-chart-omni-semp

If you are still confused or just like to see all differences in one chart. I made one just for you! Klick the link to open.
tabel-hib-semp-omni

Nivalis: how to… part 3

Guest post by MoonStar

This week I’ve been treating you with photo-tutorials on the Nivalis Dress & Tunic.
So far I’ve explained how to hem the bottom  and how to sew the colorblock option.
Today we will take a closer look on the collar.

I’ve seen questions about making the collar as well as questions on how to attach the collar. So today I will try to explain both these steps.

How to make and attach the collar

collar-step-01
This photo shows you the pattern pieces needed for the collar.
As you can see I already ironed the interfacing to the small pattern pieces. I also folded these pieces in half and pressed them. This will help you once you’ve sewn the 4 pieces together.

collar-step-02-a
Next thing to do is sew those 4 pieces together…

collar-step-02-c
4 collar pieces are one long piece of fabric now…

collar-step-02-d

Fold the long piece in half (right sides together) and sew the both ends together. You create a “circle”…

collar-step-02-e
which should look something like this…

collar-step-03
You close one of the sides. When working with a print like I did here, you will close the part that looks like the bottom. Otherwise your print will be upside down after you attach it.

We are now ready for the next step: attaching the collar to the dress.
If you want to sew buttonholes, do it before you attach the collar. And don’t be afraid about the buttonholes! Personally I like the look of the buttonholes best on this pattern. But I know not everybody shares that opinion…

collar-step-04

Don’t forget to use the markings on the pattern pieces to place the collar on the dress. You should “wrap” the collar around the dress.
The photo on the left might be confusing… the collar is upside down on how it should be attached. It’s to show you on which side you should have the buttonholes.

collar-step-05
With the collar pinned in place, sew on your regular machine, or when you’re more confident you could skip this step and go straight to your serger.

collar-step-06
After sewing with a stretch stitch you can now finish the raw edges with a serger or with a zigzag stitch or a overlock stitch on a regular machine.
Give it another good press and you’re all done!
Oh, sorry, you need to attach your buttons first. About the buttons, they are supposed to be decorative. But I attached the first button on the other side so it is actually functional. As you can see in the picture below, it’s not noticeable.

Time to show off your creation!!!

nivalis-fox

Hope you all enjoyed these past three days reading about the Nivalis Dress & Tunic.
What pattern would you like to read more about in a next series?

Nivalis: how to… part 2

Guest post by MoonStar

Yesterday I told you how Sofilantjes decided to start working on some FAQ’s.
Quite a few of these Frequently Asked Questions involve parts of the instructions in the Sofilantjes patterns. Instructions are quite clear and I find all patterns pretty easy because of the combination of written instructions and graphics. But sometimes it happens that the confident beginner needs some extra help and even the more experienced sewist can have a temporary brain freeze.  And so I thought it would be nice to add some photo tutorials.

First pattern I’m tackling is the Nivalis Dress & Tunic, more specifically 3 questions we hear often:
How to…
hem the bottom (that strange corner part)
– sew the colorblock version
– make and attach the collar

Yesterday I’ve explained 2 ways to hem the bottom. Today’s post is all about the colorblock version of the Nivalis Dress & Tunic.

How to sew the colorblock version?

For this one I will be showing you step-by-step photo’s

colorblock-step-1
Top and bottom pattern piece of front bodice

Important note: when making the colorblock version you need to read the instructions about which pattern pieces to use. Actually I think it’s important to read all instructions carefully before you start.

colorblock-step-2
Right sides of the fabric together
colorblock-step-3
Start by pinning the center of both pieces together
colorblock-step-4
Pin the edges together, aligning the curves. Pin the corners first and then start pinning the rest of the curve.
colorblock-step-5
When you would fold the top part up, it would look like this. Can you see the right shape coming together nicely?
colorblock-step-7
Sew together and press
colorblock-step-8
Right side should look like this
colorblock-step-9
Finish the edge (with serger or use a overlock stitch or zigzag stitch on a regular machine) and press again

Repeat these steps for the back bodice pattern pieces.

You are now ready to continue with the instructions of the Nivalis Dress & Tunic.

nivalis-how-to-2

Come back tomorrow to see how you can make & attach the collar to the dress.

Nivalis: how to… part 1

Guest post by MoonStar

The Sofilantjes Facebook group has been expanding tremendously this year. We are very pleased to see how many people enjoy our patterns.
Over the past few months we’ve noticed there are quite a few of the same questions that keep popping up. Therefor we’ve been thinking to launch a FAQ’s document in the group. Bear with us, we are working on it!
Did you know you can find quite a few FAQ’s on the website? Check it out here.

Of course a lot of the Frequently Asked Questions in the Facebook group involve questions about the way certain parts of patterns are to be constructed.
So, I will be making tutorials on those parts that can be challenging to the beginning sewist.

First pattern that I’m discussing is the Nivalis Dress & Tunic.
In the next 3 days I will try to explain how to:
– hem the bottom (that strange corner part)
– sew the colorblock version
– make and attach the collar

I know hemming the cap sleeves is also something that might need some extra instructions to the less confident sewist. I might do a photo tutorial on this when the weather is getting warmer again (sorry to our Down Under friends or any other folks that live in warm and sunny parts of the globe).

nivalis-pyjama-60

How to hem the bottom of the Nivalis?

I’ve tried several ways. I’ll start with the last one. This is the one my mother suggested. She’s been sewing for about 60 years, so you can say she’s one of my most important role models when it comes to sewing.

Hemming version 1:

hem-bottom-v1-step-1-2-3
These steps are just my way of preparing the actual hemming.
  • I finish the corner edge and the bottom edge with my serger (an overlock stitch or zigzag stitch on a regular machine will do fine as well)
  • Next I draw a line to where my hem needs to be folded (so double of the hemming length; in this particular case 5 cm or 2 inches)
  • Then I fold my hem upwards and press it all around. This really helps the hemming later on!
hem-bottom-v1-step-4-5-6
After preparing the bottom, you will now follow instructions to put your Nivalis together. Come back to this tutorial when you’re ready to hem the bottom, or actually, before you close the sides.
  • When you are sewing the side seams, you do not sew the little corners, you leave them open for this way of hemming.
  • You now fold the bottom upwards. Because you already pressed the hem, this step will be easy. Pin in place!
  • With the bottom hem folded upwards and pinned in place you are ready to sew. To get a clean finish you can baste the hem in place before using your twin needle or some cute decorative stitch.

Hemming version 2:

Another way of hemming is this one. I find it quicker, but it can give just a tad more bulk in the corner if you’re a little bit sloppy…

hem-bottom-v2
  • Preparations are the same as version 1, although you might want to skip finishing those little corners, as that can be the reason why the corner gets bulky.
  • When you close the side seams you now also close the little corner!
  • Fold the hem upwards again, which is yet again easier because you pressed it already during preparations. You might have to pay extra attention to the corner when folding it up and pinning it into place.
  • With the bottom edge folded upwards & pinned in place you can start sewing. Yet again, using a basting stitch first can be very helpful.

Want to know how to do the colorblock version of the Nivalis Dress & Tunic? Check out tomorrow’s post!

Guestpost: How to draft a bust dart for the Litore dress

The wonderful Vickie White has offered to show us how she drafts the bust dart for the Litore Tunic and Dress(es) for her beautiful developing tween. I love the way her dresses turn out. She also used the same method on the Solis dress she made her tween. Thank you Vickie!

Tutorial

step one: Measure the child and cut pattern to size. For mine I did a size 12 with 14 length.

Step two: Measuring your darts, you want these to sit on the side of the breast, the side seam on mine is 6″ (15,25 cm) so my dart would sit 2 1/2″ (6,35 cm) from the side seam (3 1/2″ (9 cm) if measuring from the top seam). You will be going in about 2″ (5 cm).

Step three: Mark your pattern, the dart will be 3/4″ (2 cm) wide at the side seam and angled in to meet 2″ (5 cm) in. you want the dart angled slightly down.

Step four: mark your fabric, I used tailor chalk you can also use pins. DO NOT CUT ANY FABRIC OUT. Make sure to mark both the outer and liner pieces.

Step five: sew the dart in place and iron it down flat. At this stage you can sew the side seams and run a rough test fit to make sure the dart falls at the side of the bust.

Step six: put the bodice piece together as the instructions and test fit

Follow the rest of the directions from here to finish out your dress.

full dress

Making a dress from the ADV Tee Pattern

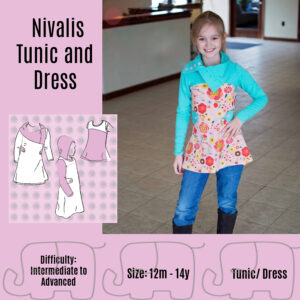
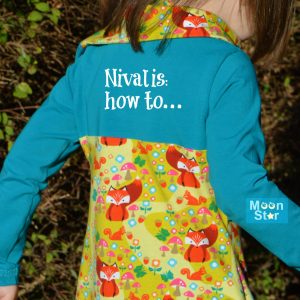
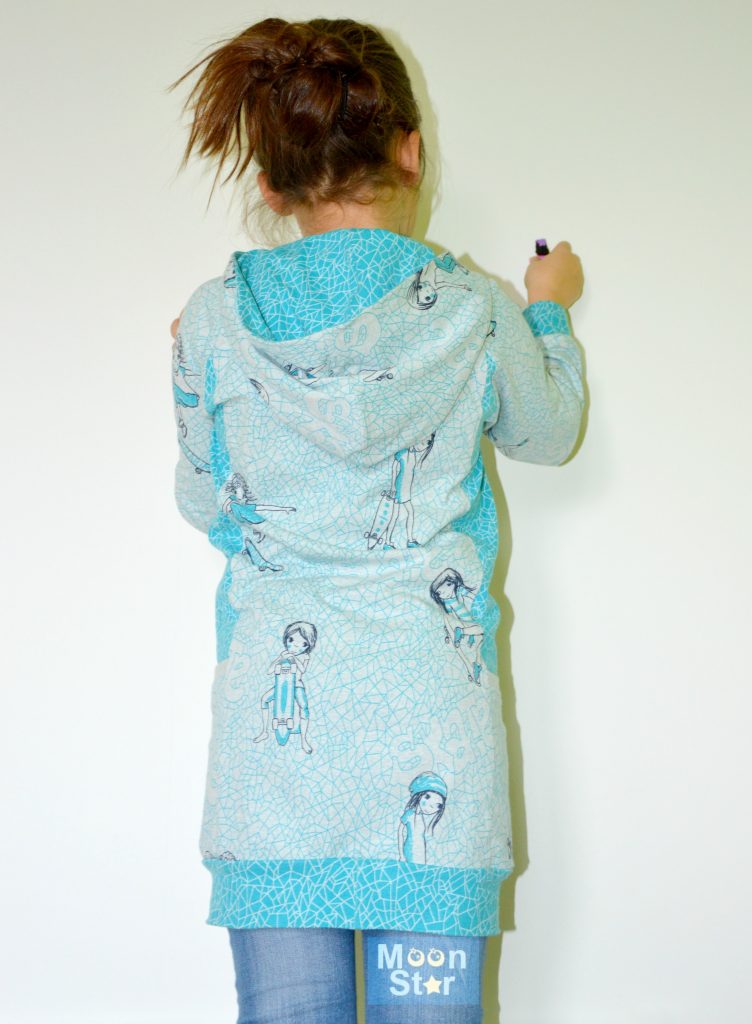
Thanks Anne for having me again, I am so excited to share how I made a new dress for my daughter using the ADV Tee pattern!

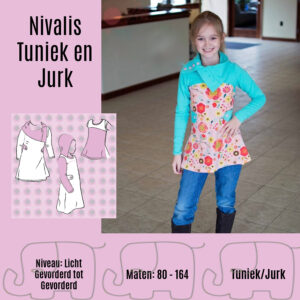
Op verzoek van Sofilantjes Sew and Show leden werden de naaistappen van deze hack vertaald naar het Nederlands door Miranda van Inspinration, het zijn de cursief gedrukte stukjes.

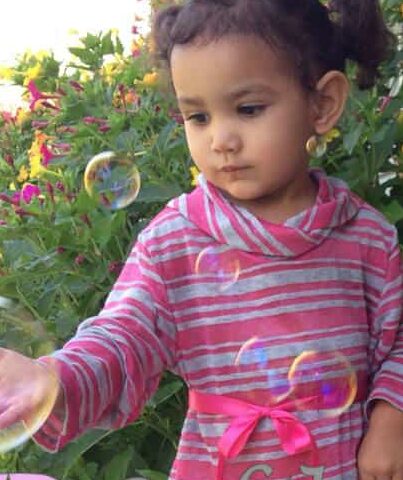
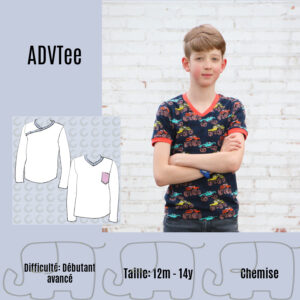
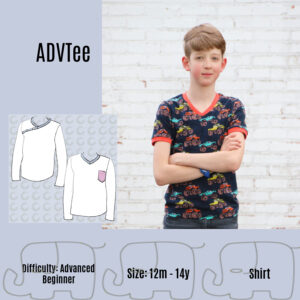
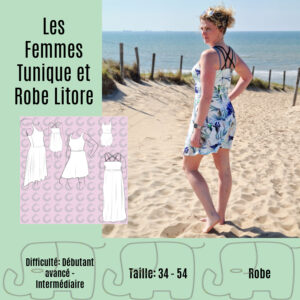
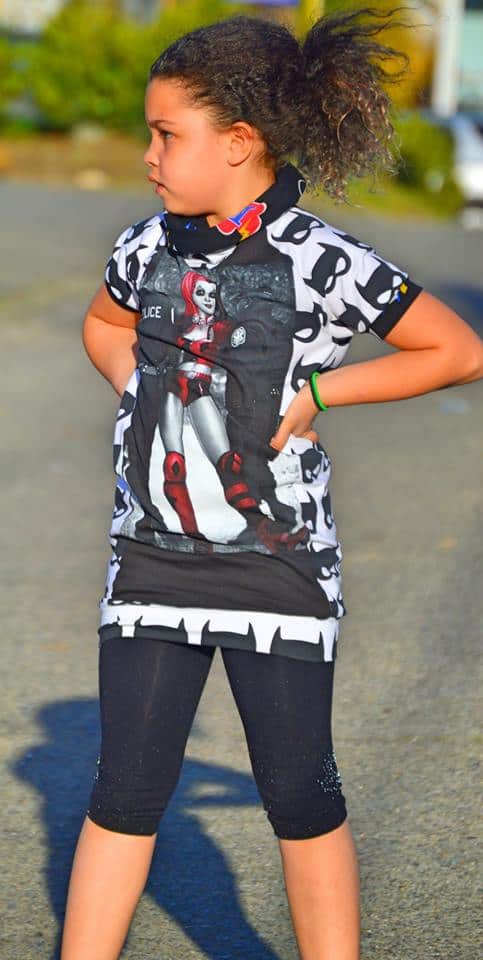
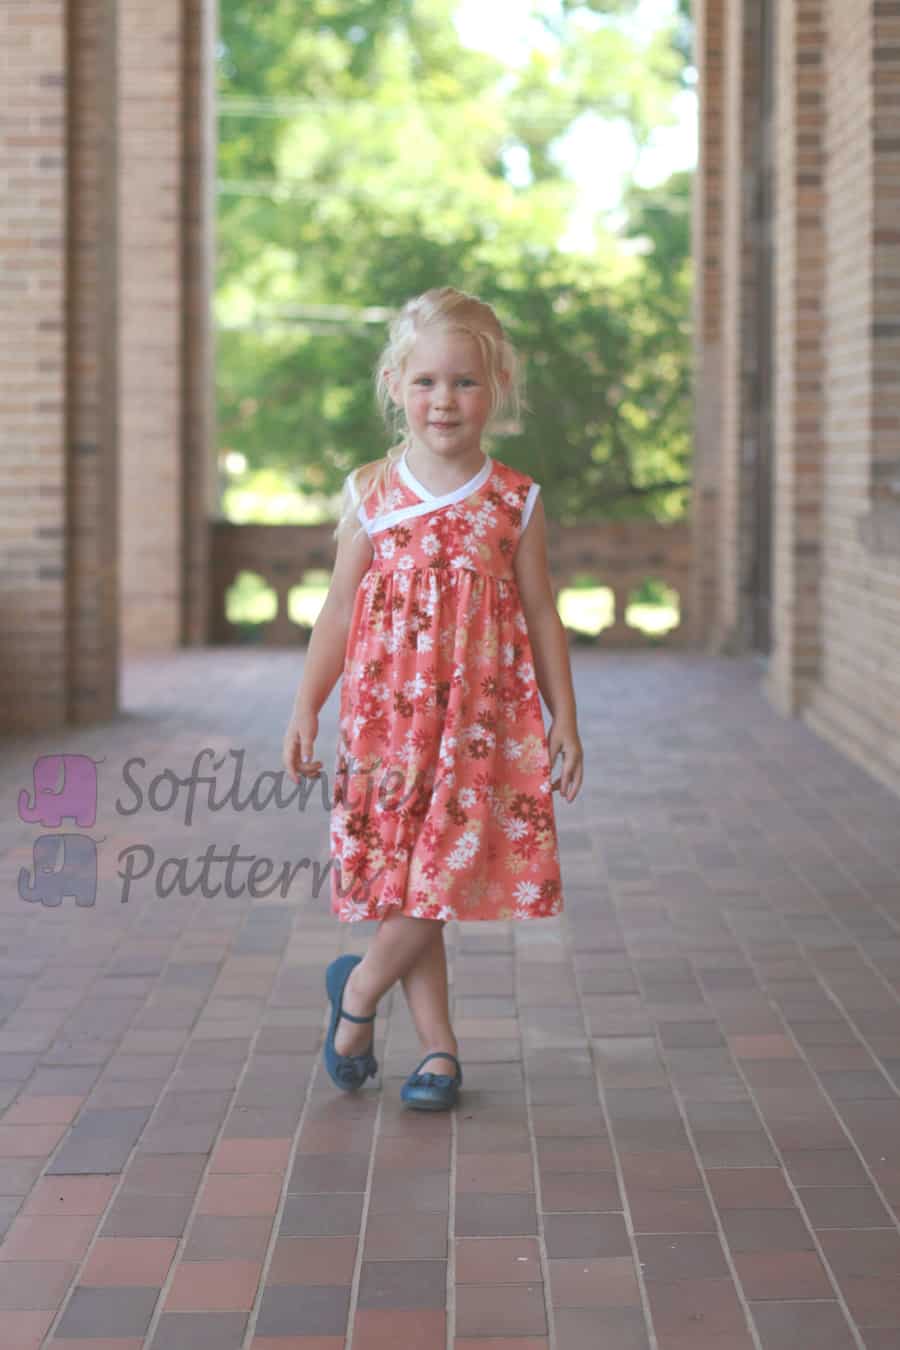
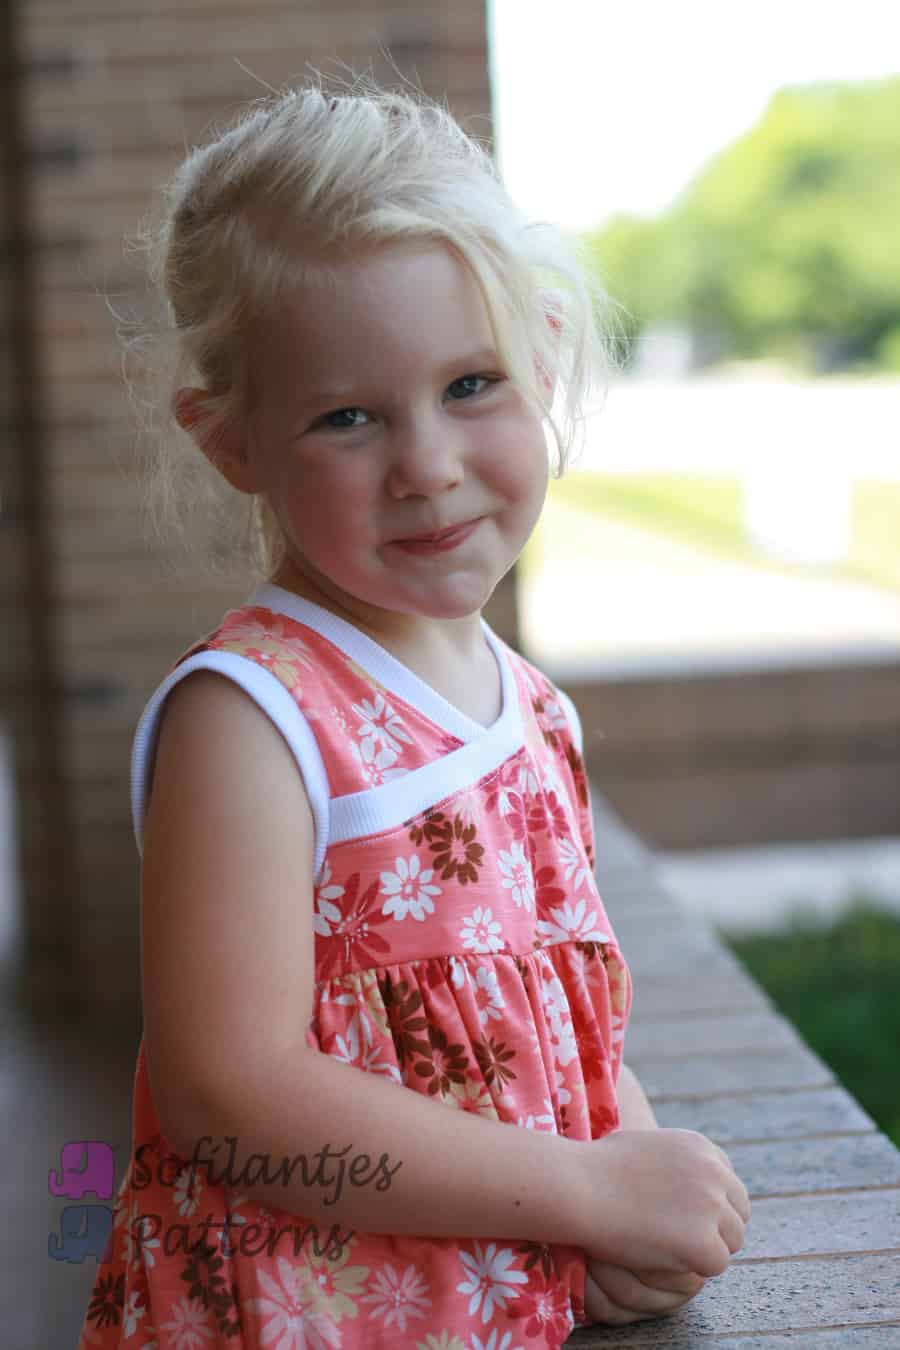
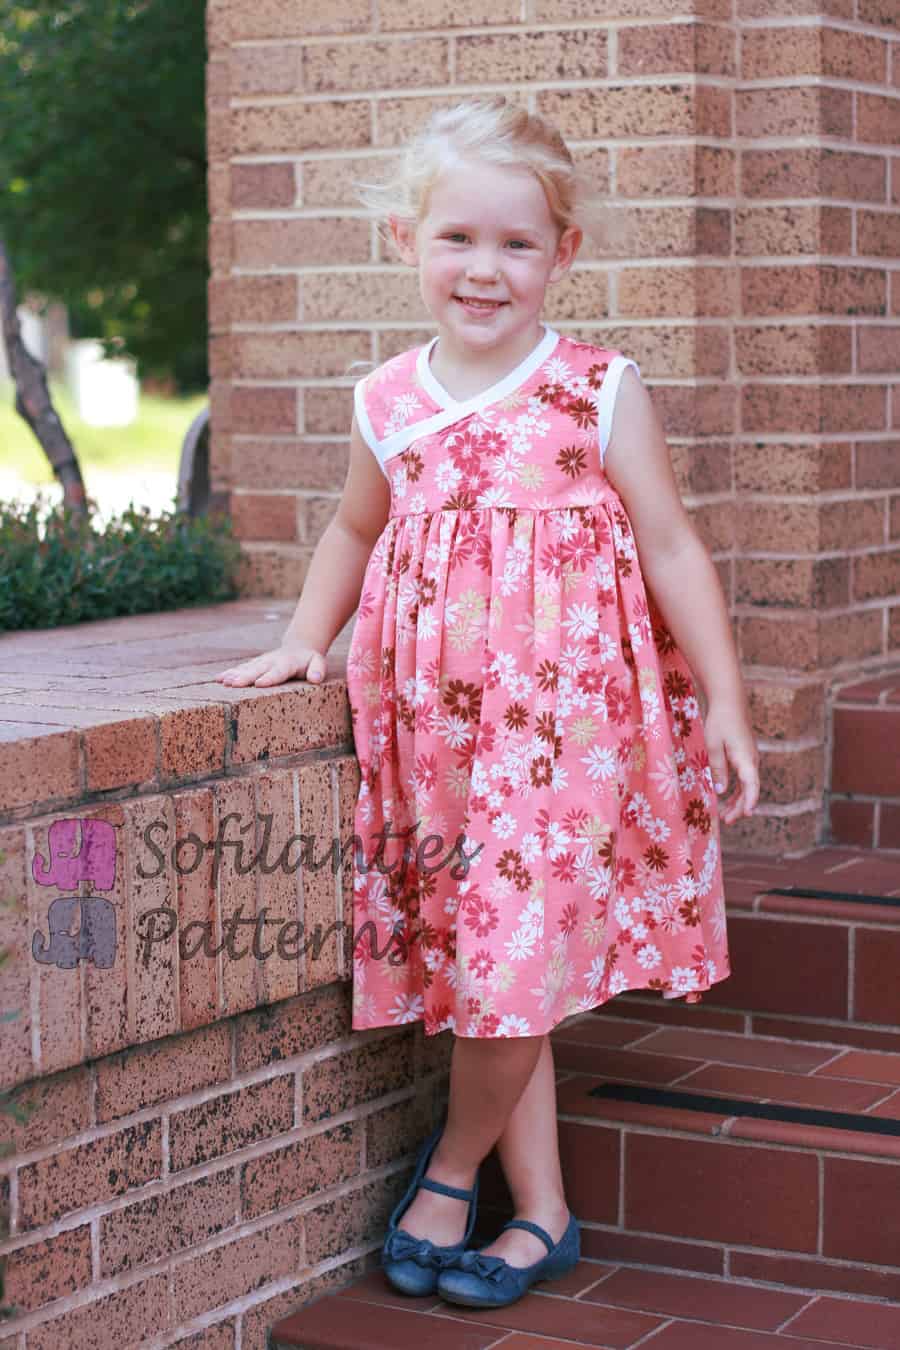
The best part about sewing for my kids is that if I come across an adorable outfit, I don’t have to buy it, but I can MAKE it! While online shopping the other day, I came across this adorable dress that would be perfect for my 4 year old daughter. As I sat there and looked at the bodice part of this dress I thought, hey that sure looks like I can use the Sofilantjes ADV Tee to recreate this look.

13487894_10154289638178000_80489493_n

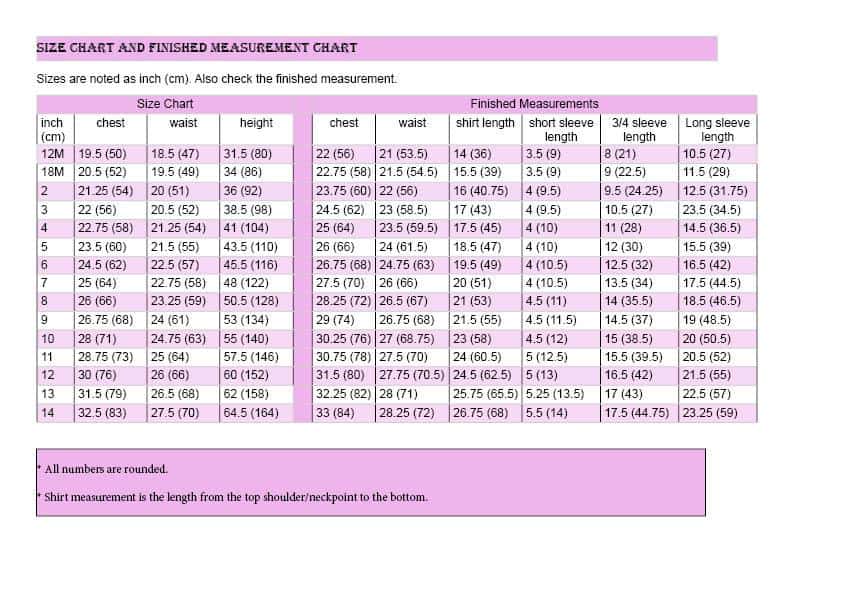
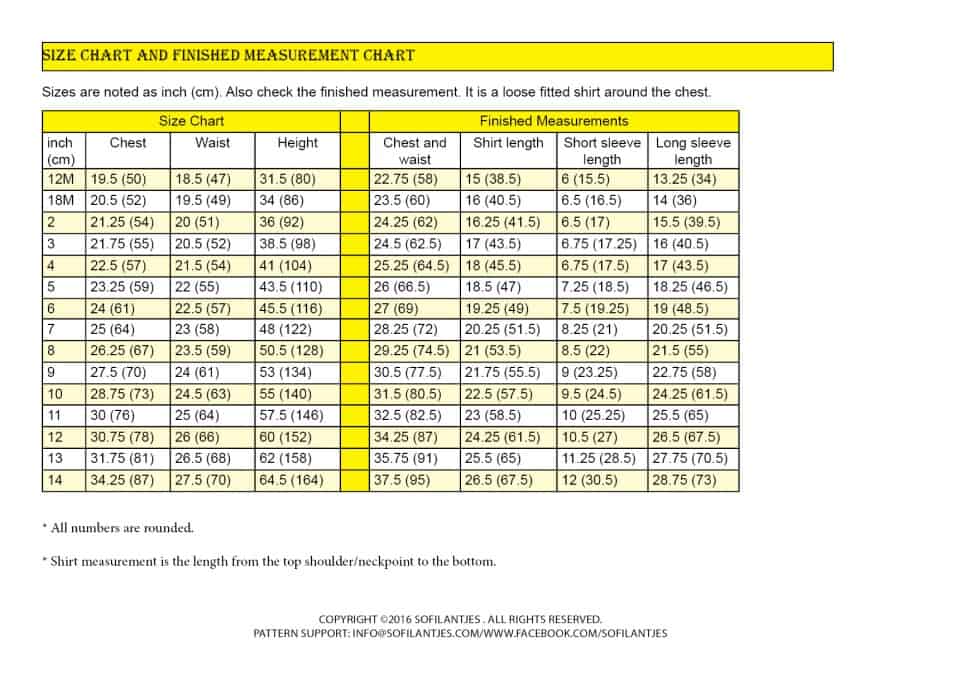
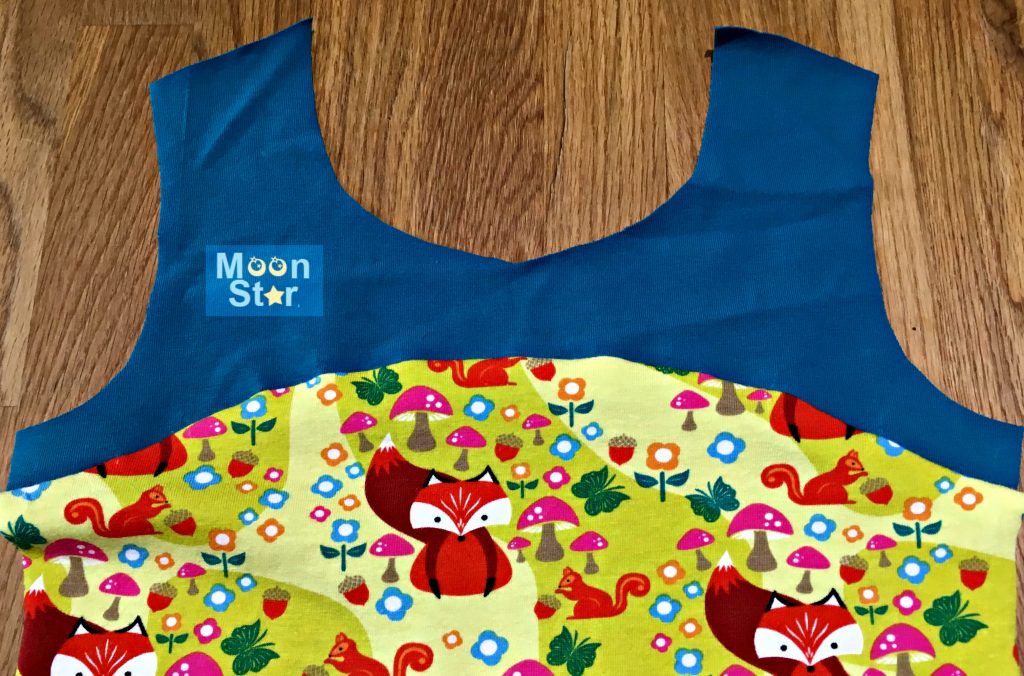
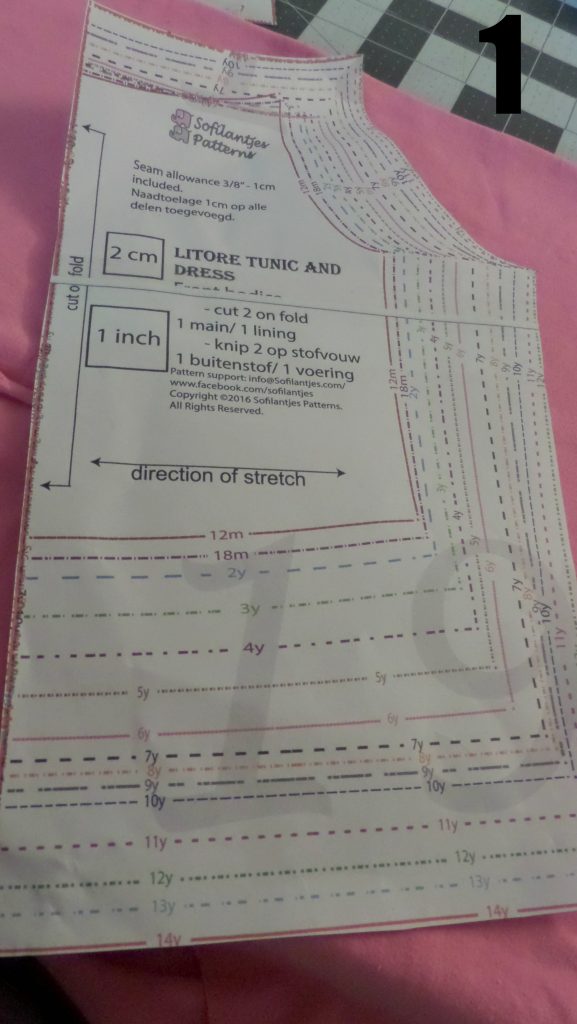
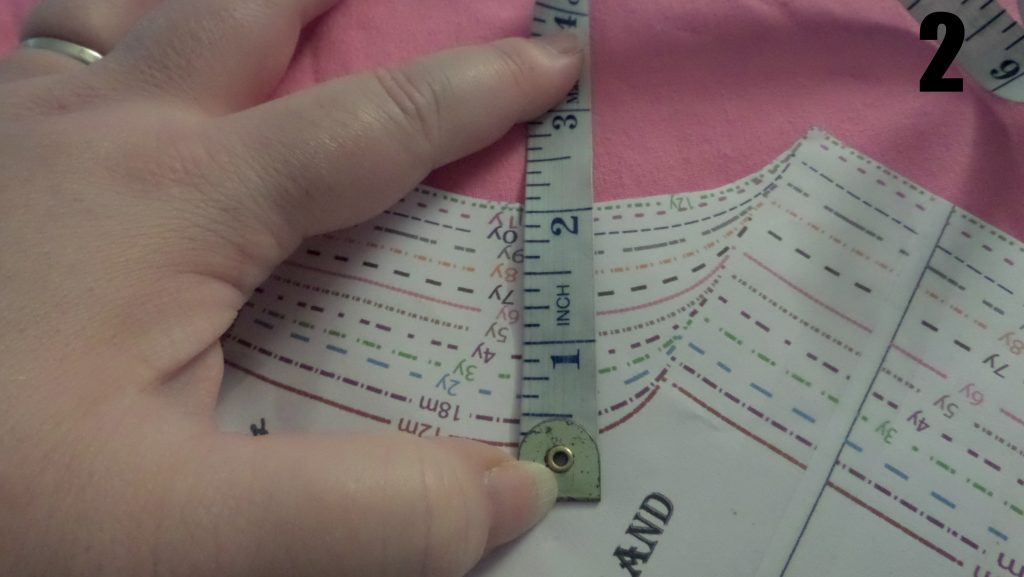
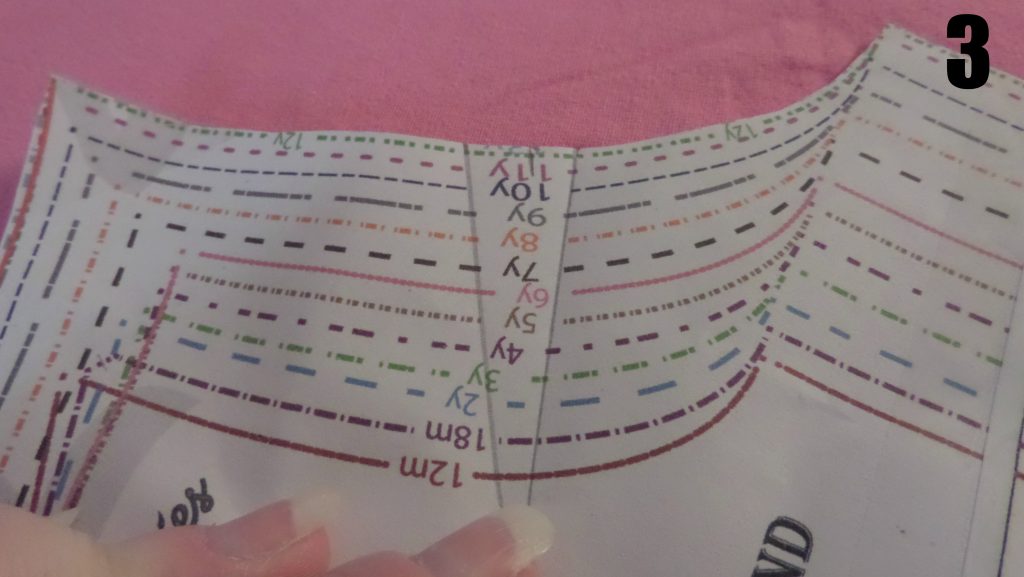
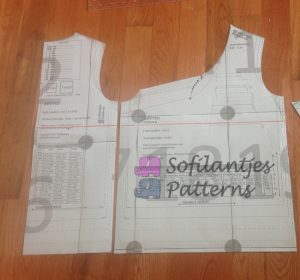
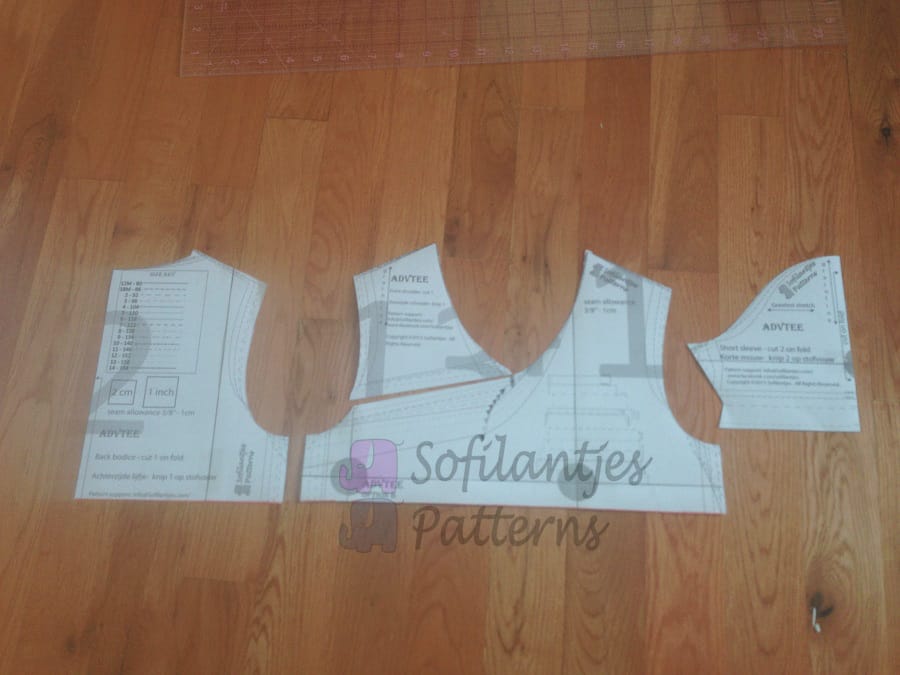
To recreate the dress that I saw, I just needed the top portion of view B of the ADVTee. According to the pattern and my daughters chest size, she is a size 4. I drew a red line across from the bottom of the armscye about 2 inches down on both the front bodice piece and the back bodice piece.

Om de jurk van de Tea collection na te maken heb je het bovenstuk van het ADV Tee patroon nodig. Bepaal de benodigde maat op basis van de maattabel. Teken vervolgens een horizontale lijn op vijf centimter onder het armsgat. Teken deze lijn zowel op het voor- als achterpand. Knip het patroon doormidden op de zojuist getekende lijn, het onderste deel heb je niet nodig.

IMG_7416(1)

IMG_7418(1)

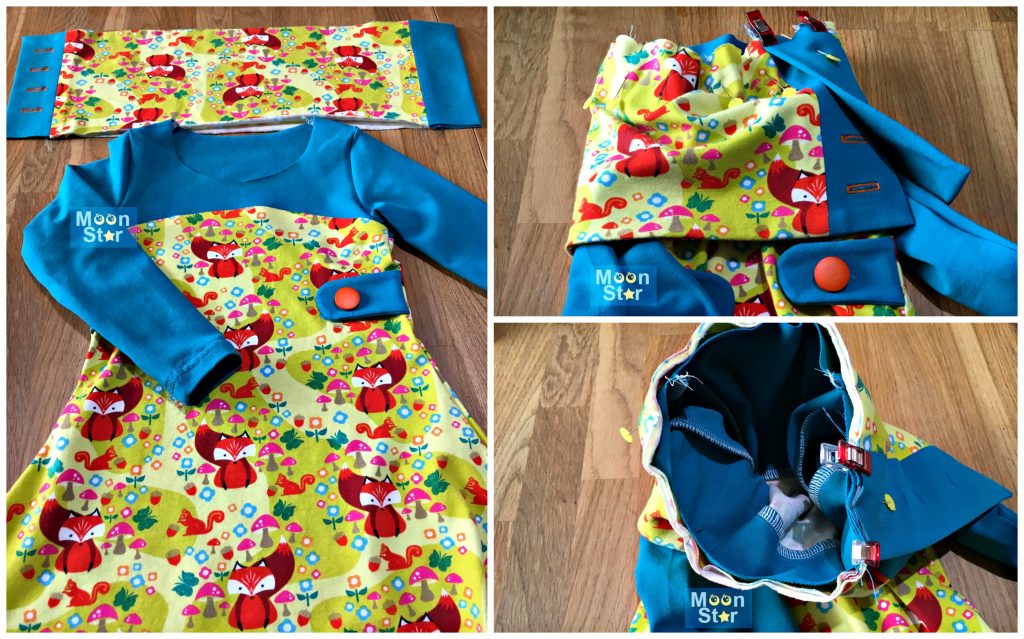
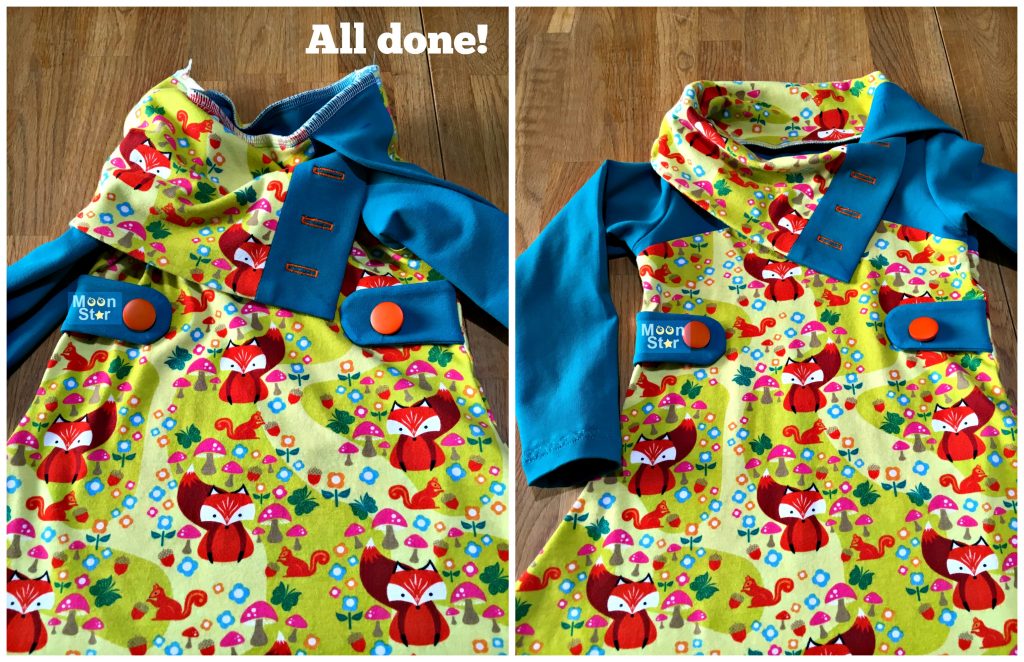
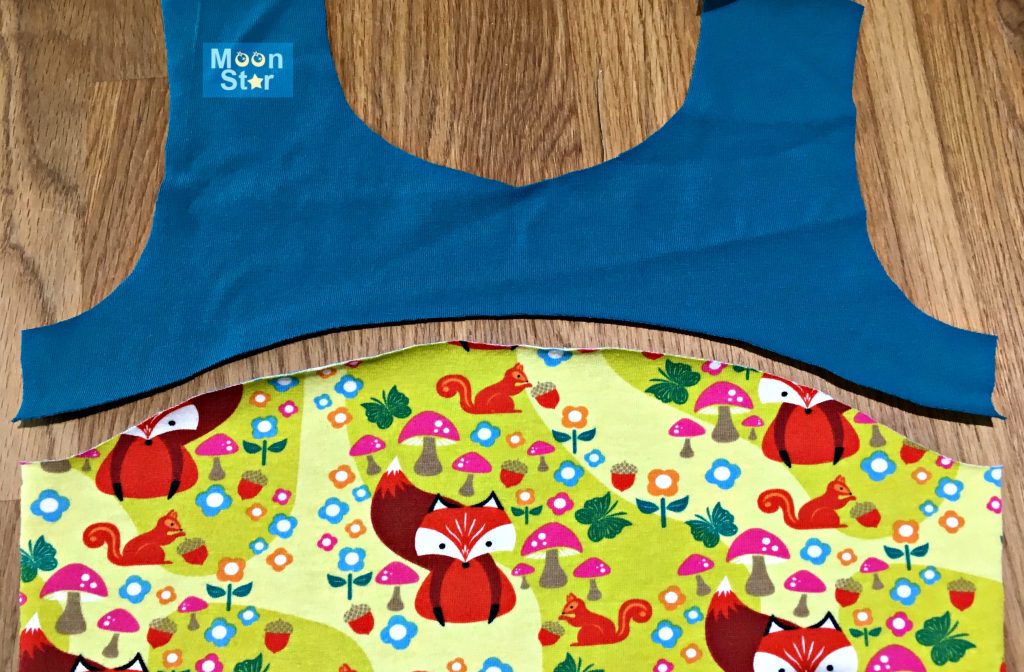
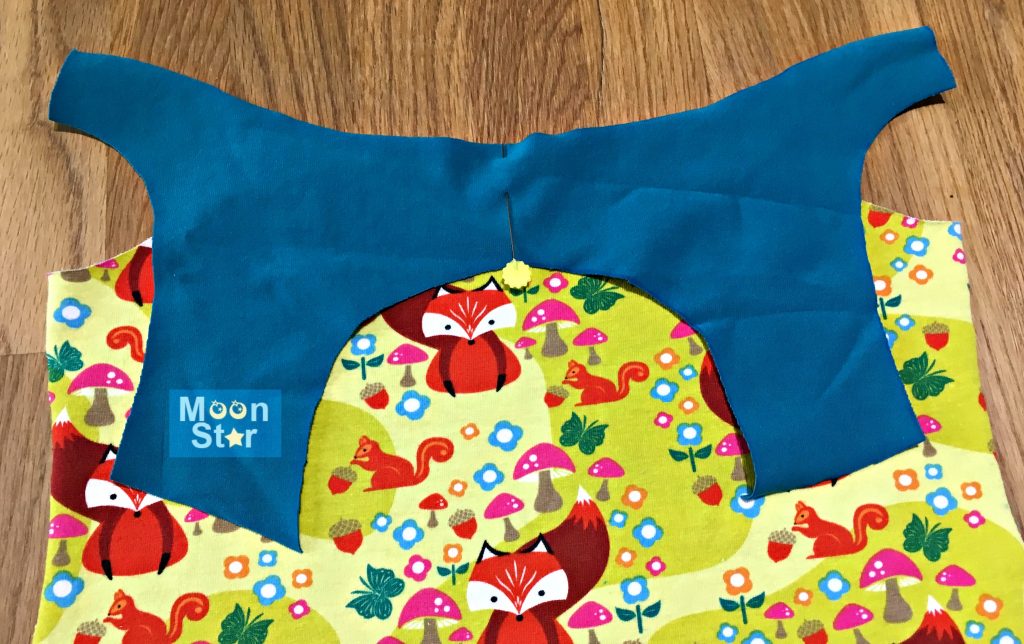
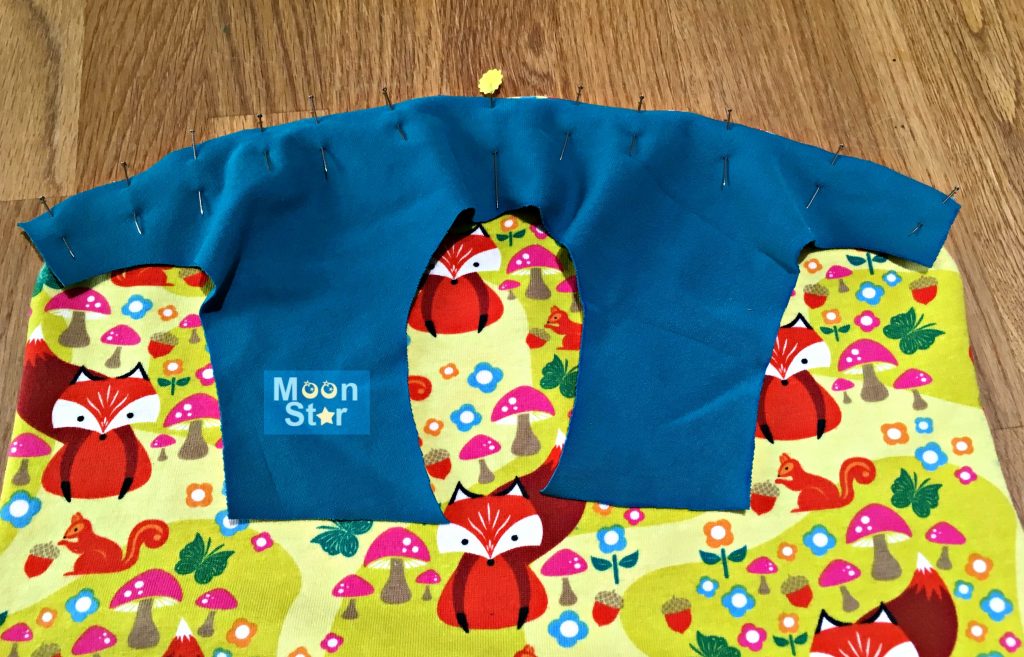
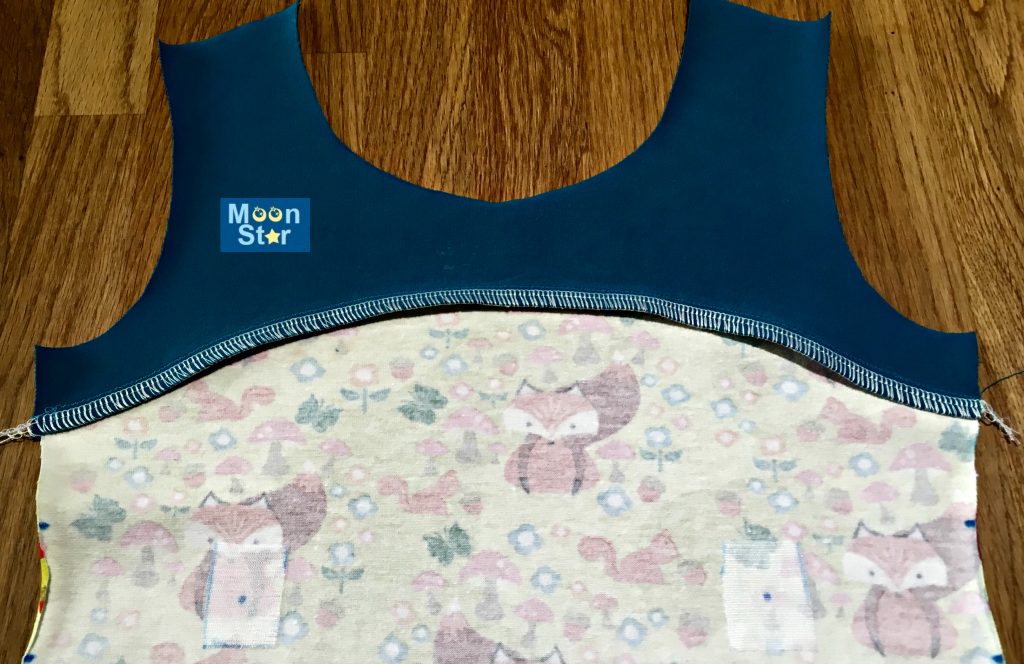
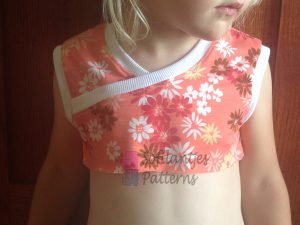
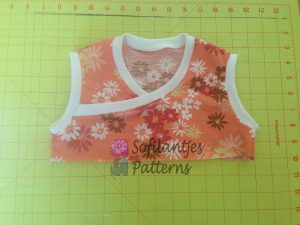
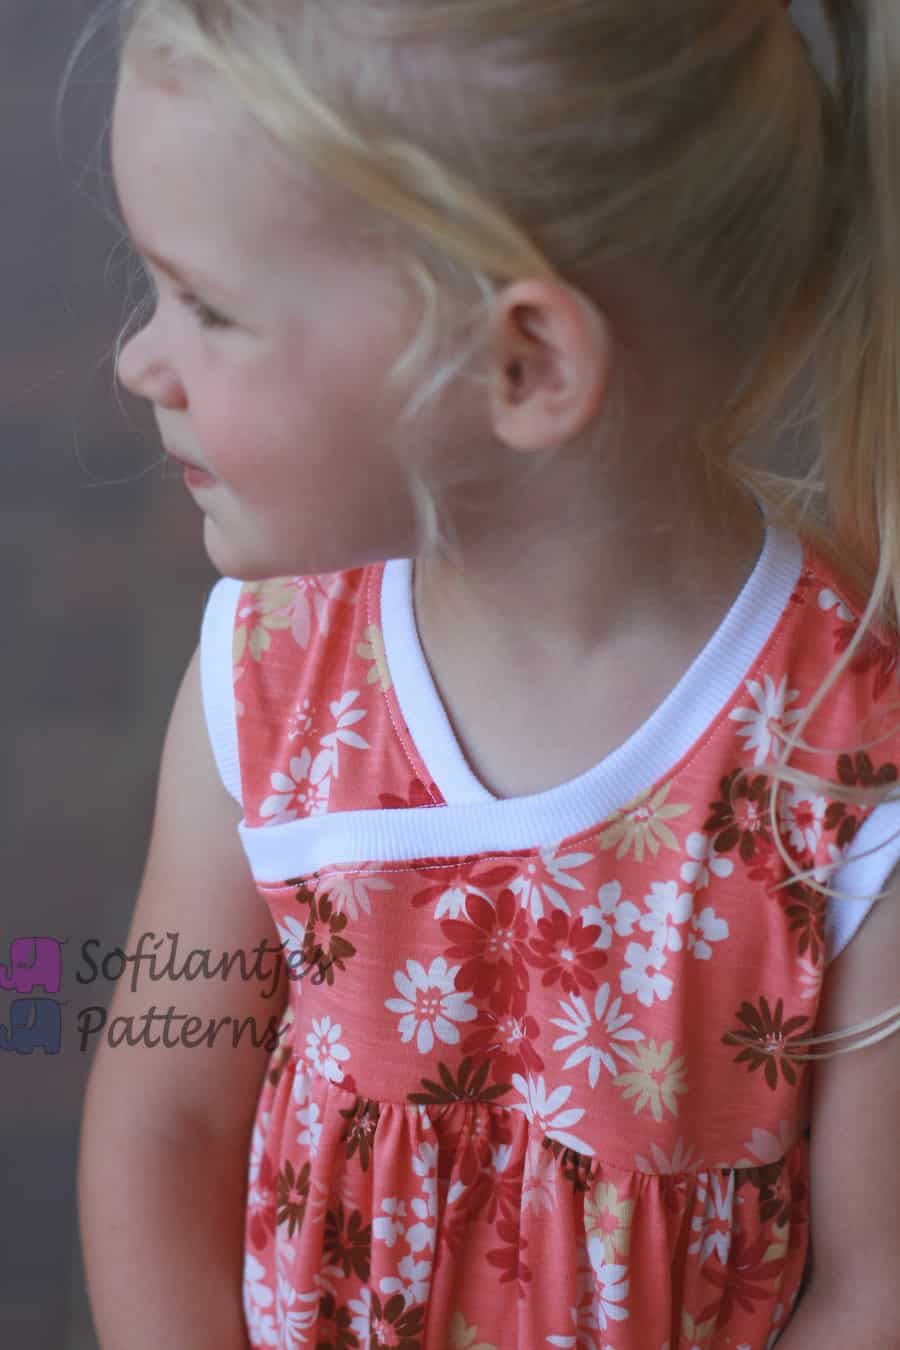
From this point I followed the directions for view B to add the ribbing to the neckline and to sew the side seams. The pattern originally calls for snaps/buttons to be placed on the crossover portion. I double checked that the bodice would fit over my daughters’ head if I sewed the crossover closed, and it was fine for my daughter, but I would recommend checking to make sure before sewing the two front bodice pieces to make one. Otherwise you can follow the pattern and add the snaps or buttons which is a cute feature. I was just trying to recreate the dress I had seen previously.  Then, after sewing, I checked the fit again to just ‘be sure’ that everything was going to fit before I continued.

Naai vervolgens, zoals in de ADVT instructies, het stuk boordstof aan de hals en naai de zijnaden dicht. Ikzelf liet de Kamsnaps weg. Nadat ik controleerde of mijn dochters hoofd door de V-hals zou kunnen,  naaide ik de hals vast (met een rekbare steek).

IMG_7421(1)

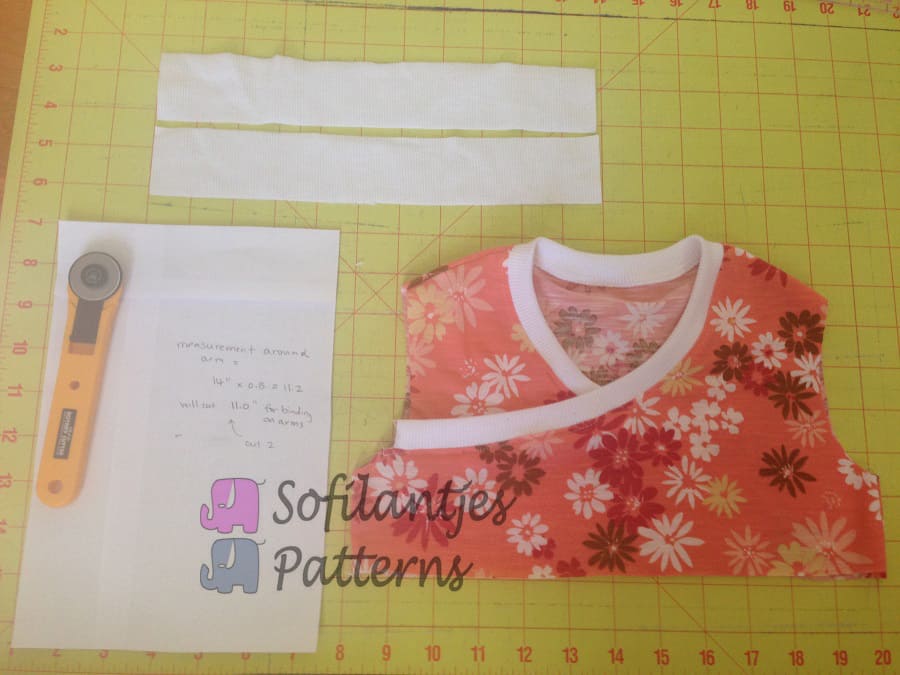
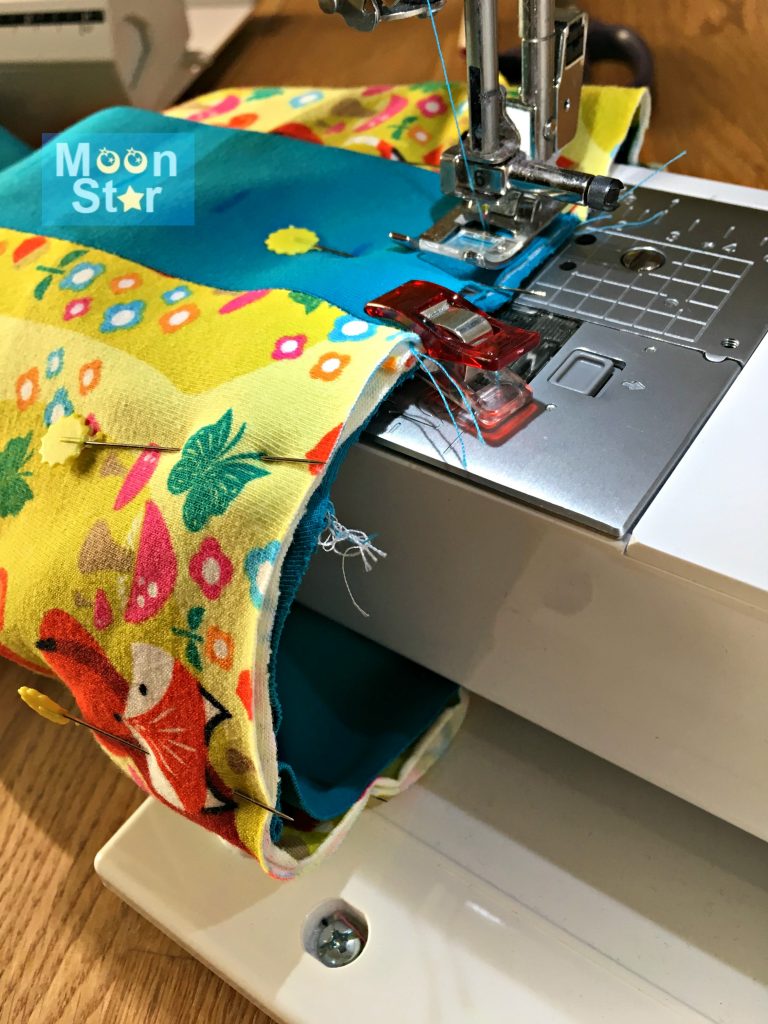
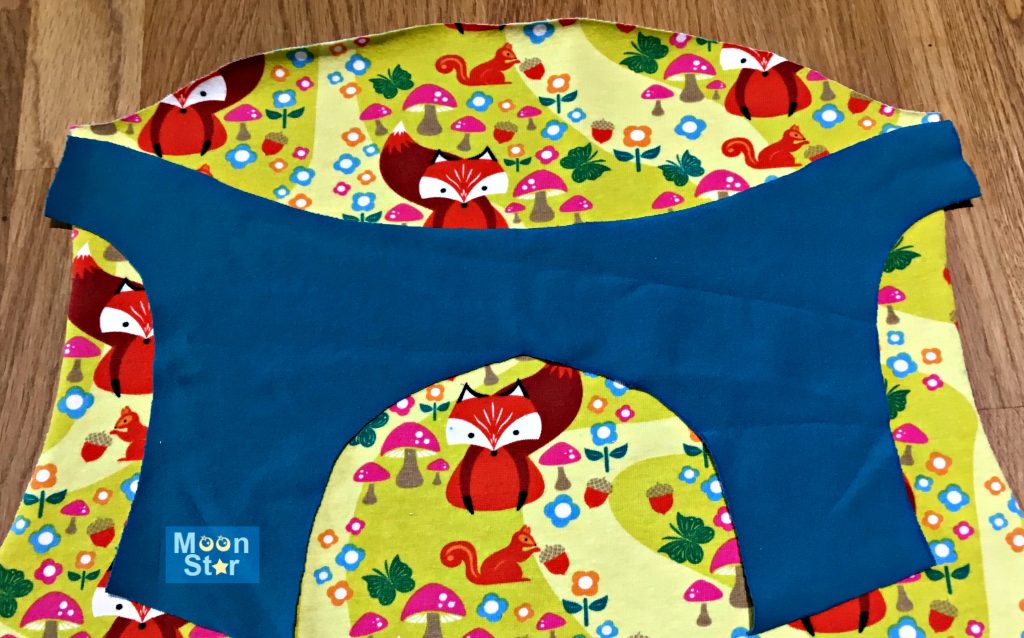
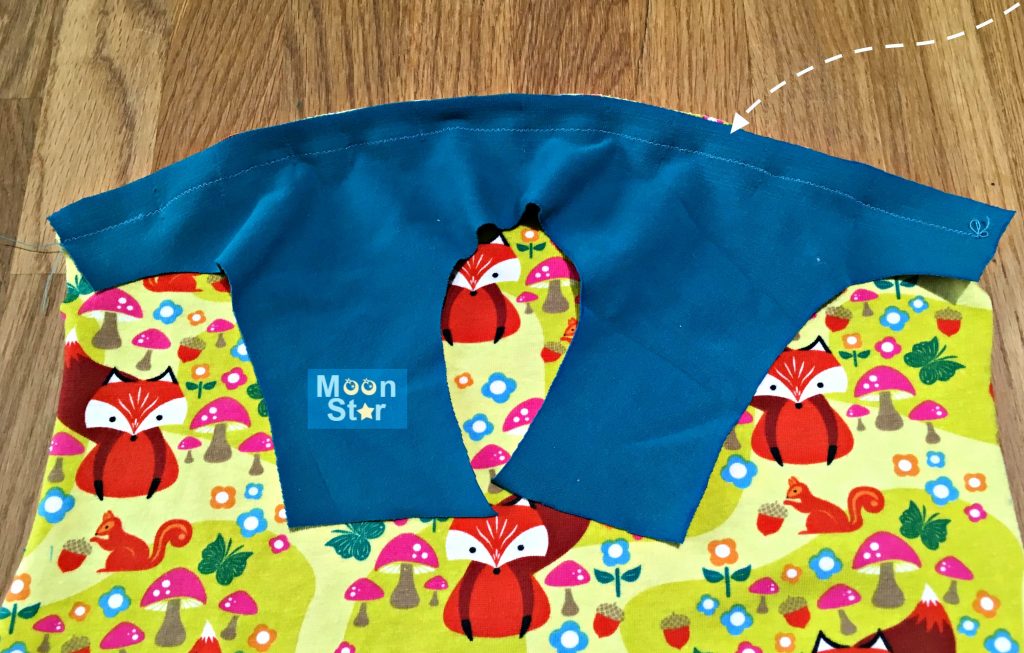
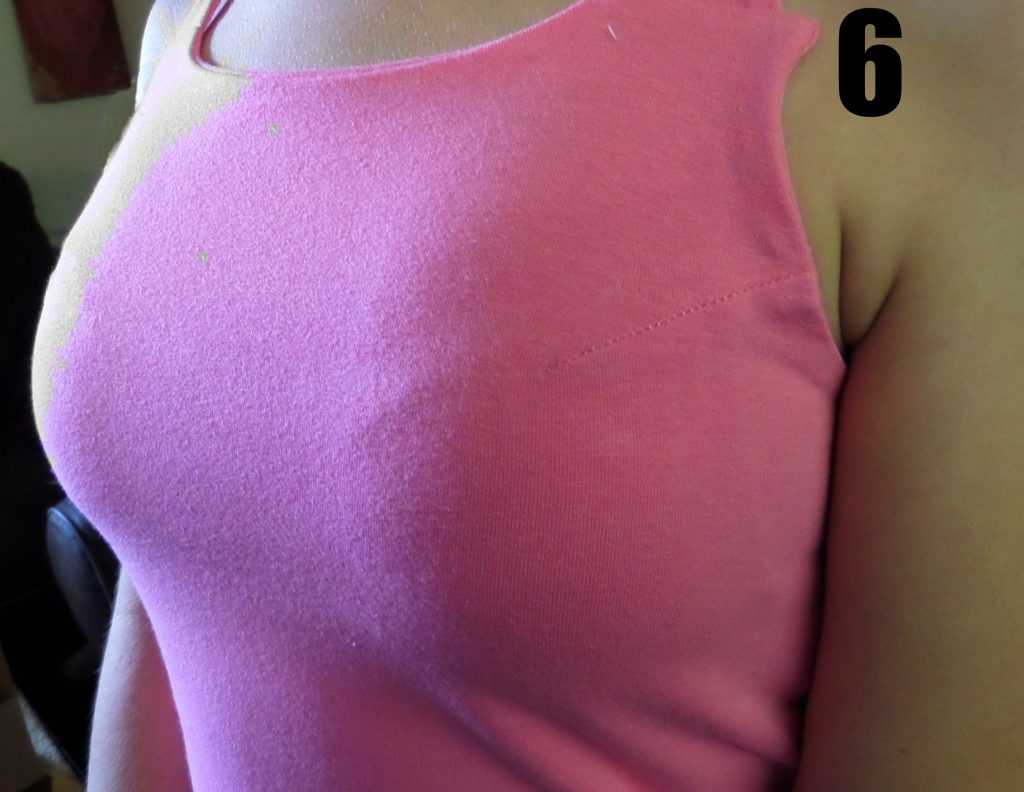
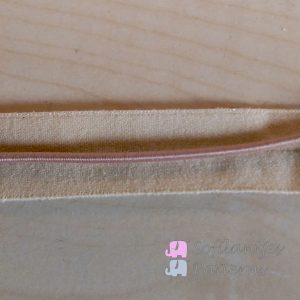
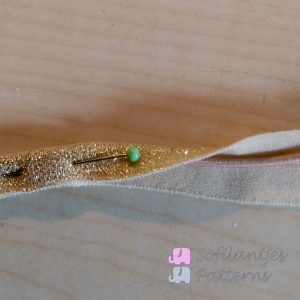
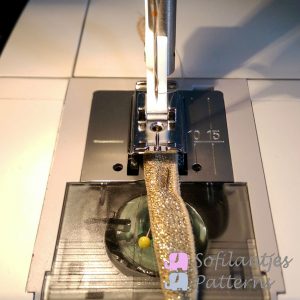
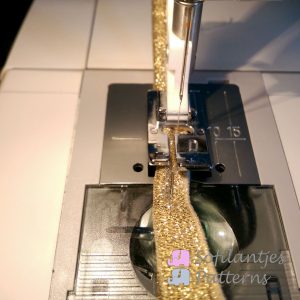
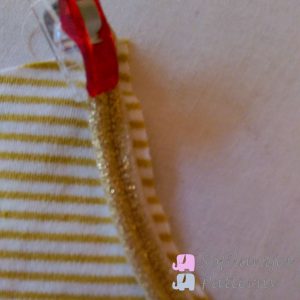
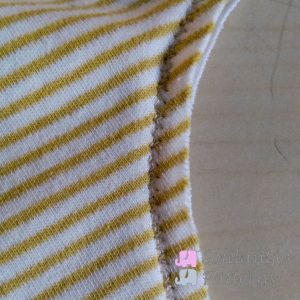
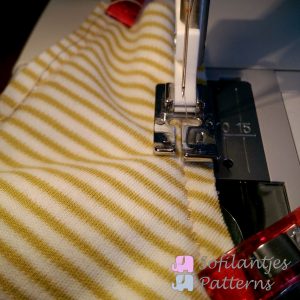
Now, the ADV Tee pattern has pattern pieces for sleeves, but I decided to just do ribbing to finish the arm area. In order to figure out how long to cut the ribbing, first I measured the circumference of the sleeve area after the sides were sewn. My measurement for the size 4 came to 14” and then you multiply by .8 which is 11.2” but I just rounded down to 11” and cut 2 pieces of my ribbing 11” x 2”. I sewed the short ends of each ribbing piece right sides together using a 1/4” seam then turned right side out and folded the pieces in half and pinned to the right side of the shirt making sure that I evenly pulled the ribbing to match the armscye. Now the bodice is completely done, and we can start on the skirt.

Ik werkte de armsgaten af met boordstof, net als in de voorbeeldjurk die ik zag. Om de juiste lengte te bepalen, meet je het armgat op. Die lengte doe je maal 0.8 cm en dat geeft de benodigde lengte boordstof. Knip vervolgens een reep boordstof van 5 cm breed bij de lengte die je zojuist bepaalde.  Deze strip naai je vervolgens aan het armgat zoals een gebruikelijk boord. Daarvoor sluit je eerst de korte zijde, vervolgens dubbel vouwen en daarna op de goede kant van de stof naaien.  Hier is eventueel nog een andere Sofilantjes blogpost (in het Engels) met plaatjes hoe je een boordje vastnaait.

IMG_7422(1) IMG_7423(1)

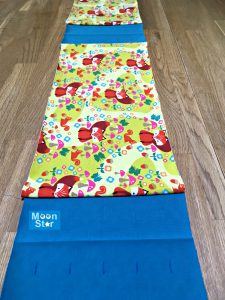
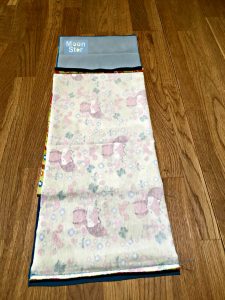
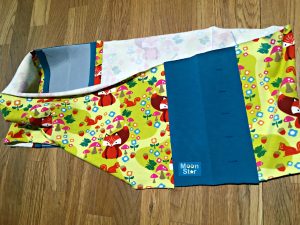
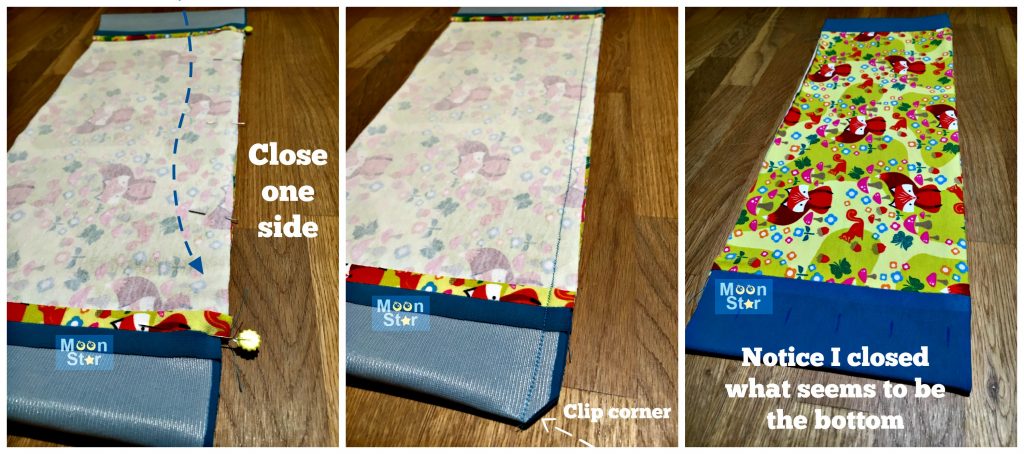
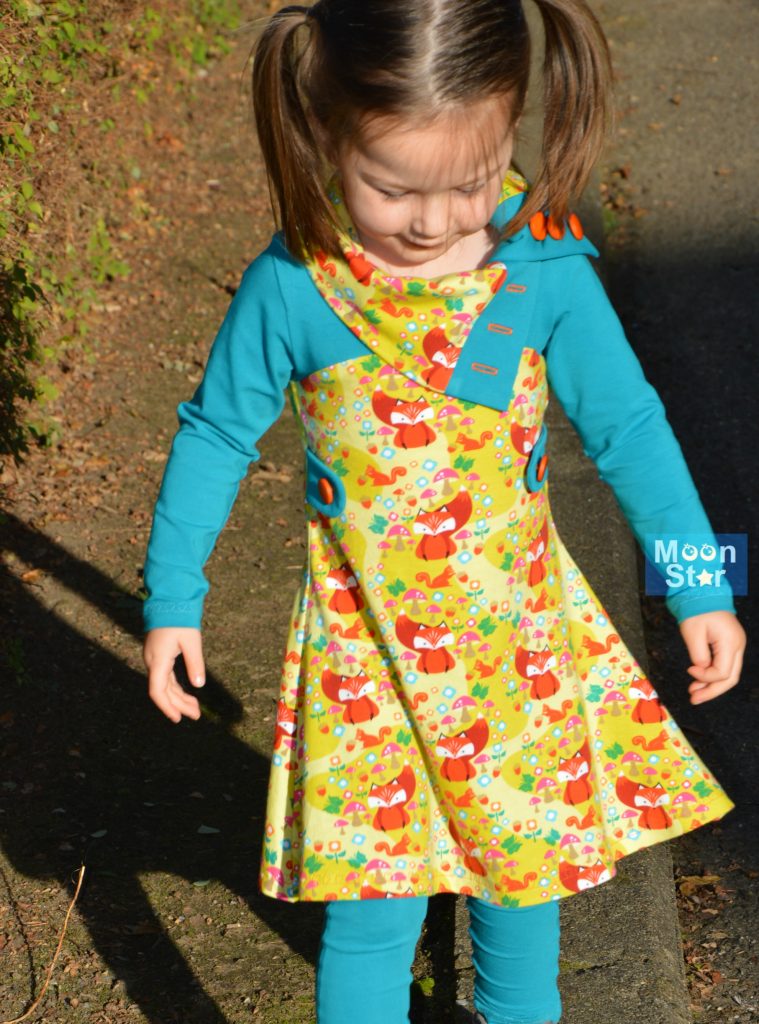
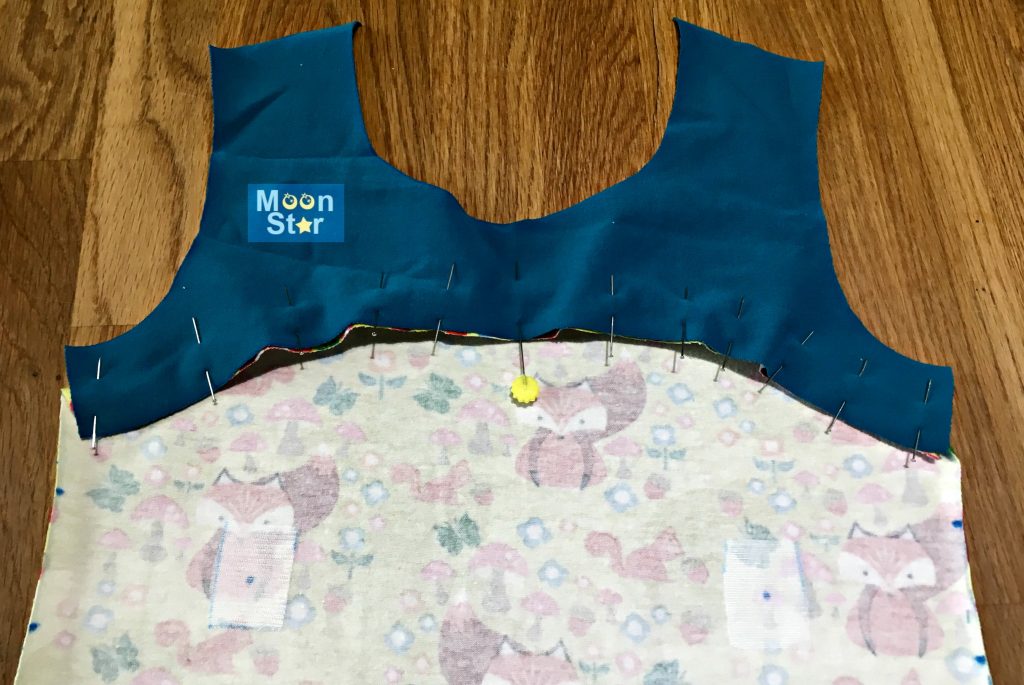
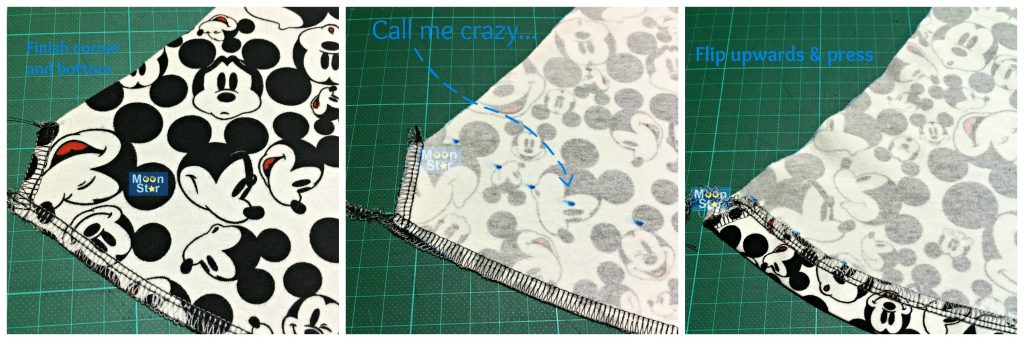
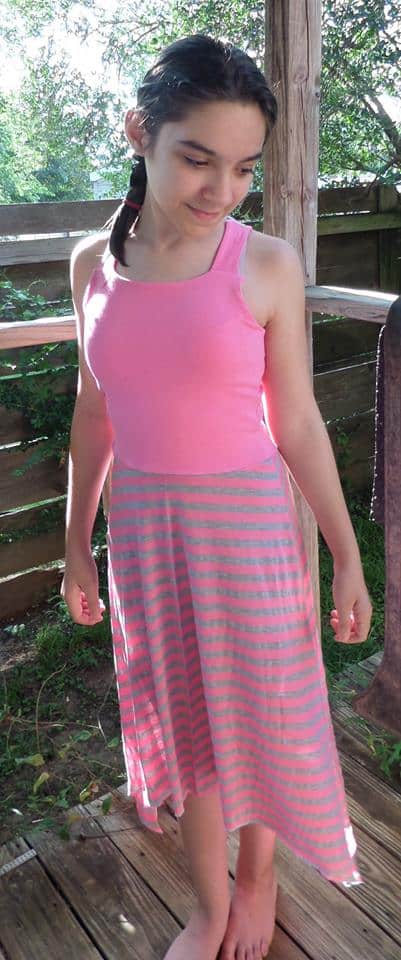
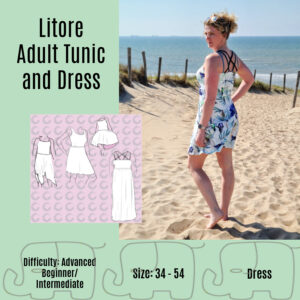
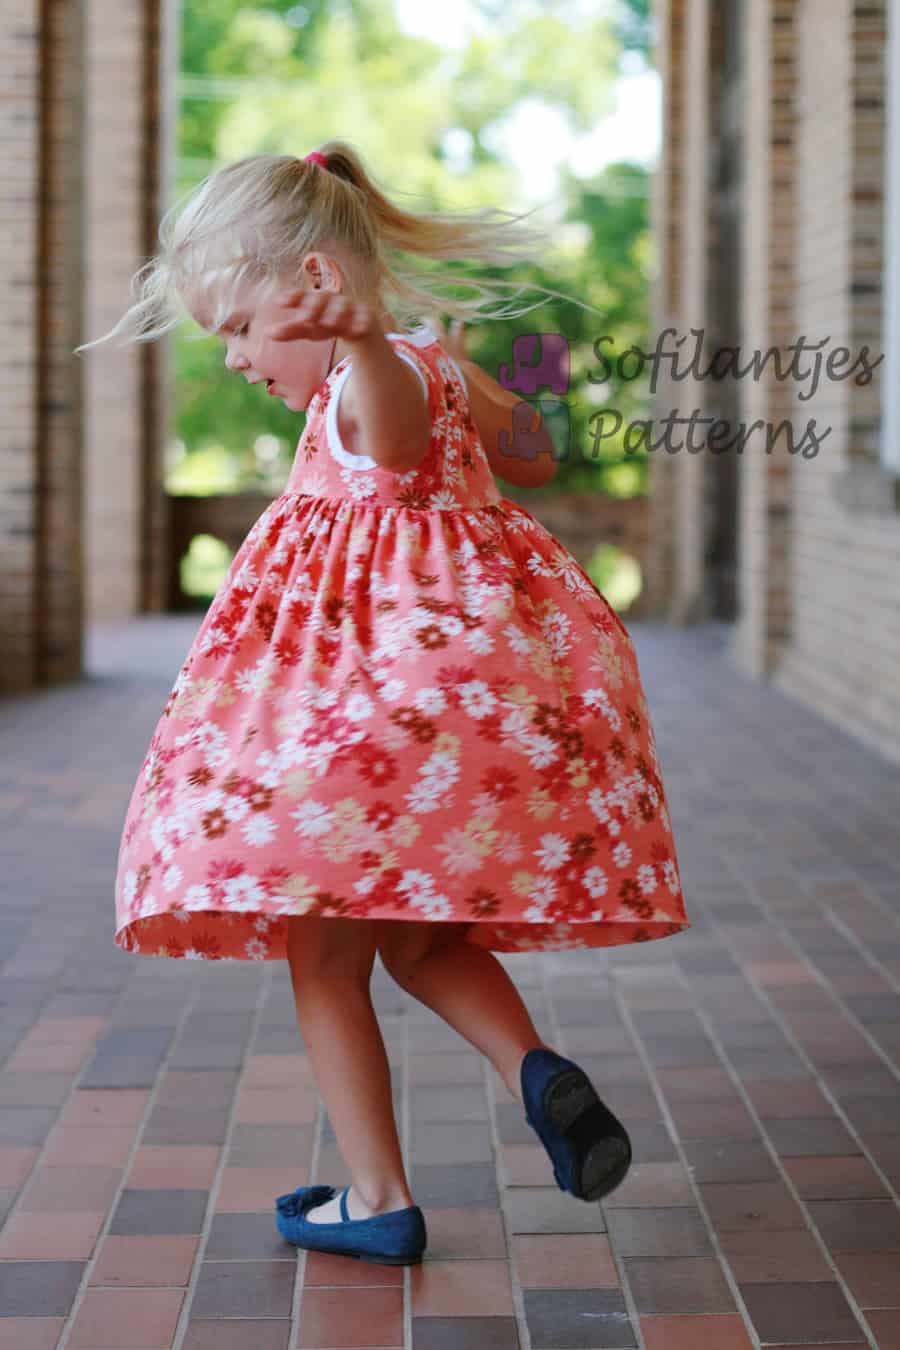
I figured the length of my skirt piece to be 19” because I wanted it to fall just below my daughters’ knee so that she had room to grow with the dress. And to make things easy, I just used the full width of my fabric which is 54” and cut one piece for the skirt portion. Do take into consideration the seam allowance you will need to sew the skirt to the bodice and any hem you will have when determining the length of the skirt you will cut. So now that I had my piece of skirt fabric measuring 54”x 19” cut out, all I need to do is sew the 19” sides right sides together to make a big tube. Figure out which side is the top of your skirt and sew 2 rows of basting stitches, one at ¼ “ from the top and then 3/8” down from the first row. Gather the fabric until it is the same measurement as your bodice piece. Place your bodice piece inside your skirt, right sides together, and sew your bodice to the skirt between your two rows of basting stitches. Doing this will make nice and even gathers. You can finish with your serger and then hem however you wish, but since this is knit, I typically leave it unhemmed since it won’t fray.

Bepaal vervolgens de lengte van het rokdeel. Gebruik daarvoor een meetlint en meet vanaf 7 cm. onder de oksel naar waar je de zoom van de rok wilt (ergens rond de knie). Voeg vervolgens naadwaarde toe (1 centimeter aan de bovenkant en twee centimeter voor de zoom). Ikzelf gebruikte de hele stofbreedte, 160 centimeter en knipte een rok aan 1 stuk (rechthoek). Sluit de zijnaad (of zijnaden als je de rok in twee delen knipt). Naai twee rijgdraden in de bovenkant van de rok, eentje op 4 mm en eentje op 10 mm. Rimpel vervolgens, door aan de draden te trekken, zodat de rok dezelfde breedte heeft als het bovenstukje. Plaats het bovenstukje in de rok, met de goede kanten op elkaar. Naai de rok aan het lijfje met een stiklijn tussen de rijgdraden. Werk eventueel de onderzoom af, dit is echter geen vereiste omdat tricot niet rafelt. Als je geen zoom maakt, hoef je dus ook geen zoom-naad-waarde toe te voegen in de eerdere stap.

Hope you enjoy this easy hack of the ADV Tee. I know my daughter will be spending many days this summer in this comfortable knit dress, thanks Sofilantjes for great patterns that can be used in so many ways!

IMG_8889(1) IMG_8905(1) IMG_8894(1) IMG_8921(1) IMG_8933(1) IMG_8950(1)

Guestpost: How to turn the Litore straps

Straps: how to make them with a serger.

A little introduction before starting this guest blogpost: my name is Patricia and I’m one of the admins on the Sofilantjes Sew & Show Facebook group.
When making the Litore Tunic/ Dress you are making thin straps. This can be challenging when you have never done this or maybe even when you have made straps before but had a hard time turning them.
You could choose to just sew the sides and then take a turning tool to do it, but you can also use a long thread from your serger to turn them. This technique is the one I will be showing you in this blogpost.

Here are the steps you need to follow when making thin straps:

1. Make a long thread with your serger, preferably just a bit longer then the length of your strap.

2. Position the long thread in the middle of your fabric piece; on the right side of the fabric.

3. Fold your fabric in half; right sides together. Make sure your serger thread is positioned all the way in the fold, so it doens’t get caught when you’re serging/ closing the strap.

4. Start serging/ closing your strap and make sure the thread doesn’t get caught by pulling the thread on the bottom of your strap every now and then.

5. Now pull the serger thread on the bottom of the strap. You might need to help the top by folding it in the top where your fabric starts going into the tube. You will also have to help the fabric a little bit to slide through the tube while you’re pulling the serger thread.
For the Litore Tunic/ Dress you’re recommended to add clear elastic to your straps when your fabric has more than 30% stretch.
To give you some extra visual support, I’m adding a few pictures on how I did this.
1. Serge your straps following the steps above. I only used a 0,6cm seam allowance
2. Sew the clear elastic along the seam allowance. I used a 3-point-zigzag on my regular sewing machine to attach it.
3. Now sew on the 1cm seam allowance with a stretch stitch

4. Turn the strap like shown above; I needed to help the beginning a bit more explicit, because with the clear elastic I used (0,9cm wide) it was a bit harder to turn

5. Give the straps a good press. Check the length of your finished straps. Cut them to the correct length.

Now your straps are ready for the next step: attaching them to the dress!

Tutorial: home made elastic piping

I promised to write this blog post a long time a go, when I made my Jeans colored Nivalis dress with red elastic piping. But time flies when you are having fun…..

Now, there are a lot of ways to sew piping and if you google I am sure you will find a lot of ways to do it. But everyone has their own way of doing things so here’s mine.
For my Kings Day Solis dress, that I have sewn with a sponsored fabric from Imaginegnats (that was originally meant for Kids clothes Week), I made golden elastic piping. At the Stoffenspektakel (a Dutch fabric market) I bought a golden crown to iron on. Both the golden crown and the golden piping fit the fabric perfectly. The fabric is really soft and the quality is great.

For my Solis dress I did not use knit fabric for the piping, like I did last time, but I bought pre-made elastic (sparkly) biastape. You can cut a strip of knit fabric if you want to (use 2 x the seam allowance plus about 3/8 – 1cm depending the width of your elastic cord). I bought elastic cord in a skin color, I did not ask the width to be honest but you can see the cords and look at the width you want to use. The wider the cord the more it will pop out. The color really doesn’t matter als long as you can’t see it through your fabric.

2

Ok here it goes (finally).

Step 1:
Place your elastic cord on top of the wrong side of your strip of knit fabric or elastic biastape. Fold the fabric/biastape over the elastic cord and pin. Make sure you are not stretching either of them.

35

Step 2:
Choose the right presser foot for your sewing machine. Most will recommend using a blind zipper foot if you do not own a piping foot. On my machine though, using the blind zipper foot for this step did not work because the biastape wasn’t wide enough to be grabbed by my feed dogs. I had to move over my needle so the blind zipper foot (having only a small hole in the middle) wasn’t an option. My blind hem foot came to the rescue.
Sew the fabric/biastape close to the cord using a very narrow zig zag stitch. I am recommending a zig zag stitch, because I used the elastic biastape at a place of the dress that needed to still be able to stretch.

86

Step 3:
Pin and sew your self-made elastic piping to your fabric using a zig zag stitch or other stretch stitch that you prefer. Take in account the seam allowance. For me this meant I needed to shift the golden biastape a little off from the fabric edge to make sure my piping would peek out just at the seam allowance.

7

Step 4:
Make sure there is no cord at the beginning and end of your elastic piping to prevent bulk at the seam allowance. If you look at the previous picture, you will see the piping starts at the shoulder seam. I use a seam allowance of 3/8″ – 1cm. The first 3/8″ – 1cm has no elastic cord.

Step 5:
Place the lining fabric on top of the main fabric just like your normally would. Sew the layers together, but make sure your fabric with the piping sewn on is on top. Sew right on top of your piping stitching line.

410

Step 6:
Follow the pattern instructions and enjoy the result.

Hopefully, this was clear to you. If you used this tutorial I’d love to see the result. Also google a little, there are many more tutorials out there to teach you new things.

SALE

REGISTER FOR OUR NEWSLETTER

OR FOLLOW US