Ook al ben ik uit de rompers, ik vind ze ontzettend leuk om te maken en als (kraam-)cadeautje te geven. In deze gastblog beschrijf ik een andere manier van het aanzetten van de biaisband bij rompers.
Even though I don’t have kids that wear onesies anymore, I love making them as gifts.
In this guest post I show another way to attach the binding to the bottom of the onesies.
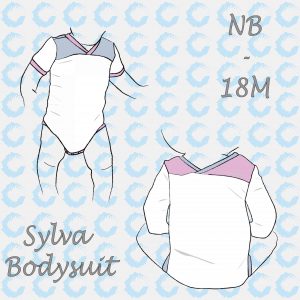
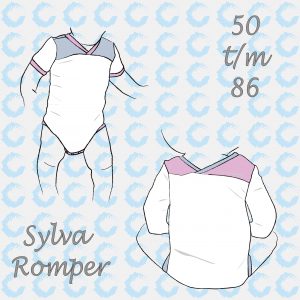
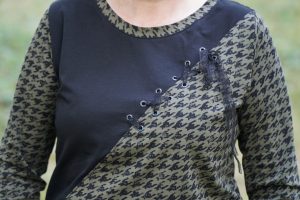
In de beschrijving van zowel de ADV als de Sylva romper wordt beschreven hoe je de biaisband aan de onderzijde vastzet wanneer het lijfje aan één zijde gesloten is. Na het aanzetten van het biaisband sluit je dan het lijf waarna je de zijnaad naar achteren vast zet. Ik vind het mooier wanneer de onderzijde allemaal uit 1 stuk lijkt te zijn, daarom zet ik de biaisband op een andere manier aan.
Hieronder een tutorial over hoe ik de onderkant van de romper maak.
In the description of the ADV and Sylva Onesie, you can see how you attach the binding by leaving one side of the bodice open. After attaching the binding, you close the bodice and stitch the sideseam to the back. I like it better when the binding seems to be in one piece. That’s why I attach it in a different way. Here’s my tutorial.
Let wel: ik heb nooit naailes gehad, alles dat ik doe heb ik mezelf geleerd door te doen, filmpjes te kijken en door te vragen op onder andere de Sofilantjes Sew and Show groep op facebook. Mijn technieken zullen daarom vast niet altijd zijn zoals het hoort, maar voor mij werken ze.
Note: I never had sewing lessons. I am self-taught by just trying, watching videos and asking questions in groups like Sofilantjes Sew and Show on Facebook. Therefore my techniques will not be right all the time but they work for me.
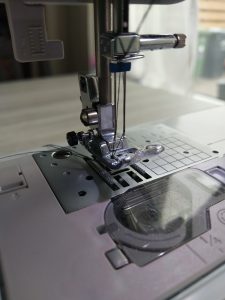
Ik begin met het locken van de bovenste delen: de schoudernaden en de boorden om de mouwen en het aan elkaar locken van voor- en achterpand van het lijfje. De delen die doorgestikt moeten worden, zoals de halsboorden bij de Sylva romper, stik ik alvast door. Dan hoef ik later al deze onderdelen slechts nog te bevestigen aan het lijf. Hierna ga ik beginnen met het aanzetten van de biaisband aan de onderzijde van de romper.
I start by sewing the top parts of the onesie: the shoulderseams, the sleeves and stitching what has to be stitched. I use an overlock for attaching the front- and back panel of the bodice to each other. After doing all of this, I start with the bottom binding.

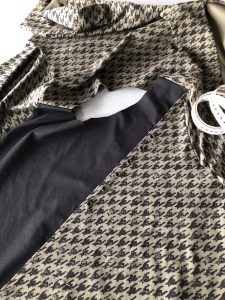
1. Biaisband sluiten
Nadat ik alle onderdelen voor de bovenkant van de romper gemaakt heb en het lijfje aan beide zijden heb gesloten, naai ik de biaisband voor de onderkant aan de korte zijden op elkaar. Hierbij houd ik 1 cm naadwaarde aan. Dit kan met de gewone machine of met de overlock. Met de overlock (wat ik vaak doe) krijg je wel iets meer verdikking op de zijnaad. After sewing all of the pieces for the top part and closing the bodice, I close the binding at the short sides. I keep 1 cm seam allowance. I often use my overlock, but it gives a bit thicker side seam.
2. Naadwaarde en plaats bepalen
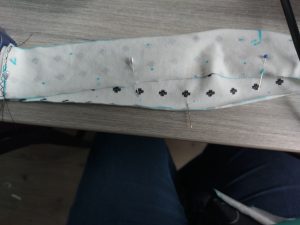
Op de lange zijden zet ik stipjes voor de centimeter naadwaarde. Op de markeringen voor de zijnaden en middenvoor en middenachter plaats ik een speld. I dot 1 cm on the long sides. I mark the side seams and back – and front center with a pin.
3. Plaats bepalen op romper
Ook op het lijfje plaats ik een speld op de zijnaden en middenvoor en middenachter. I place a pin on the side seams and back- and front center of the bodice.
4. Vastspelden
Ik leg de spelden op de biaisband en het lijfje met elkaar gelijk zodat ik daarna alles op 1cm kan gaan spelden en de band mooi verdeeld wordt. I line the pins of the binding and the bodice and divide the binding over the bodice using 1 cm seam allowance.
5. Stikken
Stik de biaisband op 1cm vast op het lijfje. Stitch at 1 cm.

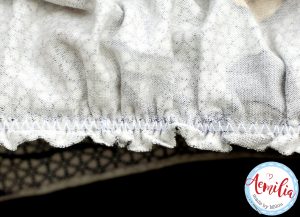
6. Optioneel: terugknippen
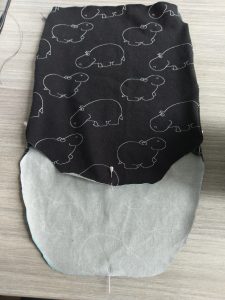
Persoonlijk vind ik het fijn om na het vaststikken de rand terug te knippen op ongeveer 0,6 cm Personally I like to cut back fabric to about 0.25 in. This step is optional.

7. Biaisband omslaan
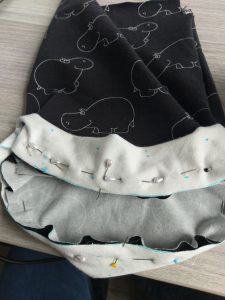
Sla de band om en naar binnen en speld weer vast. Veel spelden gebruiken en rustig naaien zijn belangrijk bij het aanzetten van biaisband. Of je de spelden nu horizontaal of verticaal wilt zetten, is persoonlijke voorkeur. Flip over the binding to the other side and fold it inwards. Use a lot of pins. I think it’s personal preference if you like your pins horizontal or vertical.
8. Wisselen van naald
Bij deze stap wissel ik naar tweelingnaald of ik kies een siersteek. Switch to a twin needle or decorative stitch.

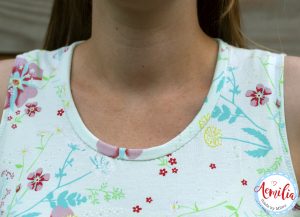
9. Doorstikken biaisband
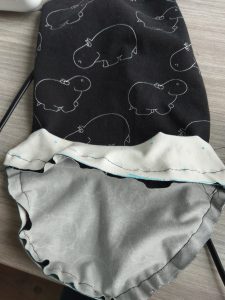
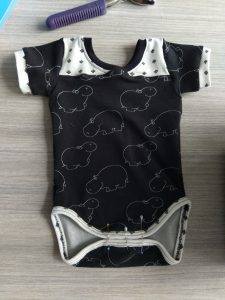
Met tweelingnaald of siersteek stik ik de biaisband door. De onderkant van de romper is nu, op de knopen na, klaar. Stitch the binding using twin needle or decorative stitch. Now the bottom of your onesie is finished except for buttons.
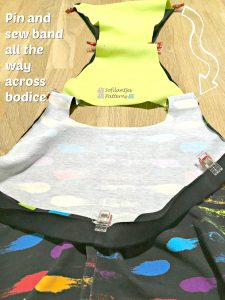
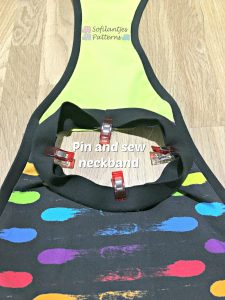
10. Bovenste delen bevestigen
Voordat ik met het lijfje begon heb ik de schoudernaden al genaaid en de mouwen in elkaar gezet. Samen vormen zij het bovenste deel. Bevestig de bovenste delen aan het lijfje en steek spelden op de plekken waar de knoopjes moeten komen. Before I started with the bodice, I already sewed the shoulder seams and made the sleeves. Together, they make the top of the onesie. Attach the top pieces to the bodice and pin the spots for the buttons.

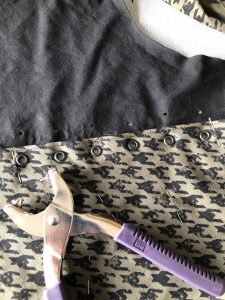
11. Knoopjes bevestigen
Bevestig de knoopjes aan de onderzijde van de romper. Ik gebruik hier babydrukknopen 8mm van Prym voor en bevestig deze met de variotang. Attach the buttons to the bottom of your onesie.
Bij deze mijn uitleg over het aanzetten van biaisband aan de onderzijde van een romper.
Heel veel succes bij het maken van deze fantastische patroontjes!
This was my tutorial about attaching binding to the bottom part of the onesie.
Good luck making these fantastic patterns!
Groetjes,
Tanja Vinke-Smeenge


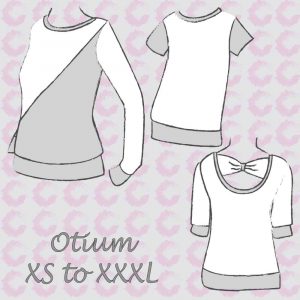 Otium Sweater Adult – English$11.98 excl. tax
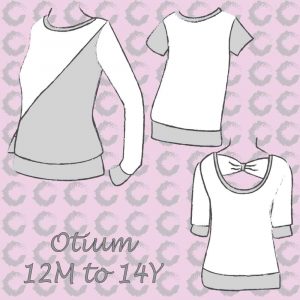 Otium Sweater – English$8.68 excl. tax
 Otium Volwassen en Kind Bundel – NederlandsOriginal price was: $19.42.$15.30Current price is: $15.30. excl. tax