Cicero Turned into a Sweater
You probably all know the Cicero Jacket! Such a fun jacket, suitable for all kinds of weather days, and I even see it hacked into a softshell jacket every now and then. But, with just a little alteration, you can also turn this pattern into a cool color-blocked sweater! Today I’d like to show you how!
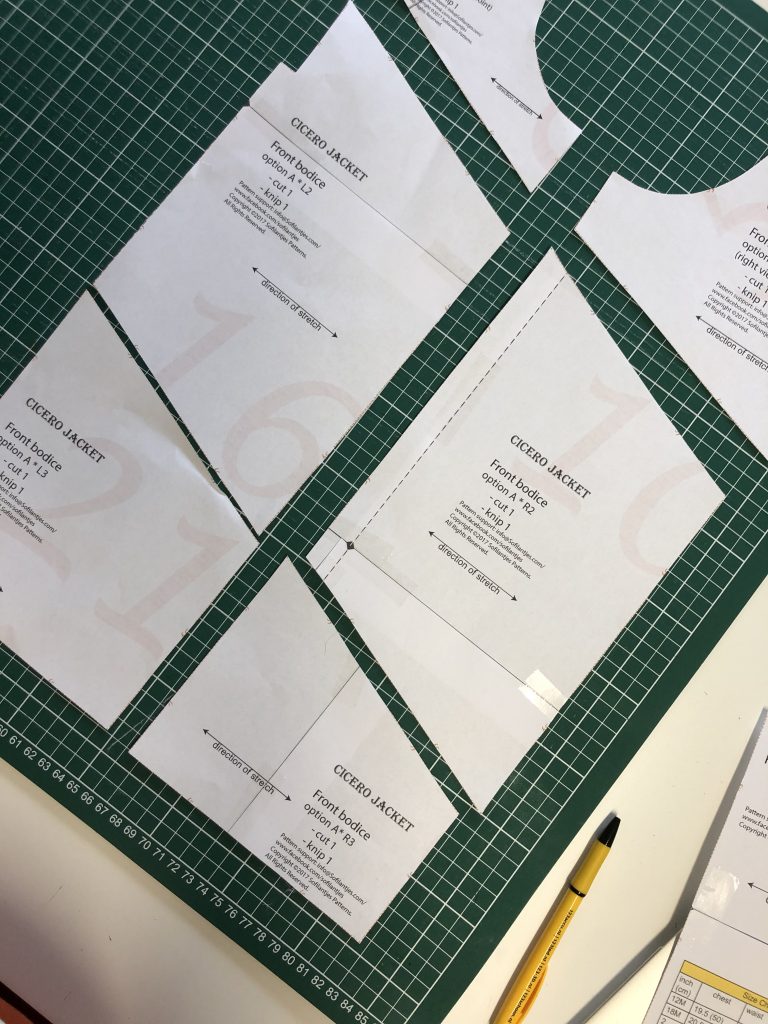
To make this alteration, you need the front bodice pieces for option A. Print them & cut them out according to the size chart.
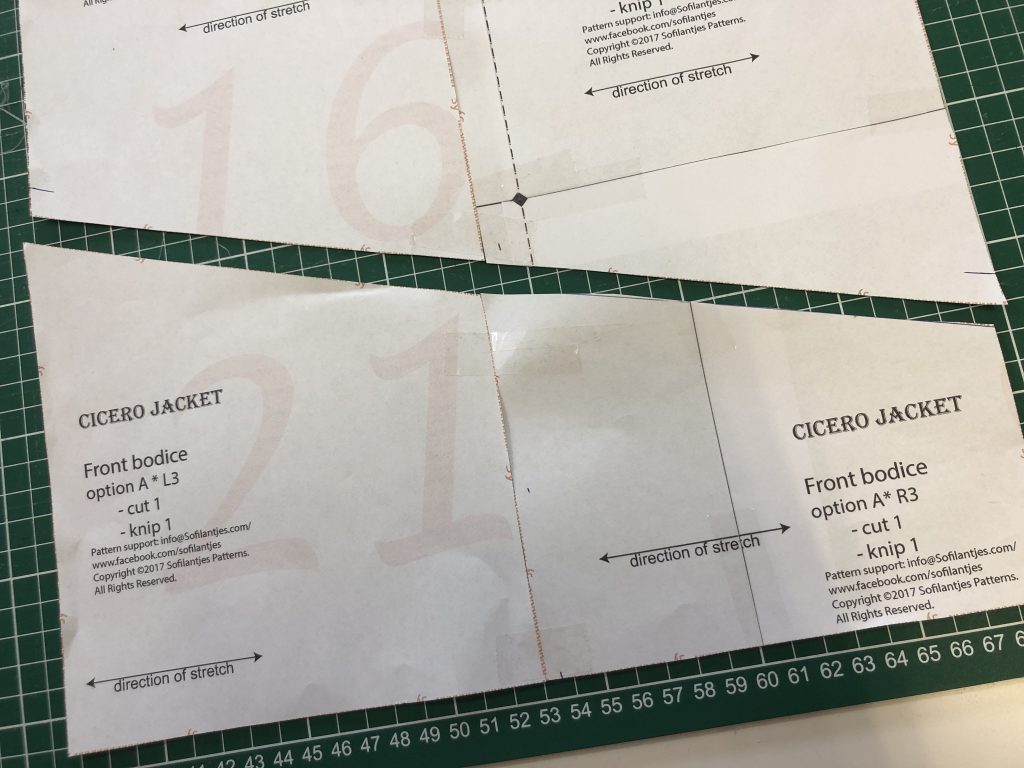
To make the jacket into a sweater, we need to combine the pattern pieces where the zipper was supposed to go, so in the middle front. We do this by taping L1 & R1 – L2 & R2 – L3 & R3 together in the middle. I laid the pieces side by side without any overlap and taped them together. Usually, you would sew a zipper in with 0,6 cm seam allowance so you would lose that in the width of the fabric pieces, but again the zipper would add +- 1 cm. So with leaving the zipper out, I figured it would be about the same to line up the pattern pieces instead of overlapping them to compensate for the seam allowance.
Make sure your bottom pieces (L3 & R3) line up nicely at the bottom. There will be some points sticking out at other lines. You can straighten them out by drawing a new line. Make sure, though, not to add or lose any length at the side seams when doing so.
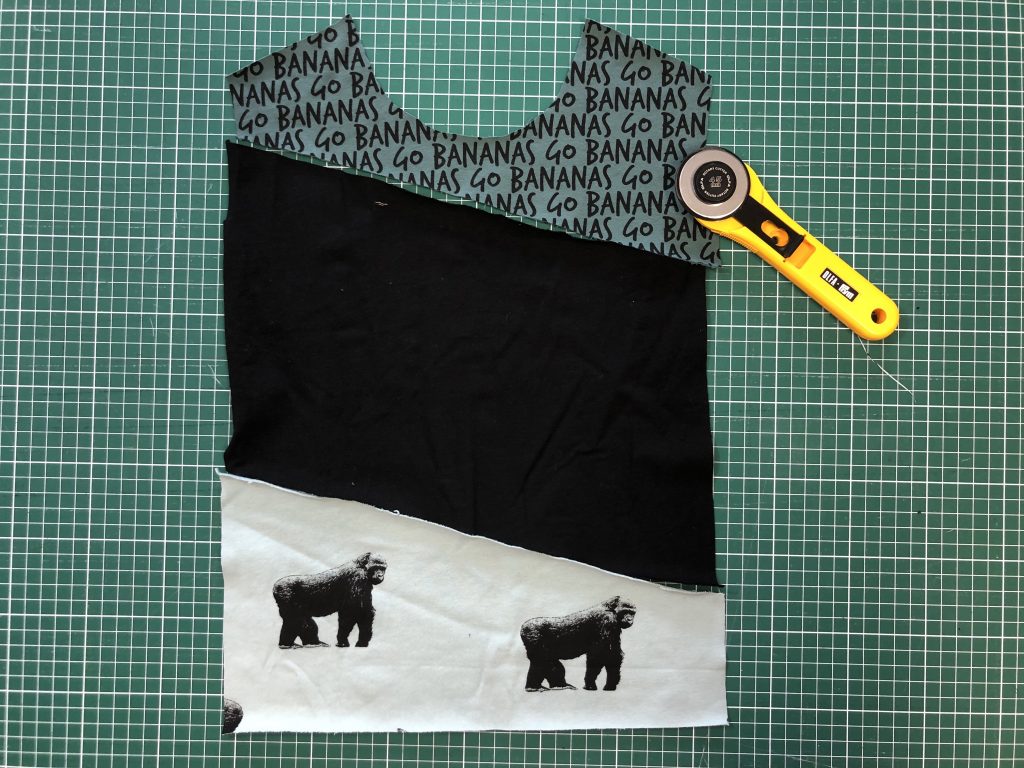
Now you’ve got three new front pieces. You can cut them out of your fabrics. It’s a perfect scrap buster!
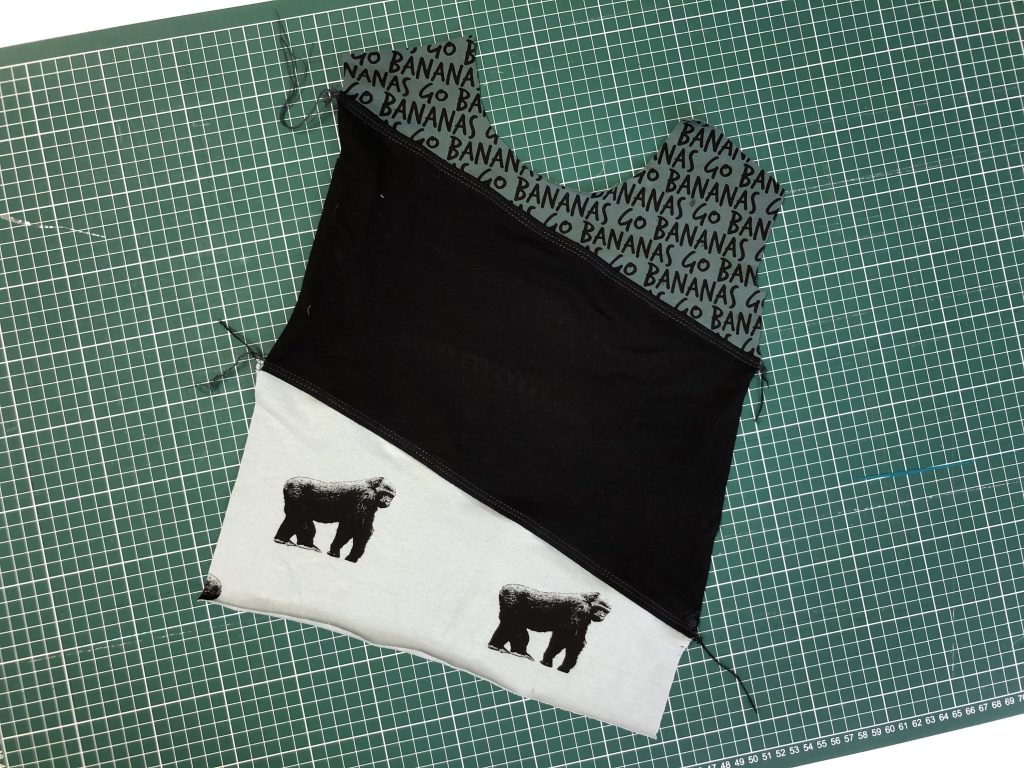
Next, we need to sew these three pieces up to make one front piece with them. First, lay your upper front piece and middle front piece right sides together and sew/serge them together using a 1cm seam allowance. Then do the same for your middle front piece and bottom front piece. Iron and topstitch the seams, and then your new front piece is complete!
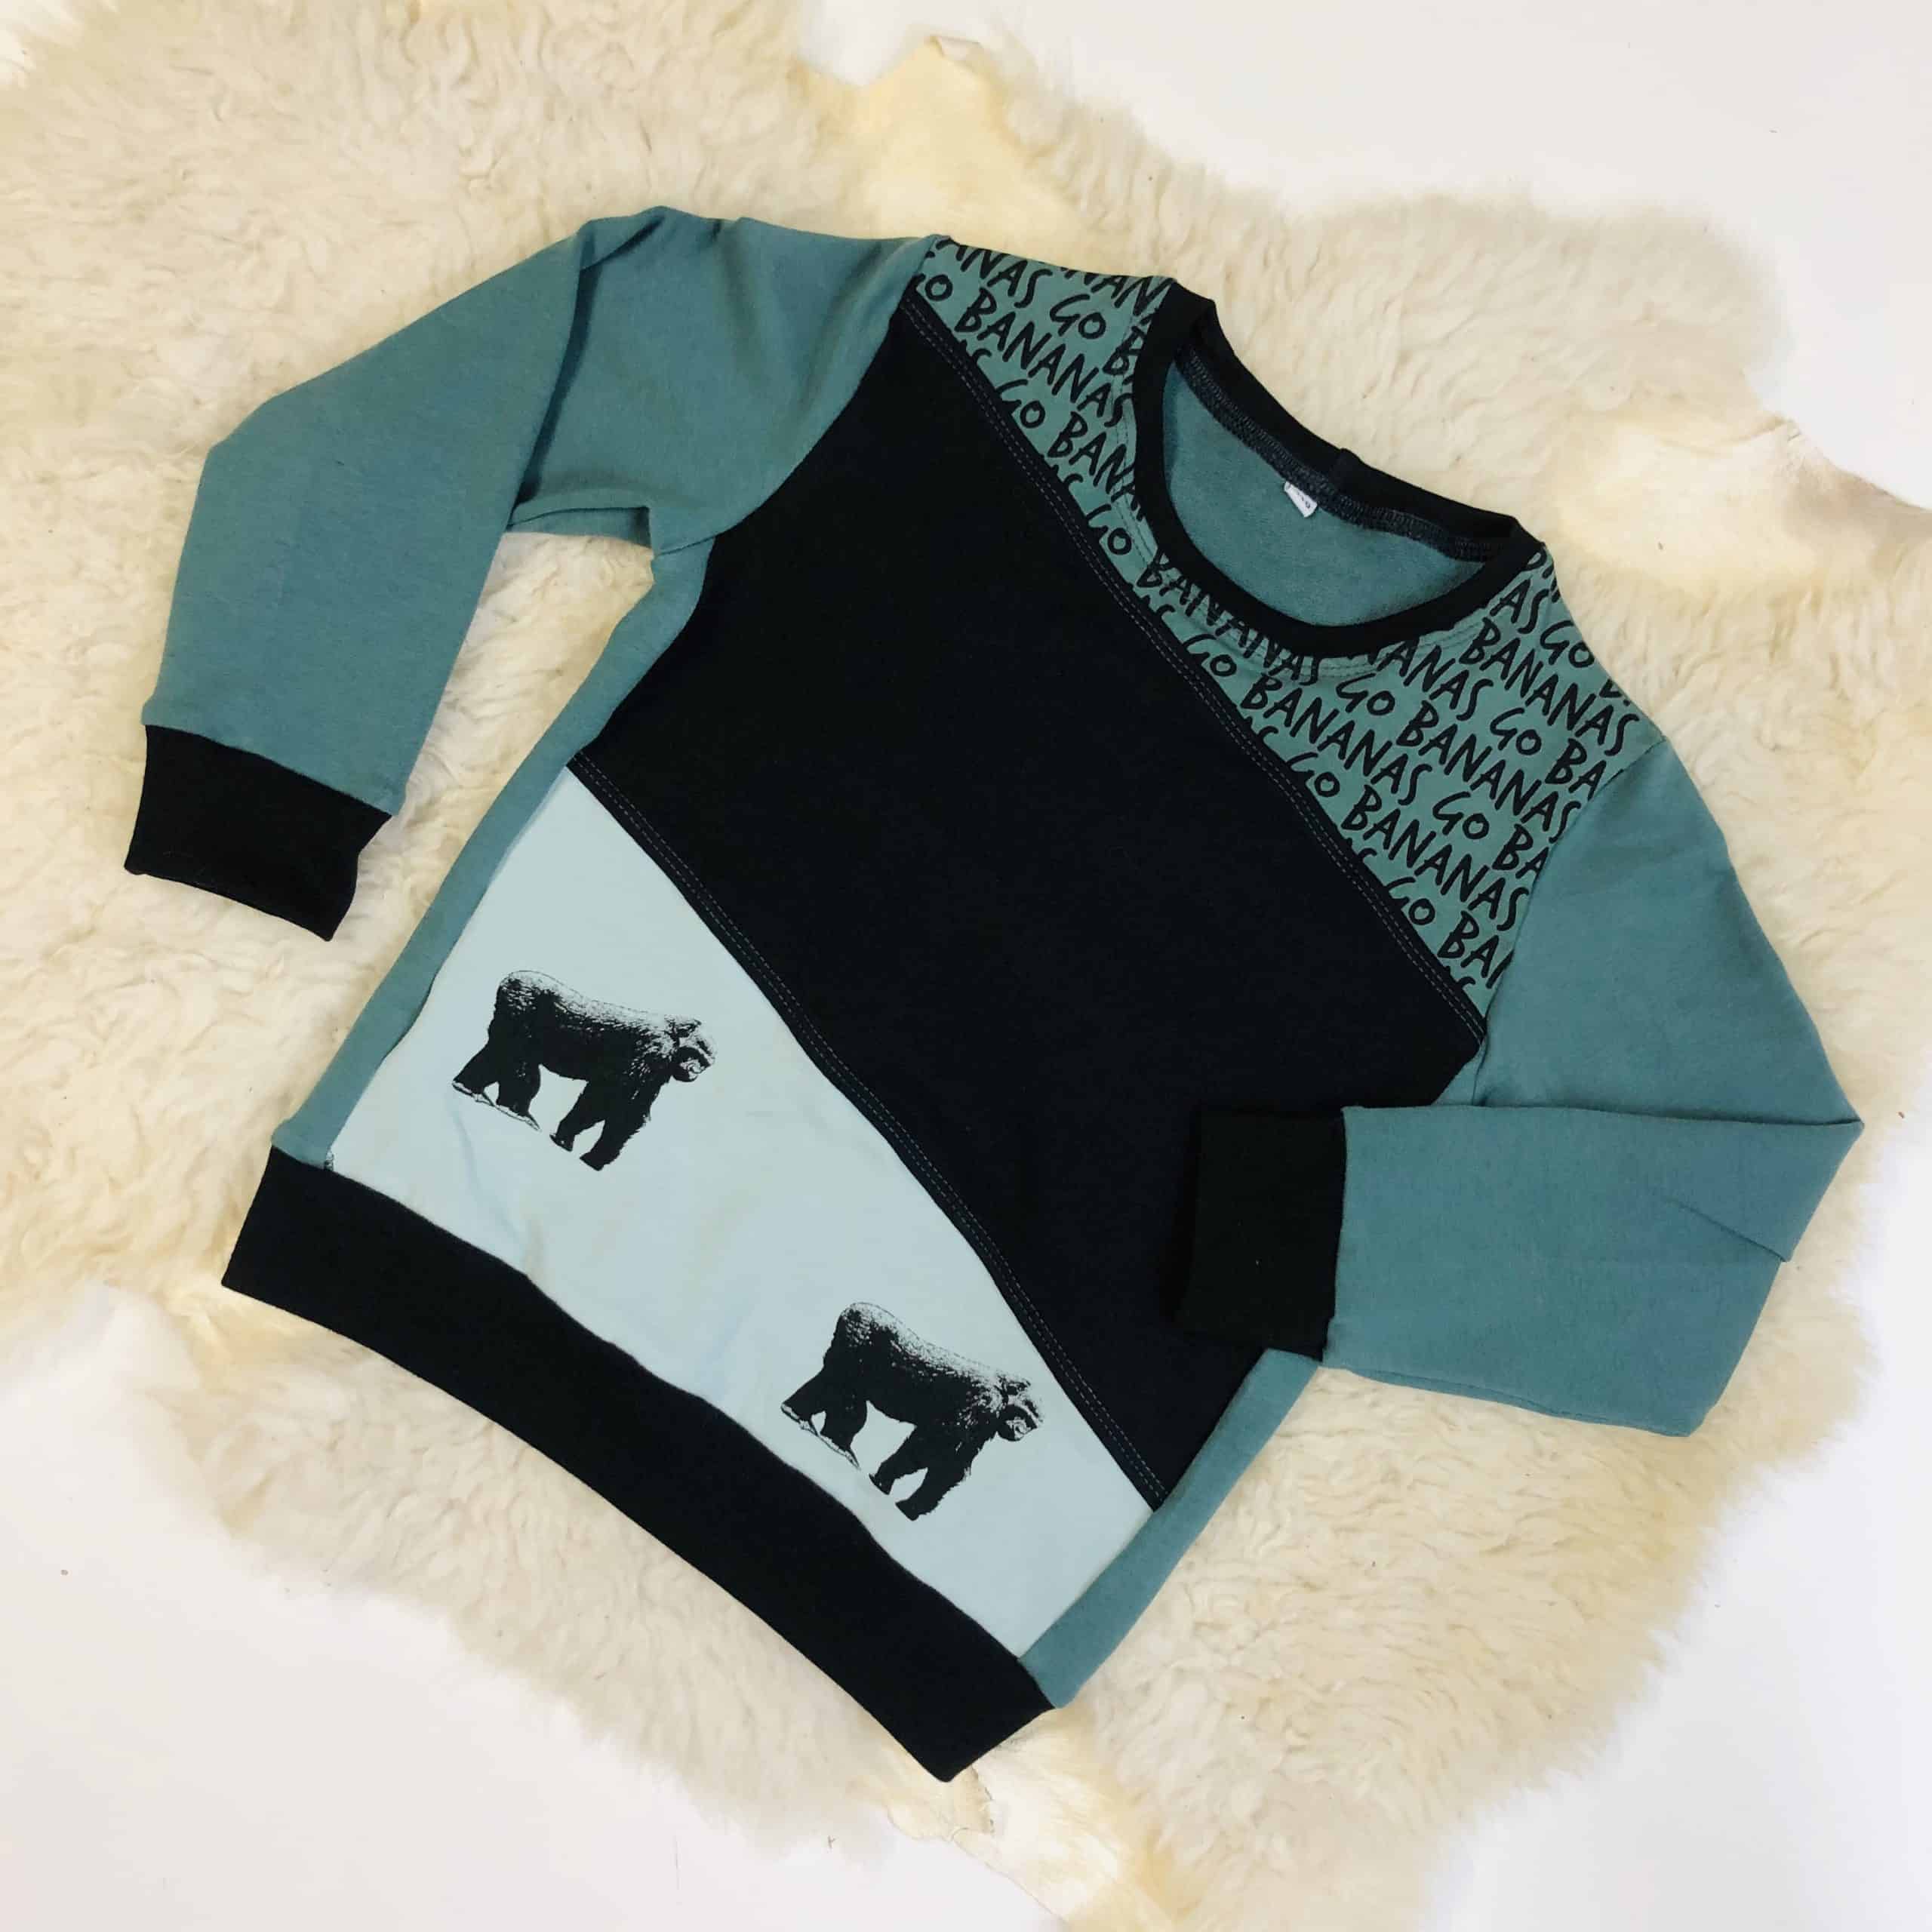
Now, let’s finish this sweater off! You can follow steps 1,2,3 and 4 from the instructions and then skip steps 5 to 12 (I’ve skipped the pockets as well). Then you follow step 13 in the instructions and skip step 14-17, which is for the B-version of the Cicero. Step 18, we need to do a little bit differently. Take your waistband and place it right sides together, and sew closed on the short side, creating a circle. Fold in half over the length of the waistband (wrong sides together) and divide it into four even pieces. Also, divide the bottom of your sweater into four even pieces. Lay your waistband right sides together with the bottom of your sweater, raw edges aligned. Line up on the 4 marked quarter points and sew the bottom and waistband together, evenly stretching the waistband as you go.
Now skip step 19 – 35 because we leave out the hood or collar and use a neckband instead. Measure the circumference of the head opening of your sweater. Take about 75% of this measurement (when using ribbing), and this length, you need to cut your neckband piece. For the height of the neckband, I took 4,5 cm. You can make this bigger or smaller according to your preferences. Sew the neckband to your sweater the same way as we did with the waistband. Now follow the instructions from step 36 until the end of the instructions to finish your sweater!


All there’s left to do is to show off your beautiful creation! I sized up one size and love the oversized look. My son is pretty happy with his new sweater too! Now you can make not only cool jackets but also cool sweaters with the same pattern! Don’t have the pattern yet? You can grab your copy.
Happy sewing!
Cindy
Blog: Miss Maakt
IG: @miss_maakt
-
 Cicero Jacket – Français$8.68 excl. tax
 -
 Cicero Jacket E-Book – Deutsche$7.85 excl. tax
 -
 Cicero Vest – Nederlands$8.68 excl. tax
 -
 Cicero Jacket – English$8.68 excl. tax
This site uses Akismet to reduce spam. Learn how your comment data is processed.
Buy more save more
(PDF patterns only)
- Spend €25* or more and save 10%.
Use code: SAVE10 - Spend €45* or more and save 20%.
Use code: SAVE20 - Spend €65* or more and save 30%.
Use code: SAVE30
(Sale items excluded)
* Excl. Taxes
Recent comments
- Anne on The Hibernis/Semper or Omni. what’s the difference?
- Anne on Tutorial: How to add a Tulle Skirt to the Regina
- Judy Blumert on Tutorial: How to add a Tulle Skirt to the Regina
- Heleen Dewitte on 25K Grand Giveaway!
- Nicole on 25K Grand Giveaway!
Archives
Thank you for visiting
Thank you for visiting our website. This website and all its content are copyright protected. Please ask permission before sharing any pictures or articles, especially when a child is shown in the image.






Leave a Reply