Long overdue, but finally the blogpost about the Nivalis cap sleeves.
It is one of the Frequently Asked Questions in our Facebook group.
Last year Nathalie posted a Dutch tutorial on her blog. Now it is time to have an English tutorial as well.
This will (finally) conclude the series on how to sew different parts of the Nivalis Dress. You can find parts 1, 2 and 3 through these links:
- This blogpost tells you how to hem the Nivalis girls pattern (that strange corner in the side seam)
- This blogpost explains how to sew the colorblock of the Nivalis pattern
- This blogpost talks about the collar of the girls Nivalis pattern
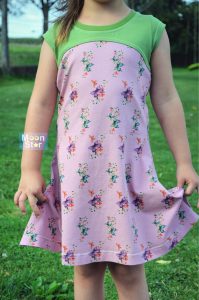
Cap sleeves are a barely there sleeve. They are shorter than short sleeves and are almost invisible from the underarm. The key to sewing a good cap sleeve is to start at the middle of the armscye. Match this with the middle of the cap sleeve and pin in each direction. This will ensure that your sleeve is evenly positioned.
Once you have sewn the cap sleeve to the bodice and place the front and back parts with the right side of the fabric facing you, you should have a similar image to this one. Note that this is the colorblocked version of the Nivalis.

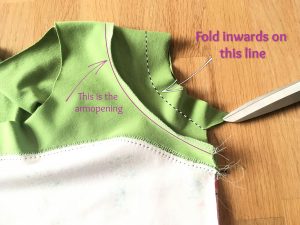
Now turn the dress inside out and this will be your view. I have marked the seam that was created by sewing the cap sleeve head to the armscye. I also marked where the fold line for the hem will be. You will fold it in a later step.
At this point you will sew the side seam. This includes the capsleeves. You need to sew the “little wing” as well. Sew with a seam allowance of 3/8” / 1 cm (seam allowance is included in the pattern).
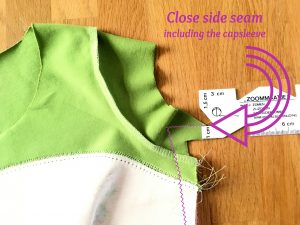
A small tip: cut back seam allowance and cut a notch in the V-shape in the capsleeve. Make sure you do not cut the seam! It will make it easier to fold the hem later on.

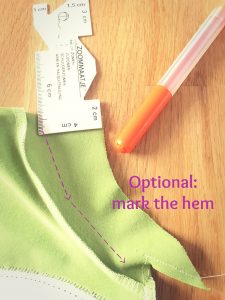
And now for the tricky part: folding and sewing the hem.
What always helps me, is marking to where I need to fold the hem. I use childrens markers, because it doesn’t fade while handling it during sewing and it washes out afterwards.
Now fold the hem inwards. This means: wrong side of the fabric to wrong side of the fabric, as shown in this picture. Fold the fabric up to the markings from the previous step. Pin in place. You can also iron it, so it will stay in place better when you start sewing.

Now sew the hem. I apologize for not having made a picture of this.
How I do this: I keep the dress inside out, like shown in the picture above. I then place the sleeve under my sewing machine. The presser foot is on the right side of the fabric, therefor you do not see where the raw edge of the hem is. You need to feel it with your fingers while guiding your fabric towards the presser foot. You need to catch the raw edge in the stitches you are making.
I sewed this dress with a twin needle. It is a bit of a drag to install the twin needle and sewing thread, but it’s so worth it when it’s finished. Oh please, will someone give me a coverlock for my birthday?!!!
While sewing the hem, you might need to stretch the fabric a tiny bit. Do not stretch it too much and please sew slowly to guide the fabric. This will give you the best result.
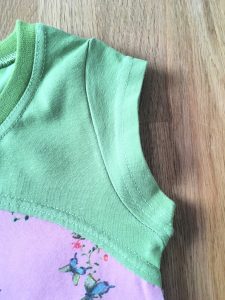
Now turn the dress with the right side of the fabric out and you should have a perfectly hemmed cap sleeve.
Repeat for the other side, finish the rest of the dress and come show your gorgeous creation in the Facebook group!
-
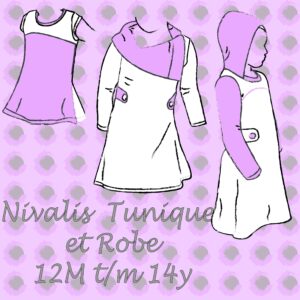 Nivalis Tunique et Robe – Français$8.68 excl. tax
 -
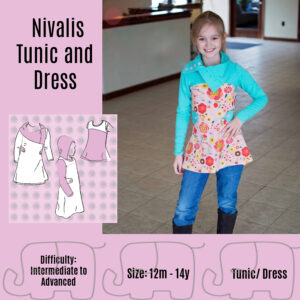 Nivalis Tunic and Dress – English$8.68 excl. tax
 -
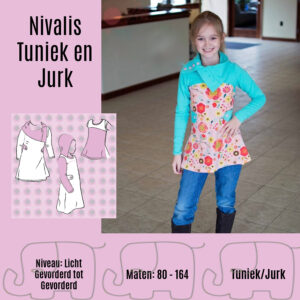 Nivalis Tuniek en Jurk – Nederlands$8.68 excl. tax
Buy more save more
(PDF patterns only)
- Spend €25* or more and save 10%.
Use code: SAVE10 - Spend €45* or more and save 20%.
Use code: SAVE20 - Spend €65* or more and save 30%.
Use code: SAVE30
(Sale items excluded)
* Excl. Taxes
Recent comments
Archives

Thank you for visiting
Thank you for visiting our website. This website and all its content are copyright protected. Please ask permission before sharing any pictures or articles, especially when a child is shown in the image.


Leave a Reply