Hi, it is Miranda from Inspinration and today I am showing how to recreate the two alternative Cicero looks that I sewed. The Cicero has two neckline options, a collar or a hood, but you can combine them as well. Anne pitched the idea to me back in January and I overcomplicated it a bit by not wanting the hood next to the zipper. I sewed this combi already back in January. I was planning to sew another because I was not a hundred percent happy with it, but piled up my sewing plate too high, and did not come around to it. I did sew another alternative Cicero, which I am also showing you today. I have a hard time staying interested in one plan for long, and in the mean time I have created 100 new ones. So, I have not figured out the optimal shape of the hacked hood, but better some guestimation for you than nothing right?
Vandaag laat ik (Miranda van Inspinration) zien hoe ik mijn twee alternative Cicero’s naaide. De Cicero heeft een kraag of een kap, maar je kan deze twee onderdelen ook combineren. Anne pitchte mij het idee in Januari en ik naaide toen een gehackte versie. Ik maakte het natuurlijk net iets gecompliceerder dan de twee dingen aan elkaar naaien, ik wilde namelijk niet het dik zou worden voor bij de rits waar kap en kraag samen zouden komen. Ik was echter niet helemaal tevreden en was van plan er nog een te naaien voor de tutorial. Maar toen kwamen er nog honderd nieuwe ideeën in mijn hoofd en een tweede gehackte kwam er niet van, wel nog een andere (veel kleinere) hack. Ik vrees dat van meer uitstel afstel komt en ook deze nog niet optimale versie zal hopelijk iemand op nieuwe ideeën brengen.

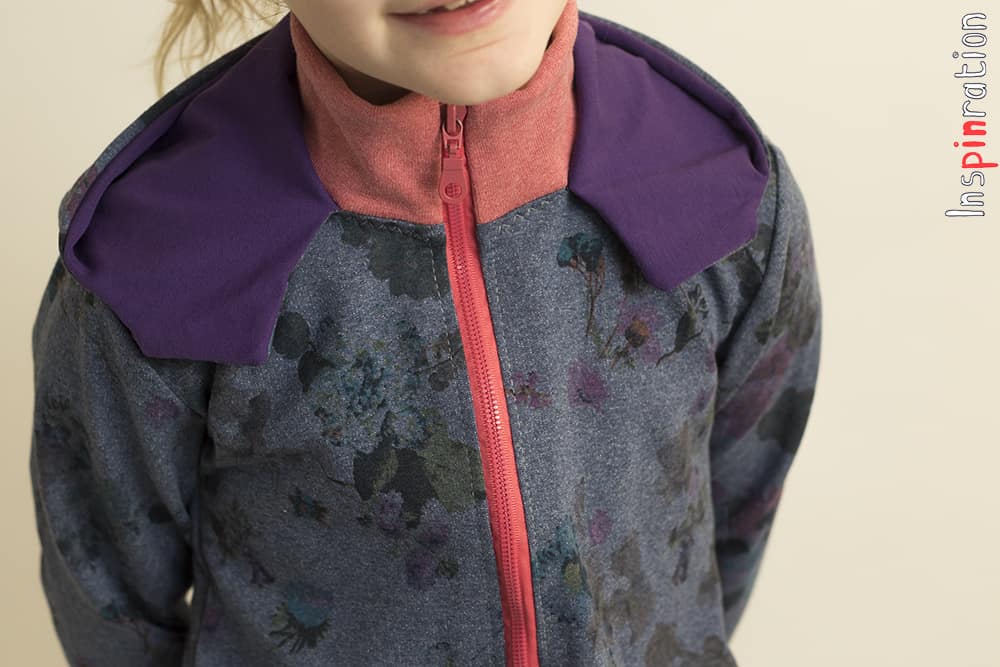
Inspired by a coat that I bought years ago, I wanted to have a front flap that could close with snaps on the hood. My first (and only) draft was a bit off, and the flap would not comfortably close, so I left of the buttons entirely. Now the flaps are just a decorative extra collar layer. For combining the hood and collar my way, you can either work with the original hood or redraft it a bit. I have no pictures of the final look with the original hood, but the slightly adjusted hood pictures should give you some idea of the final look with normal hood.
Mijn inspiratie voor dit vest komt door een jas die ik jaren geleden kocht. De kap sluit dan van voor met drukknopen en zit aan de voorkant dus niet helemaal vast. Mijn eerste (en meteen laatste) test versie had echter een te korte flap van voren, hierdoor overlapt het niet comfortabel. Ik voegde dus uiteindelijk geen drukknopen toe, nu is het gewoon een soort decoratieve extra kraag. De tutorial die ik schreef om kan en kraag te combineren kan je dus doen door de kap een beetje te hertekenen zoals ik deed, maar je kan ook de kap gewoon helemaal houden zoals hij is. Ik heb geen foto’s van een versie met reguliere kap, maar mijn foto’s zouden je zeker een goed idee moeten geven over hoe het eruit zou zien.
Tutorial 1: Hood and collar combi
Tutorial 1: Kap en kraag
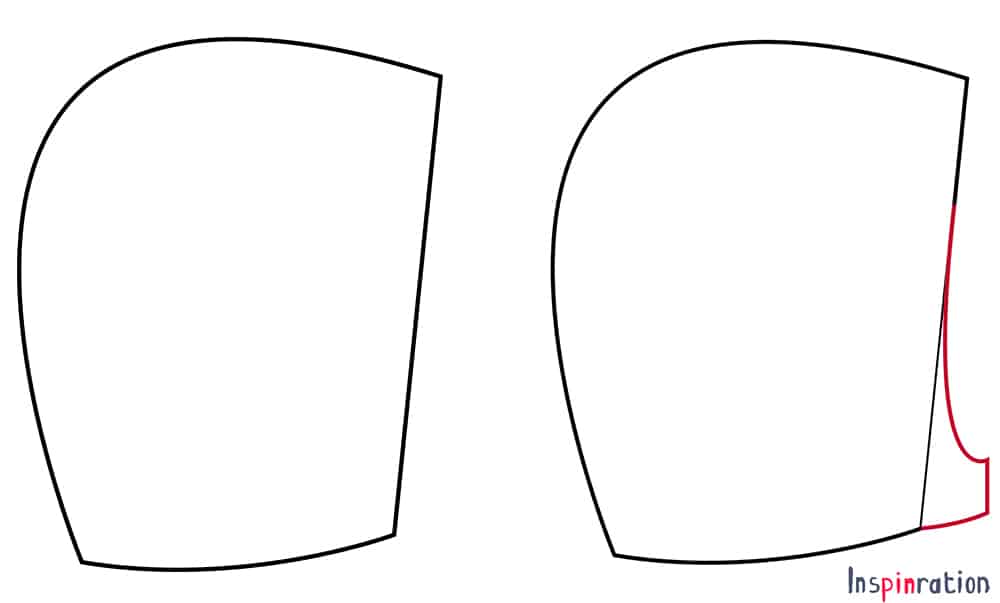
Step 1: Copy the original hood. In case you want a slight redraft, you create something similar to the picture. I extended the hood with about 3 centimeter and that turned out to be too little. Seeing you want a hood and a collar, you will also need to cut a collar piece (besides all the other regular pieces)
Stap 1: Start met de originele kraag en kap. Op mijn tekening kan je zien hoe ik de kap ongeveer hertekende. Ik voegde ongeveer 3 centimeter toe aan de voorkant, maar dat bleek dus niet genoeg. Naast een eventueel hertekende kap (zowel de voering als de buitendelen) heb je dus een kraag nodig en alle andere “normale” Cicero delen.
Step 2: Now follow all steps in the instructions and stop at step 18. Now first do step 22, 23 and 24, in those steps you sew the hood pieces together. You sew both the lining and the main hood and attach the two hoods on the front. If you redrafted your hood, you have to sew the entire red line as you can see in this graphic.
Stap 2: Doorloop de instructies van het patroon tot en met stap 18. Nu doe je eerst stap 22,23 en 24, in die stappen stel je de kap samen. je naait dus de voering en de buitenkant en je naait ze samen aan de voorkant. Als je de kap hertekende naai je dus langs de hele rode lijn van het plaatje aan de voorkant de voering en buitenstof aan elkaar vast.

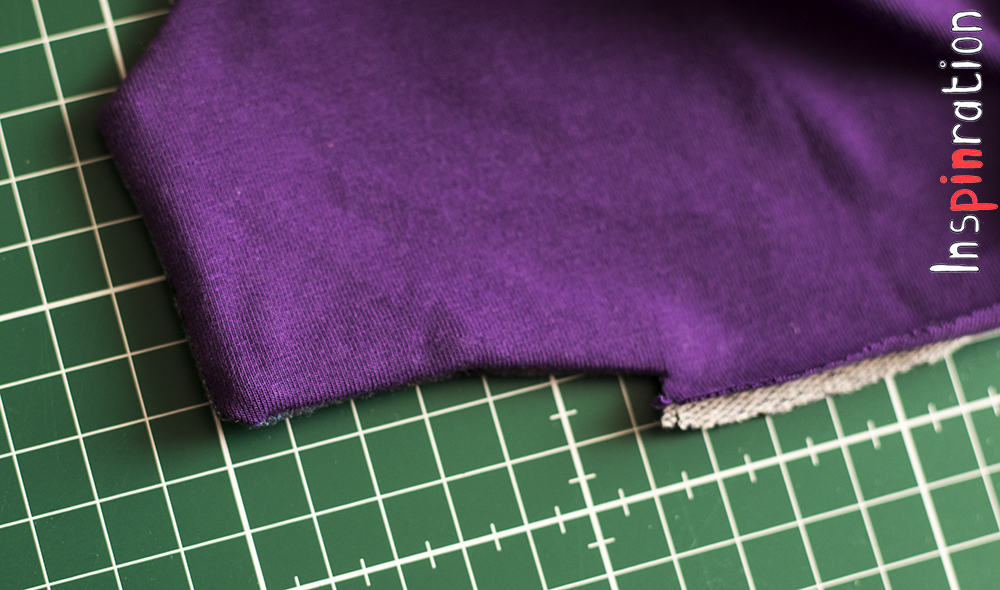
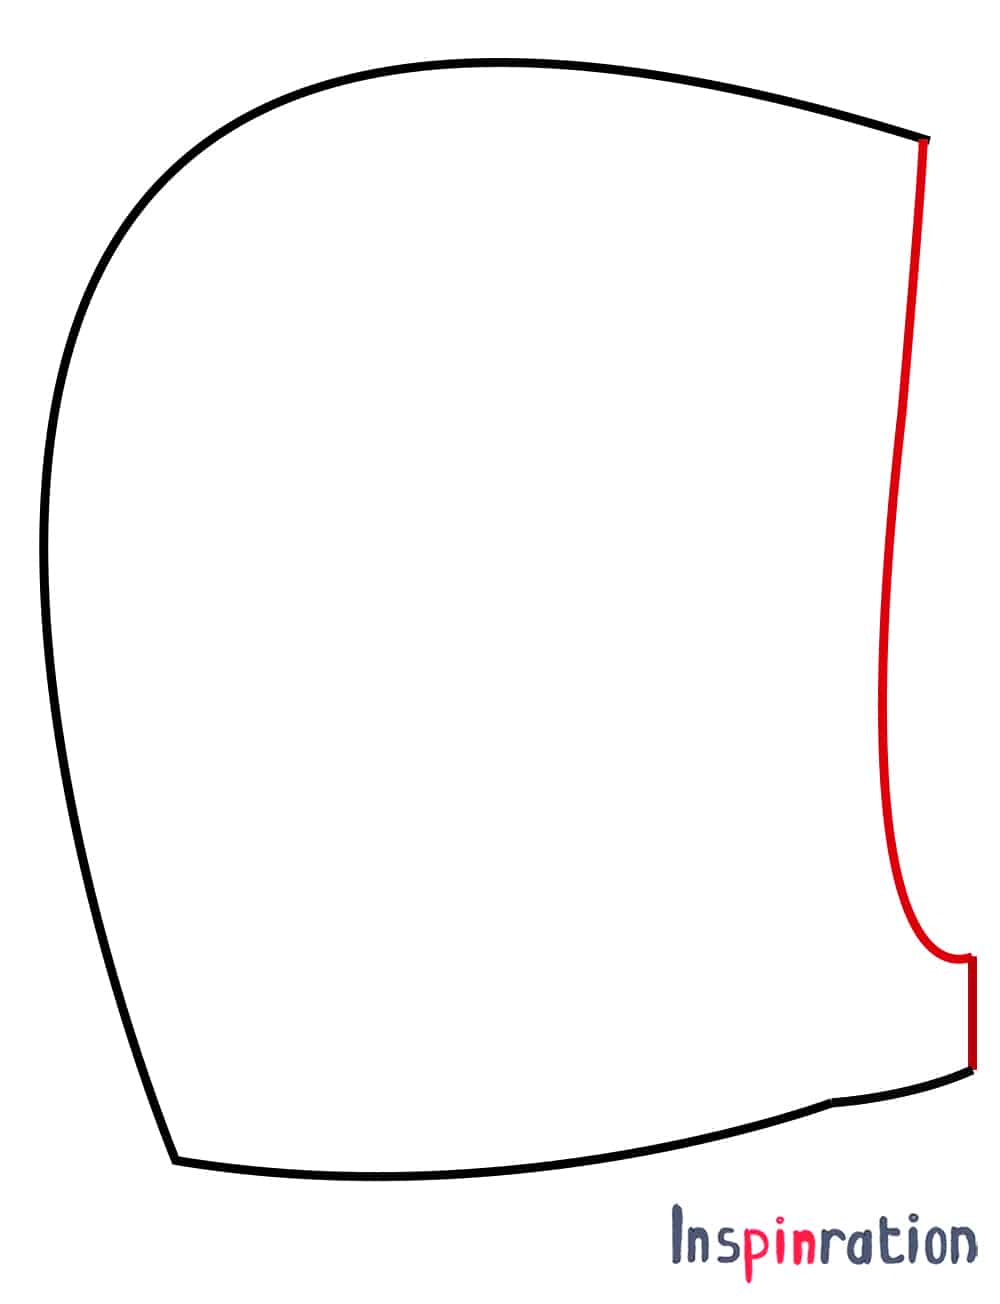
Step 3: Sew a small part of the bottom of the hood closed. I sewed about 3 centimeter beyond the original start of the hood. My drawing has a small bump (I lost the fight with my drawing software) where the original hood ended. Your draft should not have that, but this way you can see the stitching should extend a few centimeter beyond that point. Make one small cut where your stitching ends (my picture has two cuts, because I was experimenting until how far I had to sew, ignore the middle cut). Now turn the hood right side out.
Stap 3: Naai nu gedeeltelijk de onderkant van de kap dicht (terwijl de goede kanten nog op elkaar liggen). Ik naaide ongeveer 3 centimeter verder dan waar de originele kap begon. In mijn tekening zie je een kleine deuk in mijn tekening waar de originele kap eindigde (ik gaf het gevecht met mijn software op), jouw hertekende versie zou die knip niet moeten hebben. Maar door dat knikje die je dat je echt een stukje verder moet naaien dan het stuk dat je bijtekende. Knip vervolgens eenmalig in tot het stiksel an het einde van je stiklijn, in mijn foto zie je twee knipjes, maar dat is omdat ik nog aan het experimenteren was. Draai de kap met de goede kant naar buiten.
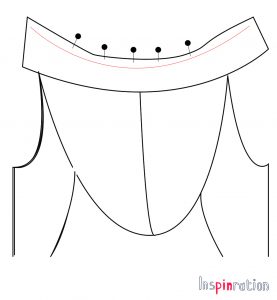

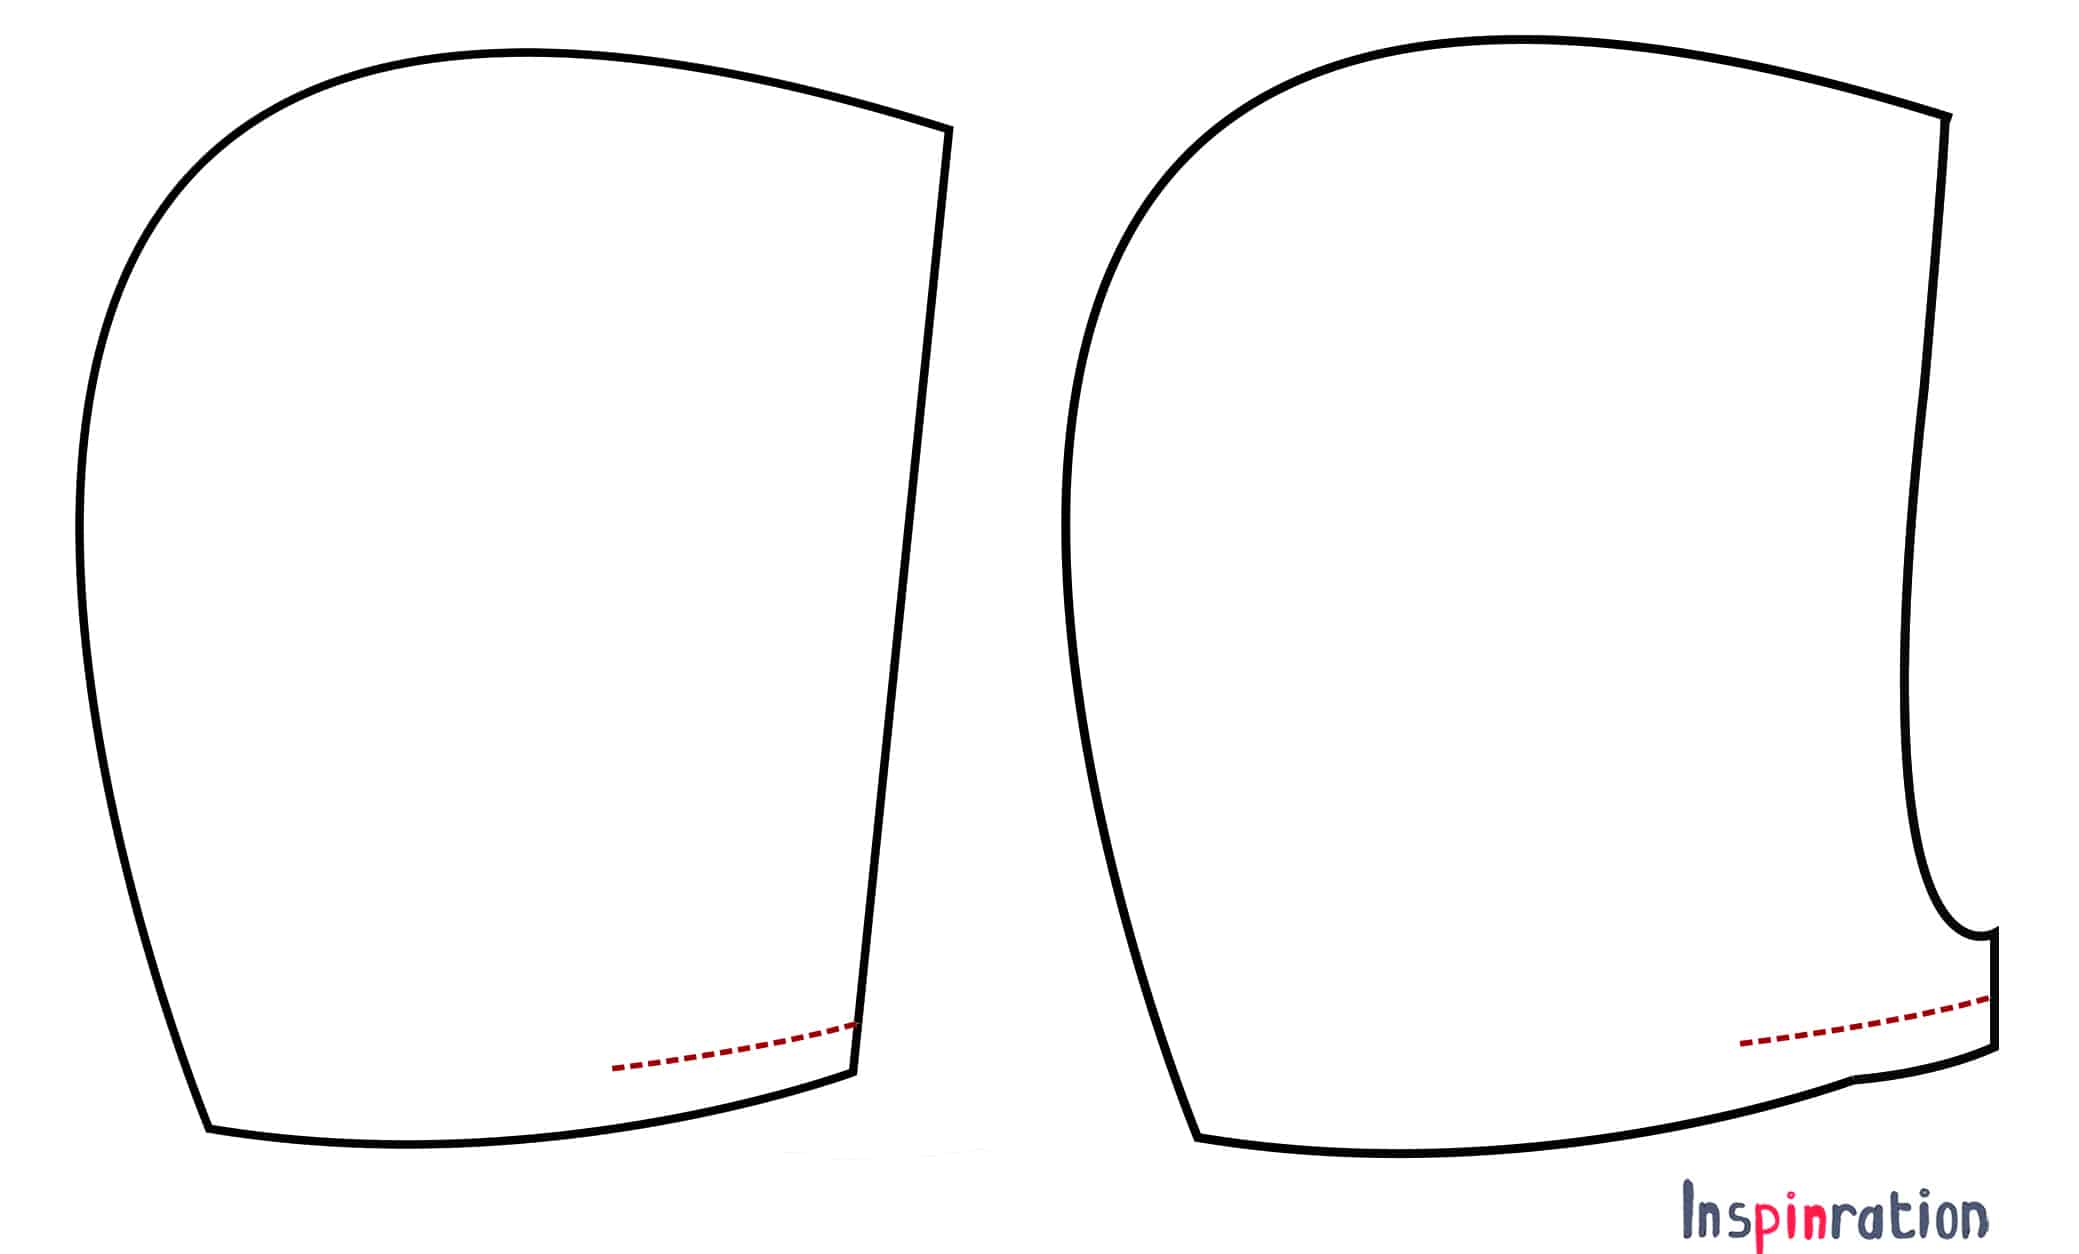
Step 4: You are going to combine step 30 and step 25 from the original instructions into one. First lay down the jacket on the table with the right side up. Put the hood on top of the jacket (lining side up), such that the middle of the hood is the middle on the back of the jacket. Place the unfolded collar on top with the lining side up. Now pin it all in place (in the actual picture I managed to put the entire package upside down, but the order inbetween the layers is the same). You hood will end a few centimeter before the end of the neckline, do not pin the hood to the neckline beyond the already sewn piece. Pull the already sewn edge of the hood out of the way a bit, such that you will not sew over it in the next step.
Stap 4: Nu ga je stap 25 en 30 van de instructies combineren. Leg eerst het vest op de tafel met de goede kant naar boven. Leg er de kap op met de voering naar boven, let erop dat het midden van de kap middenachter op het vest ligt. Vervolgens leg je de ongevouwen kraag erop met de verkeerde kant naar boven. Spelt nu alles vast (op de foto legde ik het pakketje blijkbaar precies onderste boven, de volgorde is dus hetzelfde, maar nu ligt het geheel andersom). De kap stopt nu eerder dan de kraag. Het reeds genaaide einde van de kap moet je dus niet vast spelden en juist een beetje uit de weg trekken.
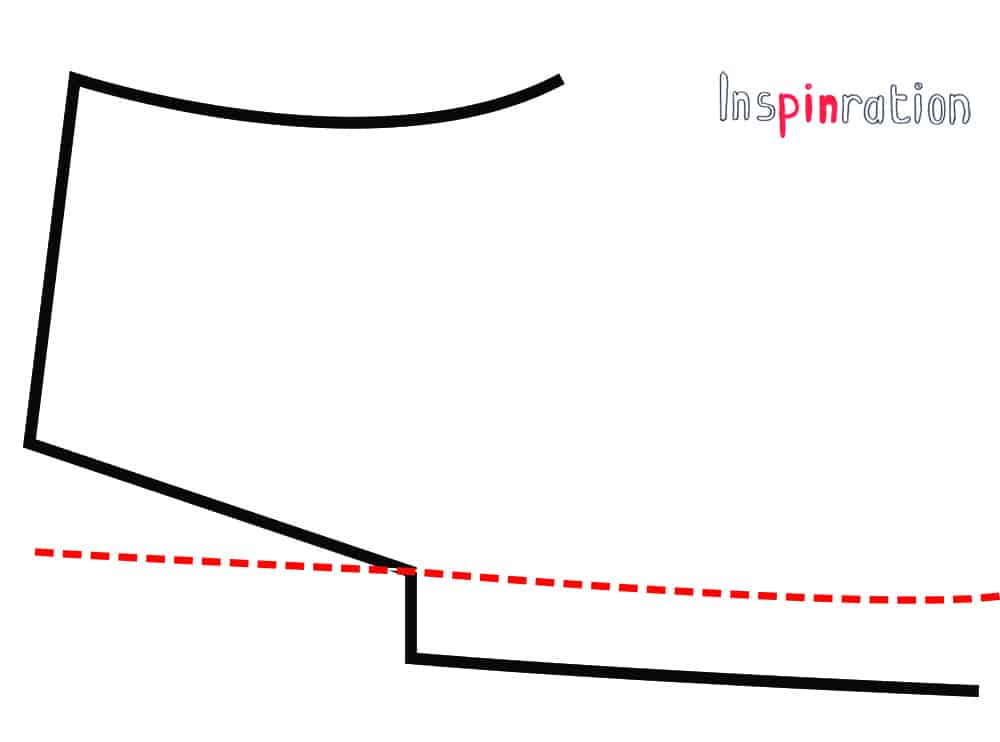
Step 5: Sew though all the layers and pay special attention to the place where the hood ends. You will have to sew the one centimeter seam allowance exactly. Make sure you do not sew over the part of the hood that already is hemmed but that you do “hit” the corner exactly. I added a graphic that I hope will help. While you are sewing you will not see the hood because the collar is on top, but the graphic shows how your should sew it. It is probably best to switch to a basting stitch (easy to remove) around that point. Just check if you sewed it alright and than sew it with the hard to remove stretch stitch.
Stap 5: Naai nu door alle lagen en let extra op waar de kap eindigt. Het is heel belangrijk dat je je precies aan de naadwaarde houd. Je moet dus niet nogmaals over die delen van de kap naaien die al afgewerkt zijn. Ik maakte een tekening hoe je naad de kap moet “raken”. Tijdens het naaien kan je de kap echter niet zien omdat de kraag erover heen ligt. Het is waarschijnlijk het beste om bij dit stukje een rijgsteek te gebruiken op je naaimachine, iets wat je makkelijk kan verwijderen. Als het dan zeker goed zit, dan naai je het vast met die bijna ongelijk te verwijderen stretch steek.

Step 6: Now continue with step 31 and beyond and show it in the Facebook group!
Stap 6: Nu kan je verder met stap 31 en verder en vergeet het eind stuk niet in de Facebook groep te laten zien!
Tutorial 2: Non zipped collar.
Tutorial 2: Kraag zonder rits

Sewing the collar without zipper is more like an alternative selection of the original instructions than an actual tutorial, but I hope it will inspire anyway.
Step 1: Cut all the “normal” pieces for a collared Cicero, you will need a zipper with the length for a hooded Cicero, this one is slightly shorter than the collar version (page 12 of the instructions)
Step 2: Follow the instructions and stop at step 21. Step 19-21 are instructions for sewing the hood version (you insert he zipper already), but you you need them for this particular version.
Step 3: Now sew step 30, attaching the collar. The zipper is already in place so be careful with those teeth and your needle.
Step 4: You already have the zipper, so skip step 31 and 32 and simply continue with step 33, folding down the sides of the collar and stitching them down. Now there is no zipper in between, but the steps you take are same.
Step 5: Follow the rest of the instructions in the normal order starting from 34.
Het naaien van een kraag zonder rits heb je geen volle tutorial voor nodig, het is meer een aangepaste instructie selectie dan een tutorial, maar misschien heeft iemand er toch iets aan.
Stap 1: Knip alle delen die je nodig hebt voor een Cicero, je hebt alleen een korte rits nodig. Op pagina 12 van de instructies kies je de rits voor de kap versie en niet die voor de kraag.
Stap 2: Volg de instructies tot en met stap 21. Normaal horen stap 19-21 bij de kap versie, maar voor deze kleine hack heb je ze nu nodig.
Stap 3: Naai nu stap 30, het vastzetten van de kraag. de rits zit er al in nu, dus ben extra voorzichtig bij het naaien over de rits (breek je naald niet)
Stap 4: Je naaide de rits er al in dus nu kan je stap 31 en 32 overslaan. Ga nu verder met stap 33 waarbij je de kraag vastzet aan de zijkant. Nu zit er geen rits tussen, maar de stappen zijn voor de rest hetzelfde.
Stap 5: Volg de rest van de instructies startend bij 34.
-
 Cicero Jacket – Français$8.68 excl. tax
 -
Cicero Jacket E-Book – Deutsche$7.85 excl. tax
-
 Cicero Vest – Nederlands$8.68 excl. tax
 -
Cicero Jacket – English$8.68 excl. tax
Buy more save more
(PDF patterns only)
- Spend €25* or more and save 10%.
Use code: SAVE10 - Spend €45* or more and save 20%.
Use code: SAVE20 - Spend €65* or more and save 30%.
Use code: SAVE30
(Sale items excluded)
* Excl. Taxes
Recent comments
Archives

Thank you for visiting
Thank you for visiting our website. This website and all its content are copyright protected. Please ask permission before sharing any pictures or articles, especially when a child is shown in the image.


Leave a Reply