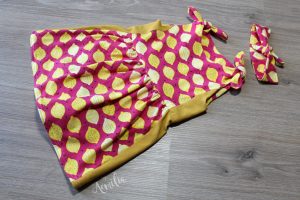
When I found this super cute lemon fabric I knew I had to have it for my little girl! After some browsing through Pinterest I saw some dresses with little bows on the shoulders; I wanted to recreate that look. So the next step was finding a pattern. I already knew about the Advena bodysuit, but wanted a dress, so lucky me, there was the Advena dress!

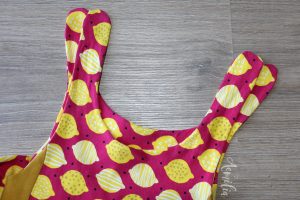
I wanted to combine the bodysuit with the dress so she doesn’t need to wear a normal bodysuit under the dress. And I didn’t wanted to use sleeves but create little bows on her shoulders. Also I like the color block on the side of the dress, so that had to stay as well. So then the drawing began.
I started with tracing the front and back bodice of the bodysuit pattern. I then put this pattern piece on top of the dress pattern and matched the shoulder seams and center line. I traced the new side seam and marked the dress line. I also used the armscye of the dress pattern, to make sure the side panel would fit. On the side panel I also marked the dress line, as I needed a seam in this panel as well.
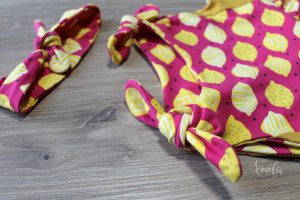
To create the little bows on the shoulders I extended the pattern from the shoulder seam and rounded off the edges. To be able to attach the skirt on the bodysuit, I cut all pattern pieces on the dress line I marked. Don’t forget to add seam allowance when you’re cutting!
Then I cut all of my pieces and first put together the top part of the dress. As I had extra seams I couldn’t use the written pattern. So I started with attaching the side pieces to the bodice pieces and then used that completed piece to create a lining. As I didn’t wanted to use bulky ribbing on those small bows, I opted to line the body. I sewed the main body and lining together, but not along the bottom.
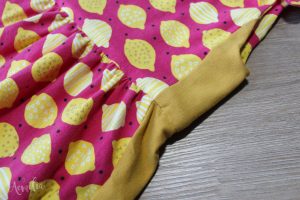
After finishing the top body I constructed the skirt. Before gathering the front and back piece I sewed the side panels on. Then I gathered the skirt (only the front and back piece) to the width of the body pieces. I attached the skirt (right sides together) to the body. I nested the seams to make sure the color block is straight.
At that point I sewed the side seams of my bodysuit bottom and attached the ribbing across the leg opening. Followed by sewing this bottom piece with the right side against the wrong side of the skirt piece.

To finish it off I hemmed the edge of the skirt with a twin needle and attached snap buttons to the bottom piece. I had to use four, instead of the recommended three, as there was a little bit of bulk in the center as I made a loop before attaching the ribbing. I handtacked the body lining over all of the seams, so no raw edges are visible inside the dress.
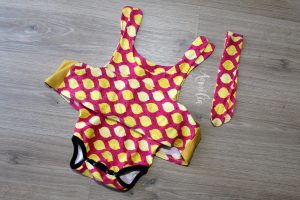
I made size 68, so my little one has to grow a little bit more to fit it correctly (she’s size 62 now), but doesn’t she look super cute and summery! My little señorita 😊

See you next time!
Milou
Want to see what else I sew? Check out my blog and Instagram:
Blog: https://aemilia-madebymilou.blogspot.com/
Instagram: @aemiliamadebymilou
-
 Advena Romper – Nederlands$6.20 excl. tax
 -
 Body/Cache-Couche Advena – Français$6.20 excl. tax
 -
 Advena Top and Dress (baby sizes) – English$6.20 excl. tax
 -
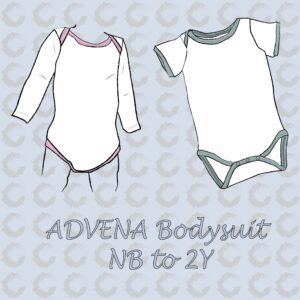 Advena Bodysuit – English$6.20 excl. tax
 -
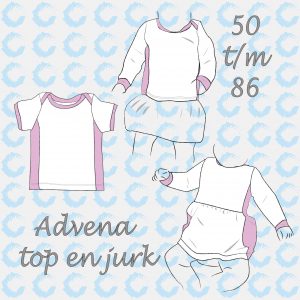 Advena Top en Jurk (baby) – Nederlands$6.20 excl. tax
 -
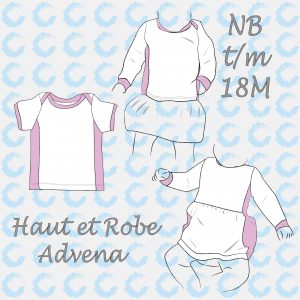 Haut et Robe Advena (baby) – French$6.20 excl. tax
Buy more save more
(PDF patterns only)
- Spend €25* or more and save 10%.
Use code: SAVE10 - Spend €45* or more and save 20%.
Use code: SAVE20 - Spend €65* or more and save 30%.
Use code: SAVE30
(Sale items excluded)
* Excl. Taxes
Recent comments
Archives

Thank you for visiting
Thank you for visiting our website. This website and all its content are copyright protected. Please ask permission before sharing any pictures or articles, especially when a child is shown in the image.


Leave a Reply