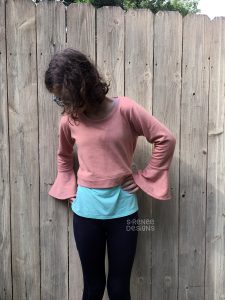
Foliis is such a great pattern on its own, but I had an idea that I couldn’t shake when I came upon some super soft brushed French Terry. I went with my gut, and started hacking away, and I couldn’t be happier with the result. Meet the Foliis cropped sweater with bell sleeves! Okay, maybe I’m a little too excited, but since this will go great over my daughter’s Solis and Optimum dresses this fall, it was exactly what she was needing. I know I’ll be making more with different sleeve variations.

Pattern Pieces Needed:
- Bodice Front (option B)
- Bodice Back (option B)
- Sleeve (I printed her size and the smaller size to narrow the sleeve as it went down the arm)
- Waistband height measurement (pattern piece not needed)
Bodice Hack
Trace out the bottom of your bodice pattern, from slightly above the armscye to the bottom of the bodice.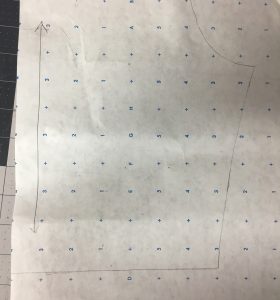
Draw a line parallel with the grainline from the top of the side seam (at the bottom of the armscye) down past the waistline.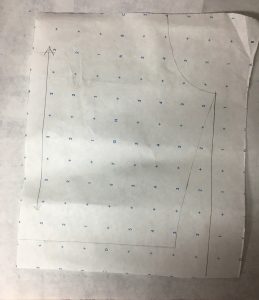
Extend the waistline to the new side seam. This line may be curved slightly, if it is, continue the slight curve.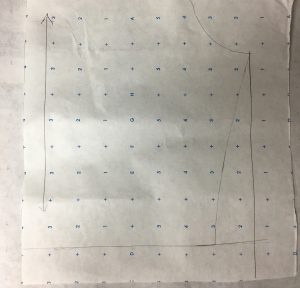
Cut out the changes and tape to your original bodice front/back, and repeat for the other bodice piece.
When cutting out the front bodice, cut on the fold, eliminating the seam allowance from center front. For help, refer to this tutorial, this tutorial will also come in handy for the neckband length.
Sleeve
Use the 3/4 sleeve length to cut your sleeves.
I chose to slim my sleeves to the smaller size as it went down the sleeve, then as I was sewing, I made a larger seam allowance to slim it even more, so you could slim your sleeves more, so that you keep a consistent seam allowance.
Before cutting out the bell part of the sleeve along with the neckband and bottom band, you’ll sew the top together so that you can figure the measurements for the rest. Following the steps in the instructions, the following:
- Shoulder seams
- Attach sleeves
- Side seams/sleeves
Neckband
Refer to this tutorial, step 5 for your neckband. I chose to use the same fabric as the rest of my top instead of ribbing, and it didn’t have nearly as much stretch, so I used something between 85-90% instead of 80%. This percentage really depends on how much stretch your fabric has. Top stitch if desired.
Bottom Band
- Measure the bottom of your top (hem area), add seam allowance to sew the 2 ends together, this will be the length.
- Measure the height of the wasitband pattern piece.
- Cut your bottom band using these measurements.
- Sew the two short ends together and press.
- Fold wrong sides together, and attach like the pattern instructions, although it will fit the bottom of your top exactly.
- Press the seam allowance toward the top (away from the band) and top stitch if desired.
Bell Sleeves
I’m not going to pretend this part was really easy to figure out, instead of going through the headache I did, here’s what I suggest:
- Measure half the sleeve opening measurement, basically if the sleeve is sewn, measure from the fold in the fabric to the sewn seam. Don’t include seam allowance here.
- Measure the difference between the 3/4 length sleeve, and the long sleeve, and add your seam allowance to attach it to your sleeve as well as the hem.
- Draw a rectangle using these measurements on a piece of paper.
- Use the slash and spread technique, spreading the hem side until it’s to the fullness that you desire. My sleeves are about 1.5” extended on each side.
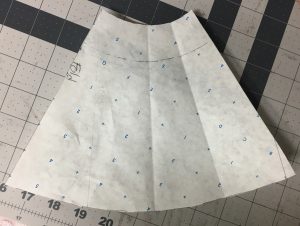
This is my bell sleeve using a slightly different method of achieving the same effect as the slash and spread method. - Once you have it figured out, tape another sheet of paper to the open spaces, and add a seam allowance on one straight side of the bell, the other side will be cut on the fold.
- Cut out 2 bell sleeves on the fold.
- Sew the straight edges together and press.
- Hem both using the amount you chose.
- Attach the bell to the sleeve of your top matching the seams. Press.

All done!
-
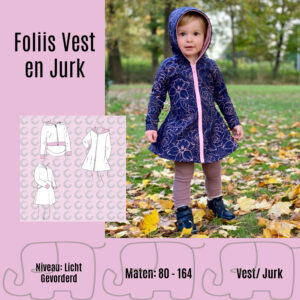 Foliis Vest en Jurk – Nederlands$8.68 excl. tax
 -
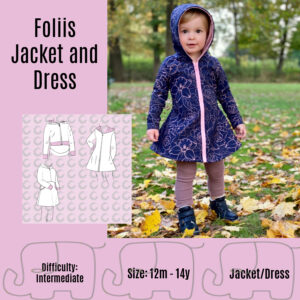 Foliis Jacket and Dress -English$8.68 excl. tax
Buy more save more
(PDF patterns only)
- Spend €25* or more and save 10%.
Use code: SAVE10 - Spend €45* or more and save 20%.
Use code: SAVE20 - Spend €65* or more and save 30%.
Use code: SAVE30
(Sale items excluded)
* Excl. Taxes
Recent comments
Archives

Thank you for visiting
Thank you for visiting our website. This website and all its content are copyright protected. Please ask permission before sharing any pictures or articles, especially when a child is shown in the image.


Leave a Reply