We have made it to week 4!!!! Hopefully over the past three weeks, you have had a chance to mess around with some new settings on your camera, practiced taking photos in various lighting and backgrounds, and then tried some new poses.
This week, since it’s our final week, I figured the best completion of our photography month would be to talk about editing our photos. I normally try to shoot for minimal editing but alas I have learned over the past year, that even a little editing can improve your photos immensely. I know there are many various programs for editing. GIMP is free software that mimics Photoshop and Pixlr is also free. There are many YouTube videos that talk about how to use GIMP and Pixlr. Also, if you own a Mac, the photo editing software that comes with your computer is pretty decent. There is also Lightroom and Photoshop. I will let you know in advance that I only own Lightroom, and that is where I do all my editing. I will walk through some basic tools that I use to edit my photos in Lightroom.
After importing my photos into Lightroom, the first thing I will do is crop my photo if it needs it. Remember, try to crop so that the focal point will follow the rule of thirds that we talked about previously. You will find the cropping tool on the right side, a box that is made with dashed lines. I typically choose a preset format, which makes it easier if you want to go and print your images. 
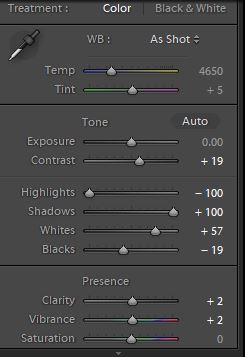
After cropping I will then check that the exposure is correct, then I will increase the contrast just a little bit. Next I move the slider for the highlights all the way to -100 and the shadows to +100. Then right below this you will see sliders called ‘whites’ and ‘blacks,’ on my PC I hold down the Alt key, and use the mouse to slide the ‘whites’ to the right slowly, your image will turn pure black and you want to move the ‘whites’ slider until you see one or two white dots appear on your image (this will be the brightest part of your image). Now do the same with the ‘blacks’ slider, again, holding down the Alt key but this time moving the ‘blacks’ slider to the left, your image will temporarily turn white, slide the slider to the left until you see some black dots, you can have more black areas than with the whites slider. Before moving on to the next section I typically increase a point or two the vibrance, saturation, and clarity. Be careful to not increase these too much as it will alter the WHOLE photo, not just certain areas.
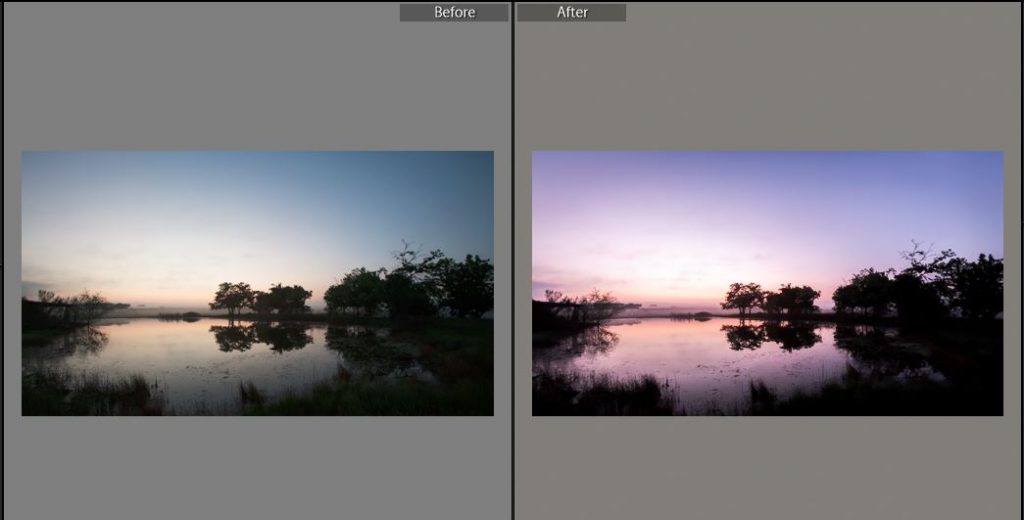
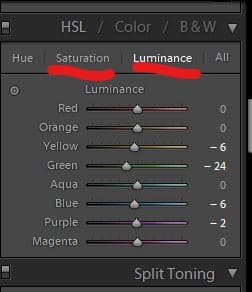
The next thing I typically do to all my photos is alter the colors individually. Above I mentioned to only increase a tiny bit of the saturation bar because that affects the saturation of EVERY color in your photo, not just specific ones you want. But you can see here, with the before and after, that I boosted just certain colors in my sunset photo to make them stand out more. You can use individual color sliders and move to the left or right. I do this for the tab in this section for Saturation and Luminance. Saturation is the amount of color seen, -100 is black and white. Luminance is how bright or dark a certain color will be, moving the slider to the left will make that specific color deeper in shade.
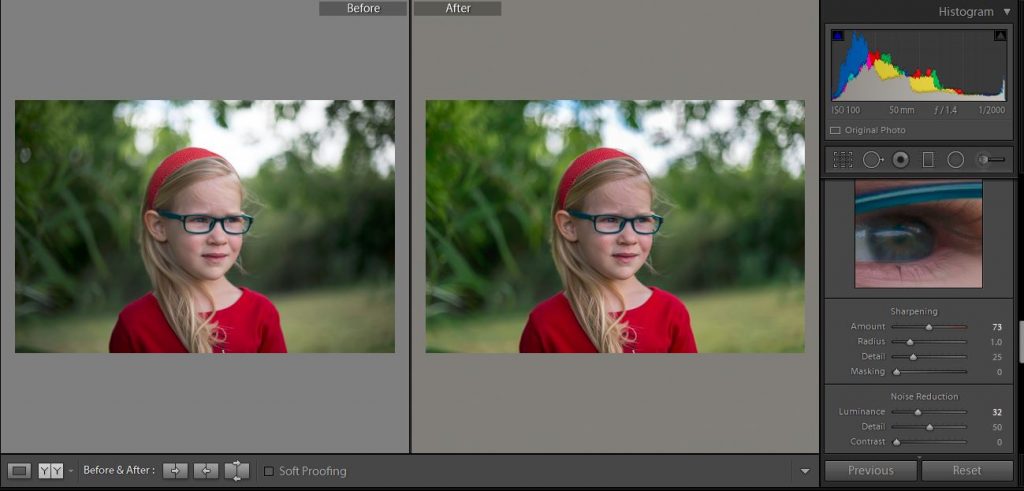
One of the last steps I do to almost all my photos is to use the sharpening too. For a portrait, you want to slide the sharpening tool to roughly between 60-70 on the slider. I also zoom in on the subject’s eyes, since you want that to be in focus! The downfall to sharpening an image is that it can make it grainy or have ‘noise’ in your image. To counteract that, use the slider under noise reduction call Luminance. If you increase this too much, your image will become too ‘soft’ looking. The key I follow is that you want your sharpening number and your luminance number to add up to around 100. If you sharpened your image to 70, then do the noise reduction luminance to 30.
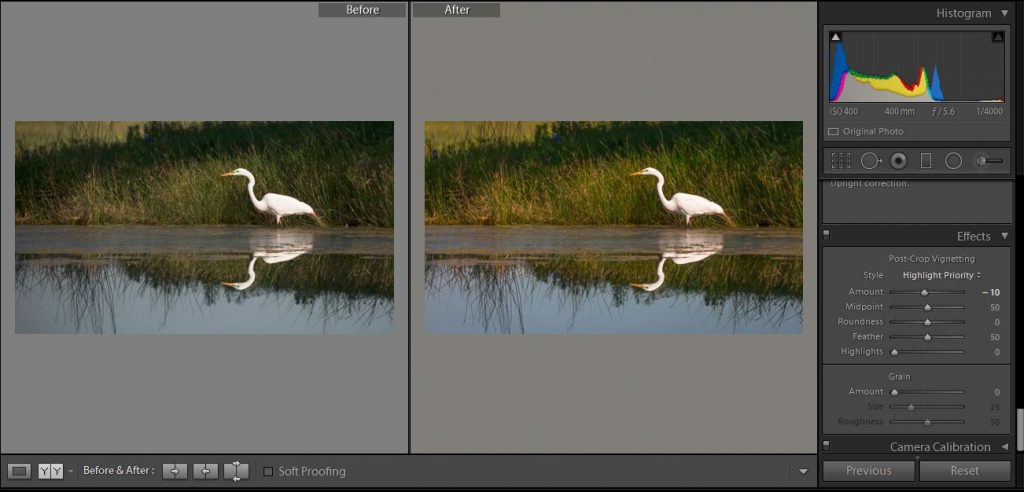
Okay, we are now at the last step in editing that I typically do to all my photos. You want your subject to be where your eye is drawn first, to do this under the effect tab on the left side you will see a section called ‘post-crop vignetting’. I move the slider to the left between -5 to -20 depending on the photo and that just darkens the corners a bit causing our eye to be drawn to the brighter area, typically your subject! This is not a drastic step, but I think adds a nice touch to photos, but not a necessity.
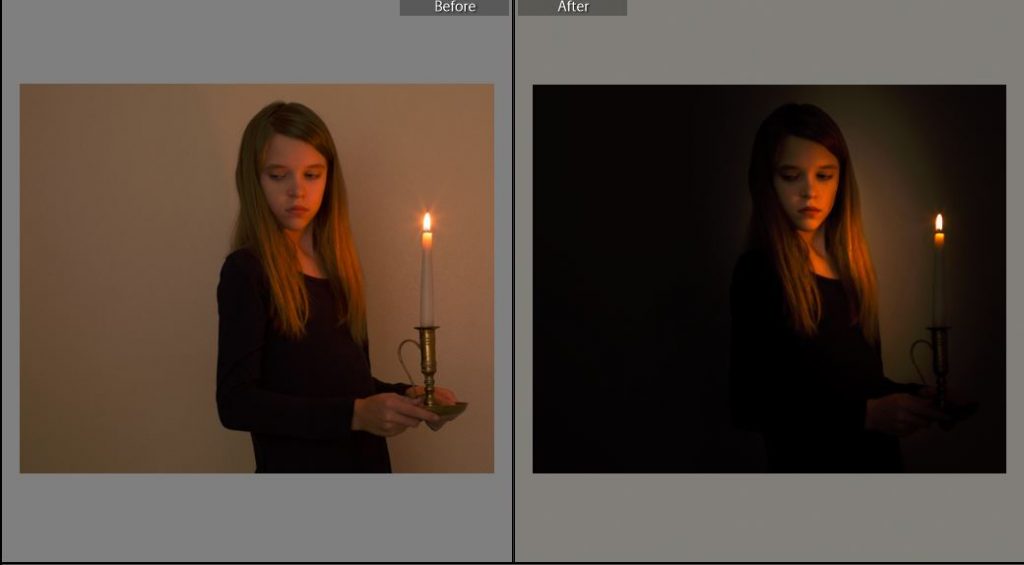
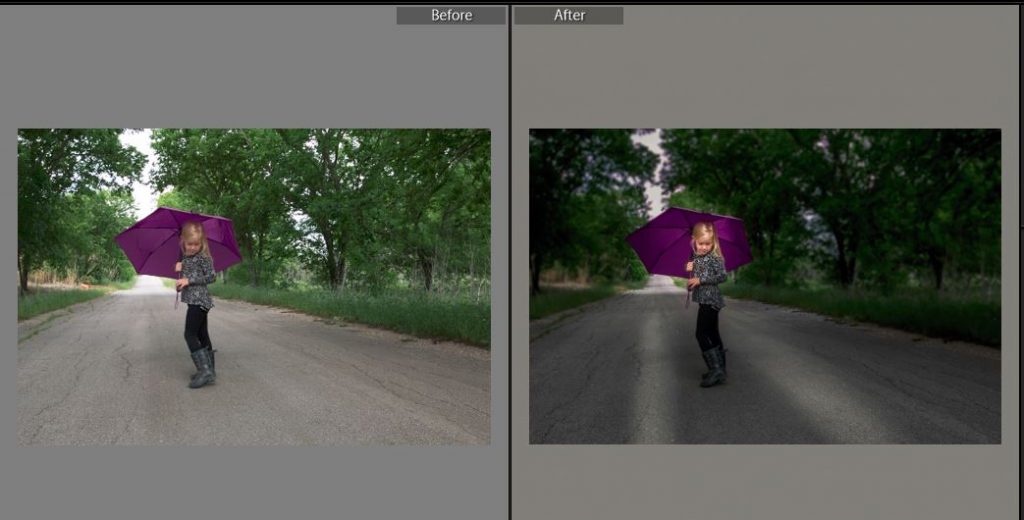
Of course this is only the very surface of what Lightroom can do, but there are many videos and tutorials out that will show you how to alter your photos to exactly how you want them. I feel that photography is an art, and the editing process is also an art. So many artistic opportunities when it comes to editing. Below are two photos that show before and after with drastic alterations, to show you what Lightroom can do, and if you have Photoshop, you are able to do even more!! I hope that you have enjoyed this month and learned something new about photography. If you have an editing program and you would like to share some before and after pictures with your edits, I would love to see them. I will have a folder labeled Photography Week 4 in the Sofilantjes Sew and Show group.
Buy more save more
(PDF patterns only)
- Spend €25* or more and save 10%.
Use code: SAVE10 - Spend €45* or more and save 20%.
Use code: SAVE20 - Spend €65* or more and save 30%.
Use code: SAVE30
(Sale items excluded)
* Excl. Taxes
Recent comments
Archives

Thank you for visiting
Thank you for visiting our website. This website and all its content are copyright protected. Please ask permission before sharing any pictures or articles, especially when a child is shown in the image.


Leave a Reply