I promised to write this blog post a long time a go, when I made my Jeans colored Nivalis dress with red elastic piping. But time flies when you are having fun…..
Now, there are a lot of ways to sew piping and if you google I am sure you will find a lot of ways to do it. But everyone has their own way of doing things so here’s mine.
For my Kings Day Solis dress, that I have sewn with a sponsored fabric from Imaginegnats (that was originally meant for Kids clothes Week), I made golden elastic piping. At the Stoffenspektakel (a Dutch fabric market) I bought a golden crown to iron on. Both the golden crown and the golden piping fit the fabric perfectly. The fabric is really soft and the quality is great.
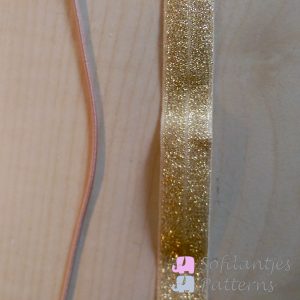
For my Solis dress I did not use knit fabric for the piping, like I did last time, but I bought pre-made elastic (sparkly) biastape. You can cut a strip of knit fabric if you want to (use 2 x the seam allowance plus about 3/8 – 1cm depending the width of your elastic cord). I bought elastic cord in a skin color, I did not ask the width to be honest but you can see the cords and look at the width you want to use. The wider the cord the more it will pop out. The color really doesn’t matter als long as you can’t see it through your fabric.
Ok here it goes (finally).
Step 1:
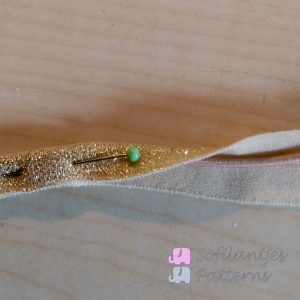
Place your elastic cord on top of the wrong side of your strip of knit fabric or elastic biastape. Fold the fabric/biastape over the elastic cord and pin. Make sure you are not stretching either of them.
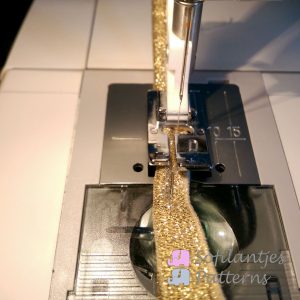
Step 2:
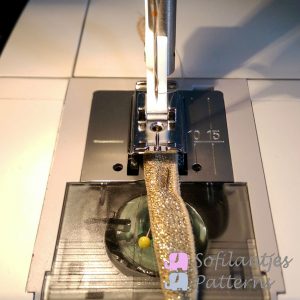
Choose the right presser foot for your sewing machine. Most will recommend using a blind zipper foot if you do not own a piping foot. On my machine though, using the blind zipper foot for this step did not work because the biastape wasn’t wide enough to be grabbed by my feed dogs. I had to move over my needle so the blind zipper foot (having only a small hole in the middle) wasn’t an option. My blind hem foot came to the rescue.
Sew the fabric/biastape close to the cord using a very narrow zig zag stitch. I am recommending a zig zag stitch, because I used the elastic biastape at a place of the dress that needed to still be able to stretch.
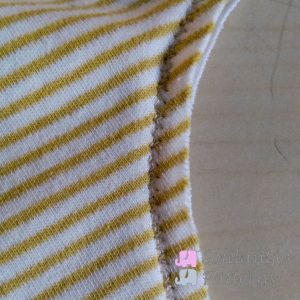
Step 3:
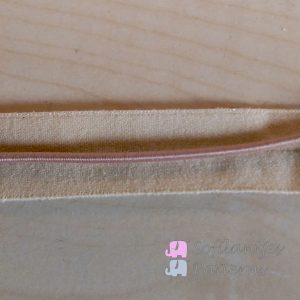
Pin and sew your self-made elastic piping to your fabric using a zig zag stitch or other stretch stitch that you prefer. Take in account the seam allowance. For me this meant I needed to shift the golden biastape a little off from the fabric edge to make sure my piping would peek out just at the seam allowance.
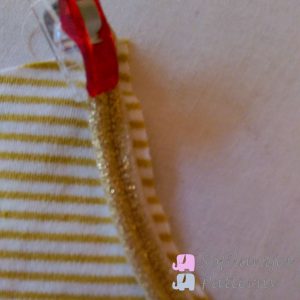
Step 4:
Make sure there is no cord at the beginning and end of your elastic piping to prevent bulk at the seam allowance. If you look at the previous picture, you will see the piping starts at the shoulder seam. I use a seam allowance of 3/8″ – 1cm. The first 3/8″ – 1cm has no elastic cord.
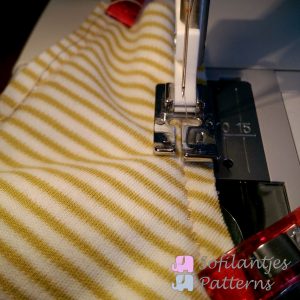
Step 5:
Place the lining fabric on top of the main fabric just like your normally would. Sew the layers together, but make sure your fabric with the piping sewn on is on top. Sew right on top of your piping stitching line.
Step 6:
Follow the pattern instructions and enjoy the result.
Hopefully, this was clear to you. If you used this tutorial I’d love to see the result. Also google a little, there are many more tutorials out there to teach you new things.
Buy more save more
(PDF patterns only)
- Spend €25* or more and save 10%.
Use code: SAVE10 - Spend €45* or more and save 20%.
Use code: SAVE20 - Spend €65* or more and save 30%.
Use code: SAVE30
(Sale items excluded)
* Excl. Taxes
Recent comments
Archives

Thank you for visiting
Thank you for visiting our website. This website and all its content are copyright protected. Please ask permission before sharing any pictures or articles, especially when a child is shown in the image.


Leave a Reply